… to look a lot like Christmas in our home.
Who would have guessed that I have been secretly crafting Christmas decorations like a maniac in the past few weeks? Well, everybody who knows me, I guess. Since we have never had a Christmas in our own home before and were constantly on the move in the past years, we are starting pretty much from zero regarding holiday items. Getting the whole house into Christmas spirit could have easily gotten an expensive maneuver.
So I broke out my hot glue gun, some Michaels coupons, collected natural (free) goods outside, used some existing non-holiday items, and went on a thrift shopping spree. Considering the materials that I was able to gather for cheap and my love for mother nature I came up with a snow-white-silver-glistening-walking-through-the-forest theme for my very first Christmas collection. Think snowflakes, white, wool, twine, twigs, trees, silver, pine cones, … I’m gonna call it Winterwanderland. See here what I whipped up for under $40.
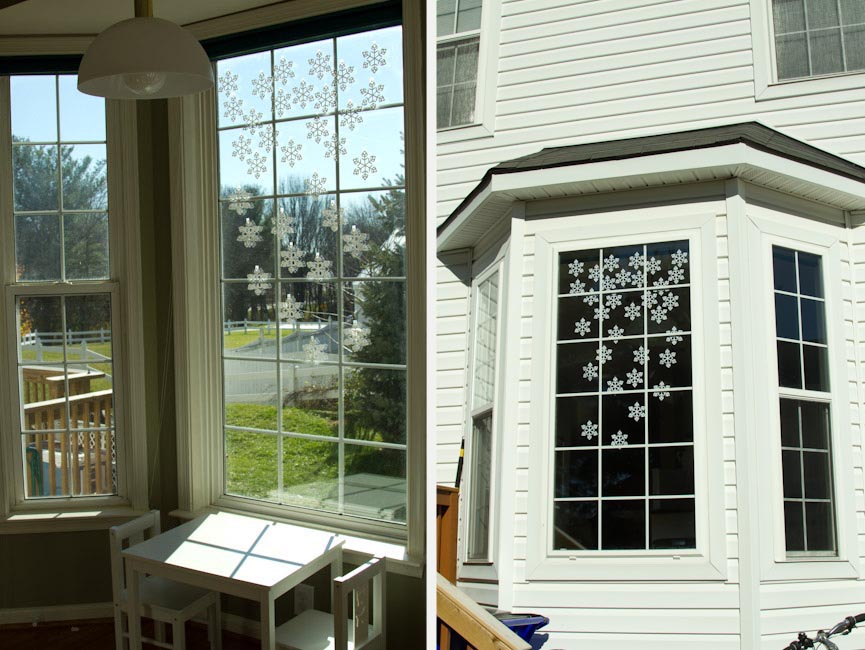
Paper snowflakes at the kitchen bay window. I was planning on cutting these out myself using this method, but then I found a bag of wooden tree ornaments at my new favorite thrift store (2nd Ave) that I wanted anyway for $1.90 and these paper snowflakes were randomly packed in the same bag. So they were basically free and saved me an evening of paper cutting. Milo loves looking at them when he eats his breakfast, but they look even better from the outside where the light hits them.
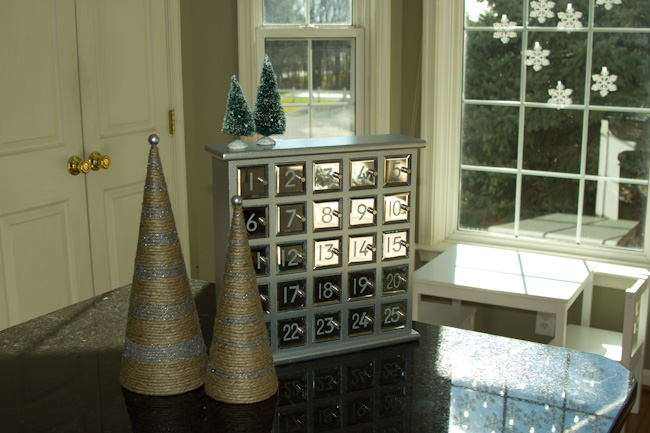
Mirror Advent calendar. This silver advent calendar with mirror doors was a thrift store find some time in spring for $3. Good thing I am looking forward to Christmas all year, so I bought it back then and now it fits perfectly in with the other decor. Oh, I added those trees on top, in case you were wondering. $1 from the Dollar Store. I am having a little bit of a hard time finding small enough items to put in there for Milo that are not chocolate treats (any suggestions?), so we might have to upgrade to a bigger, home made calendar next year. And then use this one for chocolates for Linc and me.
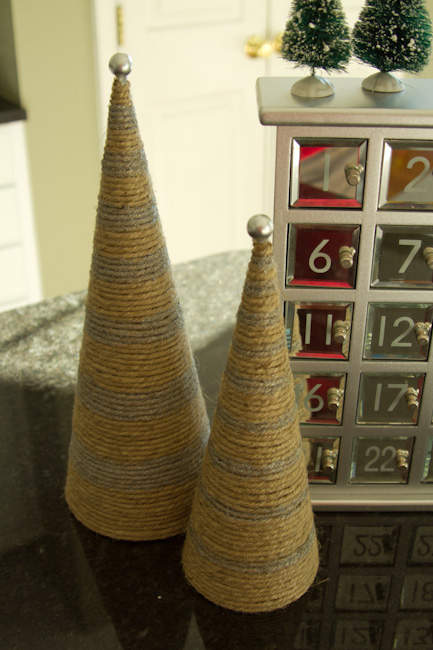
For the cone trees I got some papermache cones for $4 total, wrapped them with twine that I had from a previous project, added a silver ball (leftovers from my Advent wreath), and some silver glitter paint.
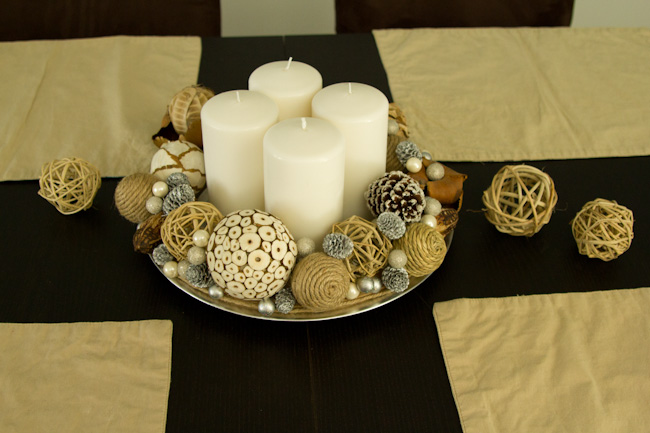
In the dining room this Advent wreath is making a statement as a modern version of the traditional Advent wreath.

This was probably the most expensive item of my collection. Even with using coupons and sales, I probably spent around $15 dollars for all assorted natural ornaments, filler balls, and candles. Unfortunately I forgot to snap photos of the process, but here is approximately how it goes: Get a flat wreath base. I found a wooden ring at Michaels, but you could probably even cut a ring out of thick cardboard. Place your candles in the middle to make sure they have enough space. Start with hot-glueing down the bigger ornaments. Then start filling in gaps with medium size pieces, then really small ones. You want to cover all of the base and achieve an even ring.
For our current table setting I just flipped over the colorful place mats that were previously seen here. How convenient that their back side perfectly matches the natural color scheme.
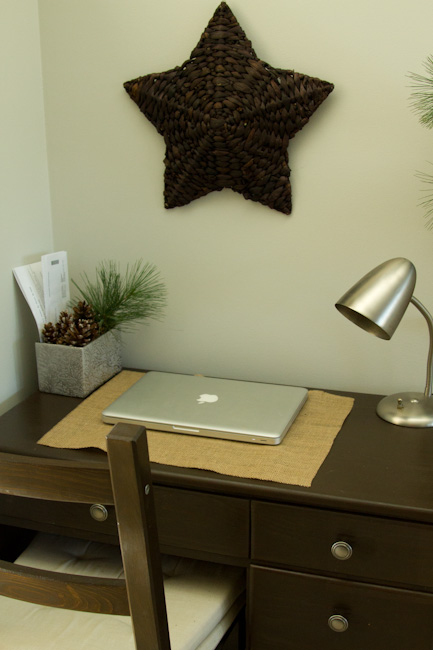
On the other side of the dining room we have this whole paying bills in the woods scene going on:
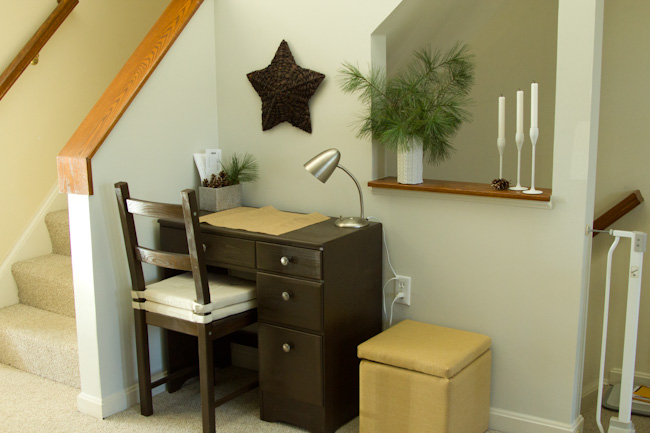
On the desk I arranged some pine cones (found for $0 in my backyard) in a silver vase ($5) to hold current letters (aka bills). The star was on sale for $4.50 at Joanns and temporarily replaces my dry-erase board. I swapped out the desk cover with a piece of burlap (this piece is just a fraction of the 3 yards I got for $5 and will use for other projects).
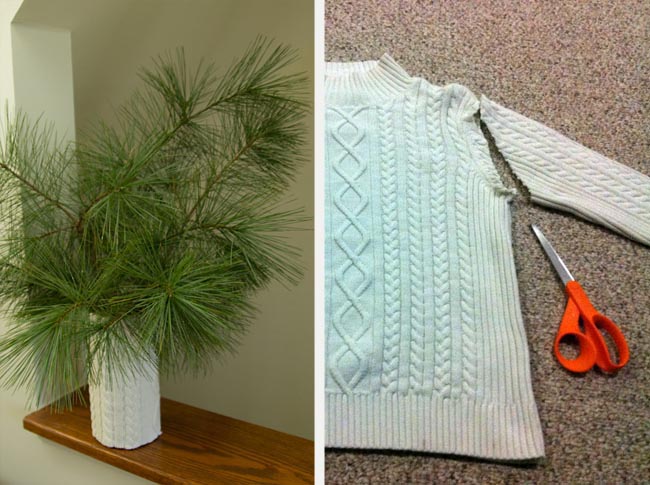
On the ledge I arranged the old candle sticks that were spray-painted white together with the dining room chandelier a few weeks ago. I made the sweater vase from a leftover sleeve of my wreath project and a vase from our wedding (cylindric glass vase, hot-glue sweater around it. Done). The pine is from a downed branch behind our house.
Similar woodsy stuff is arranged on the other ledge in the living room. Some more pine, some more pre-existing candle sticks, and other assorted items.

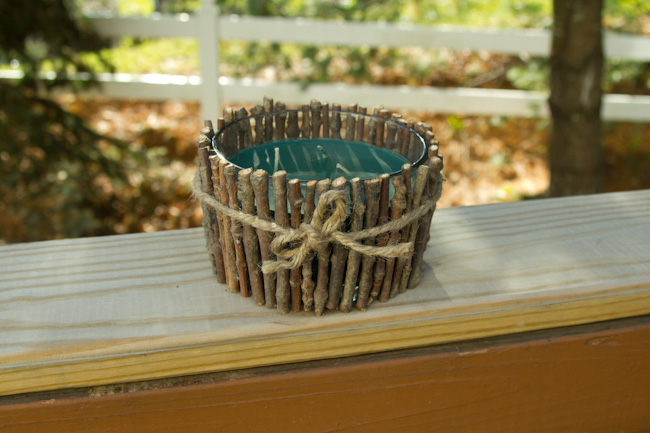
The big candle and the twig vase (currently housing a tea light) were made with my – you guessed it – hot glue gun. Milo had great fun helping me find sticks. Although he was done after finding one – actually two – one for each hand. But he learned a new word and we spent a good hour outside, so it was officially the first time Milo was crafting with me.

Then I just had to snip them to size and glue them around the straight glass. To use up the very rest of my twine, I wrapped them up with a small bow.
Moving over to the center of the living room, we have this entertainment arrangement providing snacks and candle light to our guests. The thrifted multi-purpose tray makes it removable for play action. The silver chalice is holding little chocolate treats.
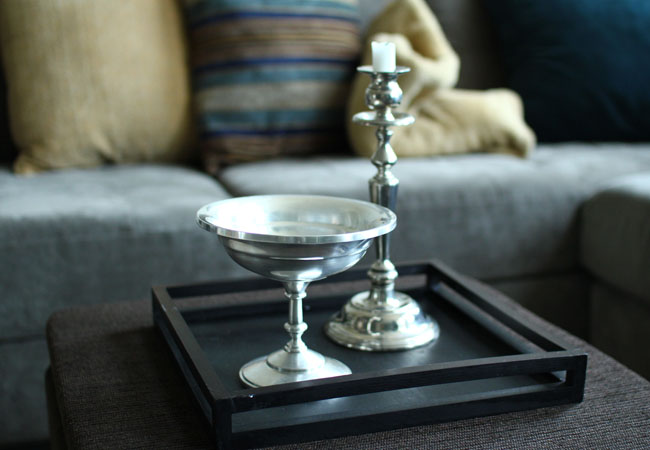
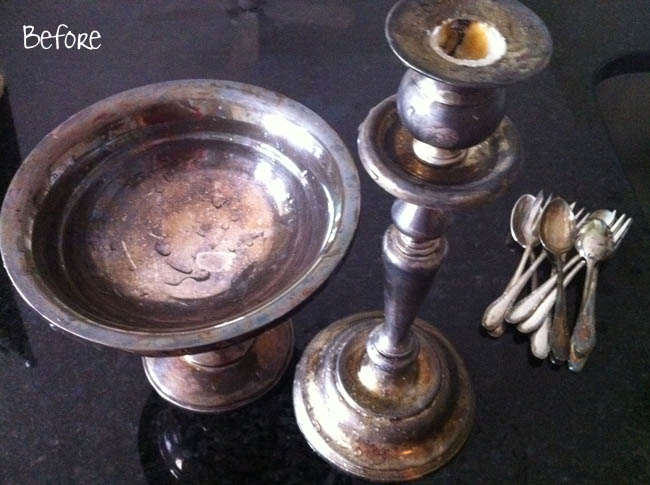
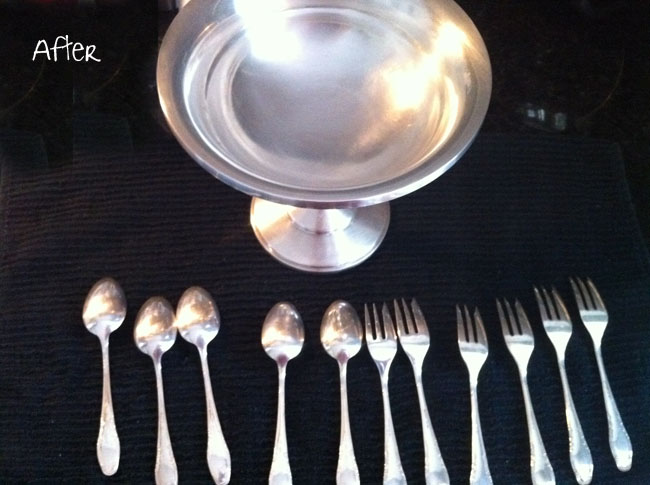
Speaking of silver. These two shiny items were one of the first purchases that Linc and I made together for our first rental home. We found them at a thrift store for about $6 with just a little bit of patina. Over the years the black smoke monster got the best of our two silver possessions and they were not really presentable any more, therefore kept in the dark basement cave together with some random spoons and forks that I don’t even know where they came from. Until I saw this tutorial about how to clean silver. So I gave it a shot. See here the before and after:
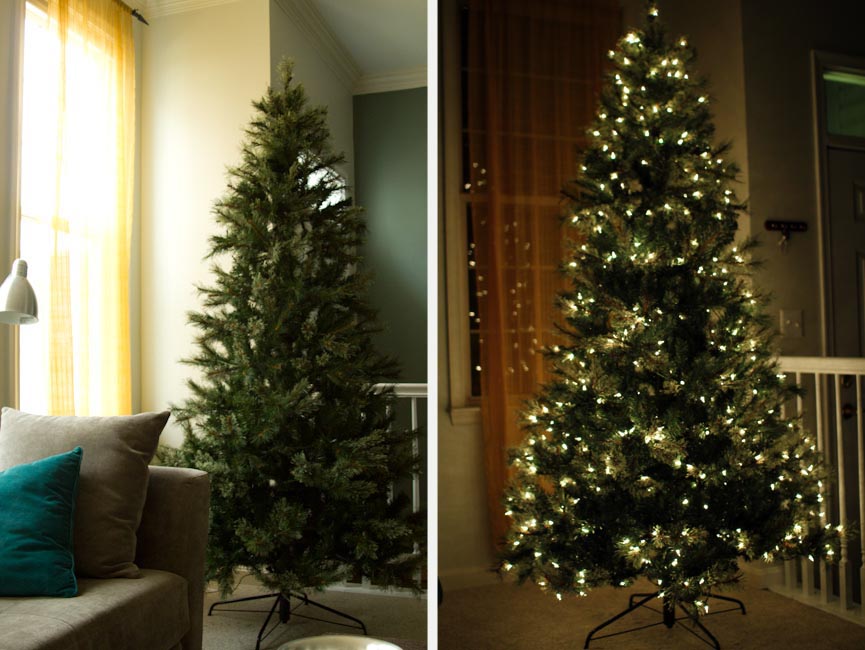
Last but not least, a sneak preview of our undecorated Christmas tree. Let’s leave it at that to end this post on a positive note. More about my adventures with artificial Christmas trees to be posted soon.
0 Comments
Leave A Comment