
In: Home Decor
June 17, 2020
Corona Induced DIY
As we have been spending a lot of time at home with nowhere else to be and not much to do, home projects have been progressing with lightning speed. Some of these cosmetic make-overs were not planned for another few years, but what you gonna do with those extra hours – you paint some stuff. I do at least.
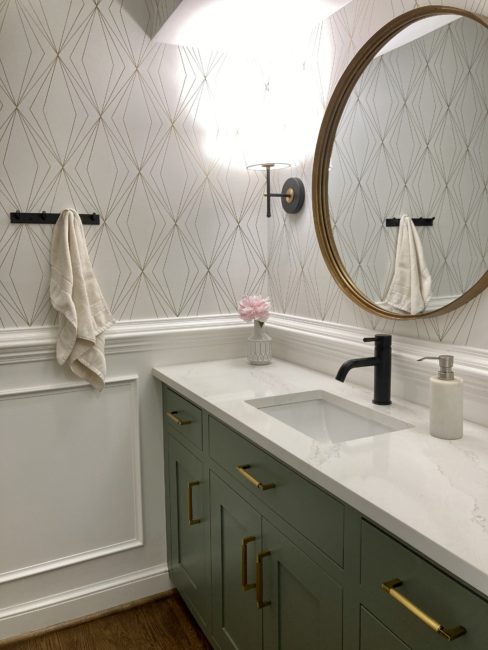
But first, I did force myself to finally finish the last 5% of the powder rom renovation we did a year ago. After 95% / the big impact of a room make-over is done, I tend to be over it and leave the last bits of finishing work sitting. Like the ceiling paint touch-ups and one piece of quarter round in this powder room. But now it’s finally done and I can share:
(more…)August 23, 2014
Housetour 2014 Upstairs
It’s been over 3 years that we lived in our beloved home. Much has changed, much will still change, and we are happy to be in this cozy place that has become truly ours. It is still constantly transforming and adapting to our ever changing needs. At this point we are planning to stay in this house roughly until Milo is done with elementary school, so another 5-6 years. The neighborhood and the community is just too great to leave and the elementary school is right across the street. Eventually however, we would like to move into a single family house with a garage and our own yard. With that in mind we are trying to make mostly cosmetic changes that take the house from old country to fresh contemporary on a low budget, so that it will sell easily and hopefully for a profit.
Some of the updates we are making throughout the house are:
- Paint all trim bright white instead of cream color
- Change all brass light fixtures to white, black, or silver
- Swap out all brassy wobbly door hardware to brushed nickel
- Remove nasty old carpet from main level and basement and replace with wood floors and new darker carpet
- Repaint rooms to a more gray based coordinated palette instead of tan and red.
Other than that it’s really just some major decorating. Look at this evolution of a home.
April 27, 2014
You’ve Been Served
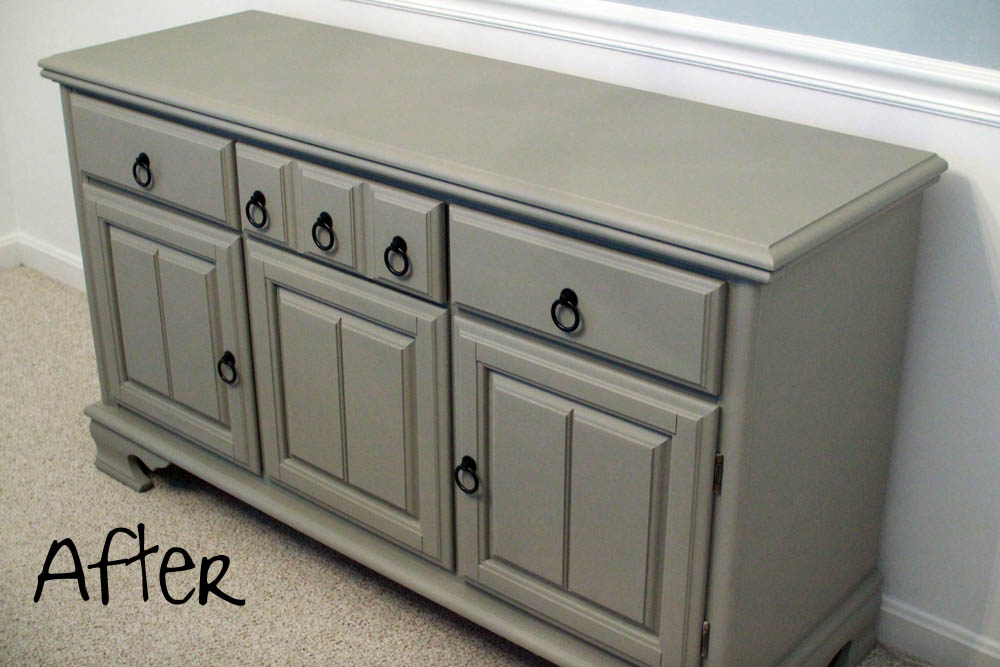
So, about 3 months ago I had written up that long post about how I made over our old dining room buffet and then it didn’t save and all was lost and I never wanted to write again. Not really. But then I decided to start on our staircase renovation, so instead of typing everything up again I started scraping off caulk hours and hours on end. A full post on that coming soon. Maybe.
So now without any patience to go into the buffet details again, let me just throw these picture at you:

I know, I know, doesn’t look too bad from far. But when you look closer it was really obvious cheap laminate, not actual wood. And said plastic foil started to peel off on one side, so it had to be done.

I used chalk paint (color “French Linen”) for the first time and while it’s not as magical as some DIY people out there make it look like (you still need to sand and multiple coats), it really creates a thick solid cover that should last for another couple of decades.

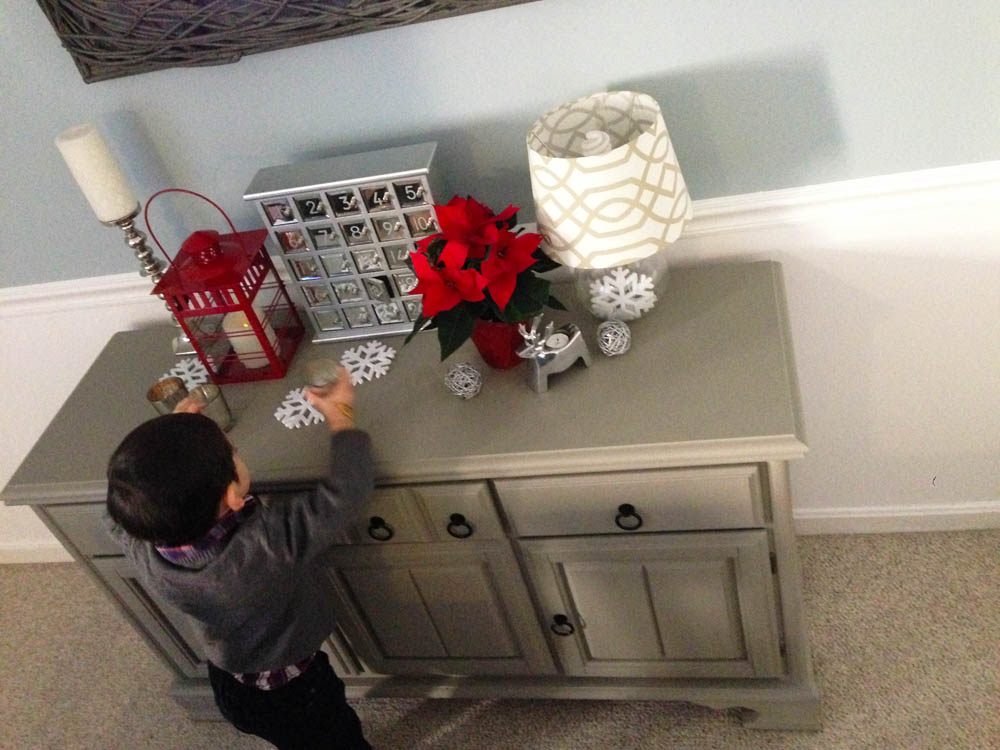
And then it was Christmas.
Happy Spring!
July 6, 2013
Get Out!
This year I was really determined to spend as much time outside as possible. Before I knew that it’s gonna be on of the wettest spring / summer in history. So instead of being trapped inside because of the cold, we are now banned from the outside by constant wetness. Rain, rain go away!
Nonetheless, our outdoor spaces got some nice small updates to make them family friendly should any day unexpectedly turn out rain free.
In the front yard we had that spiky ground cover bush going on that was really good for trash and leaves getting stuck in it, but not for hanging out front to watch our kids play.

One sunny day I went at it and just ripped it all out. It all originated in just 3 plants and the roots were all intertwined with the tree’s roots, so much sweat was shed. But all worth it afterwards. The home owners association sent the landscapers out to even things out and put down sod.

Just a few weeks later – thanks to the rain – everything was lush and green and all set for mini picnics. The flowers grew in almost too much, so I might transplant them to the backyard next year or extend the flowerbed a little.

In the backyard we took on a pain-in-the-butt project that was long needed. Previously the deck was all taken over by bikes, trash cans, and other stuff. Apparently it was not even picture worthy. So we decided to extend our patio by just a few square feet on each side of the deck stairs in order to tuck things away. For being such a small area, it was kind of a big project. Digging out dirt, hauling in gravel and sand and pavers, cutting wood borders, etc.

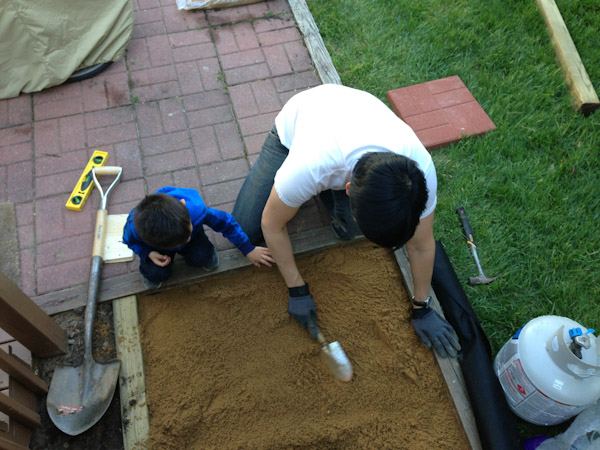

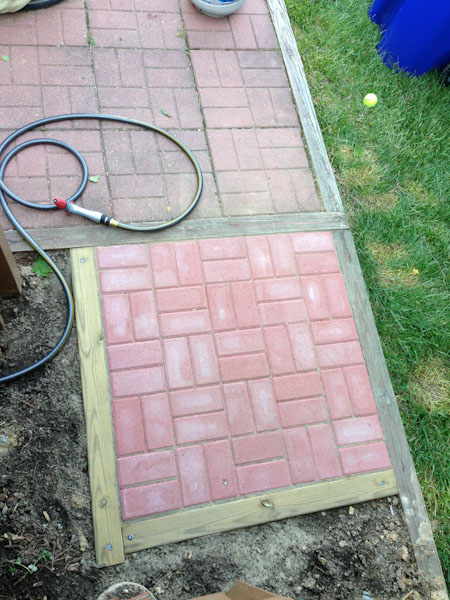
Daddy helped Milo do it and over the course of the following weeks I actually got around to cleaning up other junk that had accumulated around our deck, regraded the soil below our deck to prevent water damage in the basement, and painted the wooden border with leftover deck paint.
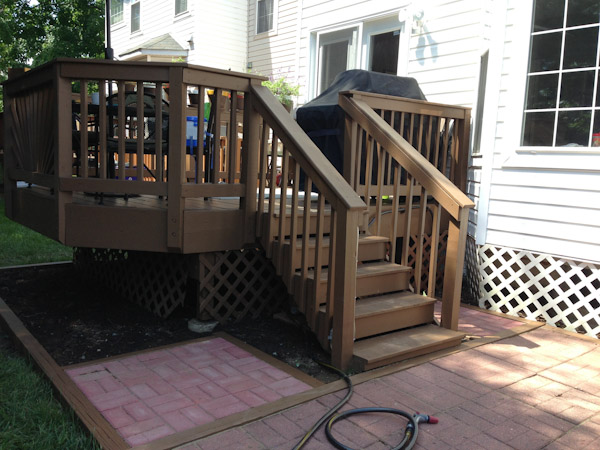
Now this whole area is just way more functional and neat without spending a fortune.

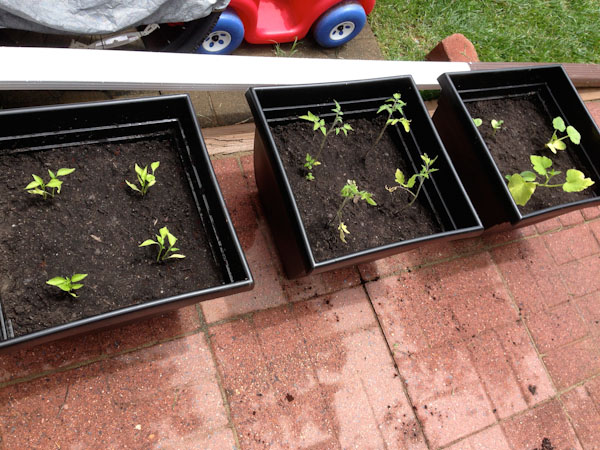
The bikes and trash cans have space on the new paved corners and make room on the original patio to even grow three big planters full of veggies.
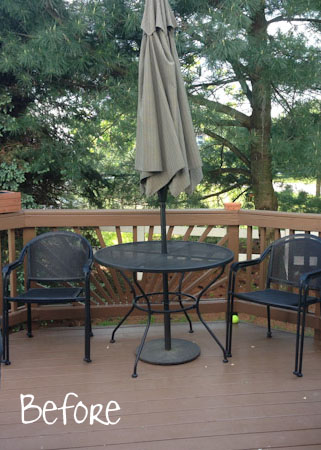
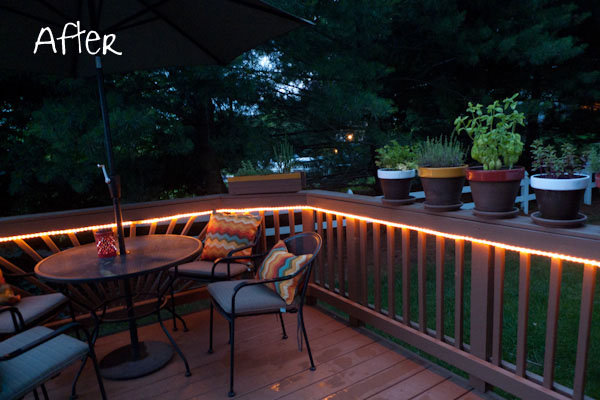
And then it was time to do something about our deck. I mean, it was all nicely renovated and painted, but came out a little too neutral / brown / blah.

With the help of some paint on the herb pots and new pillows …
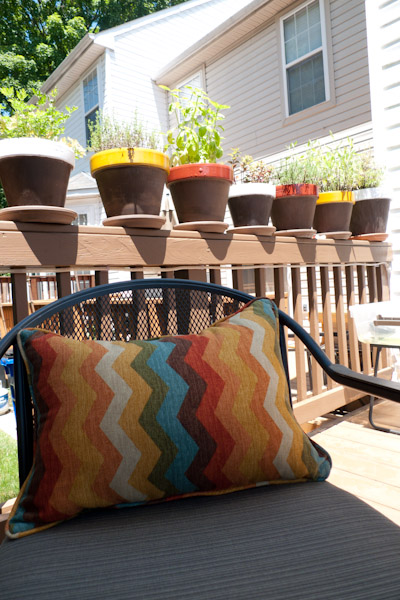
… as well as a red solar lantern, and rope lights that I wrapped all around our deck, it’s now a lot more cheerful and moody to spend summer evenings.
And who would have thought – by the time I finally get to finish this post, the summer actually has made an appearance and I am typing this as I am sipping a glass of wine on the deck. Happiness.
February 26, 2013
His And Hers Lamp Shades
Phase 2 of the master closet makeover has officially begun: DIY-ing a bunch of accessories. Up first were the light fixtures.
How these ancient light fixtures made it into our house that was built in the 90s is completely incomprehensible. They must have been rotting at the builder’s warehouse for decades before he decided to finally get rid of them in our lovely home. Too brassy, too teardropish, and too much weird glass texture. They had to go.
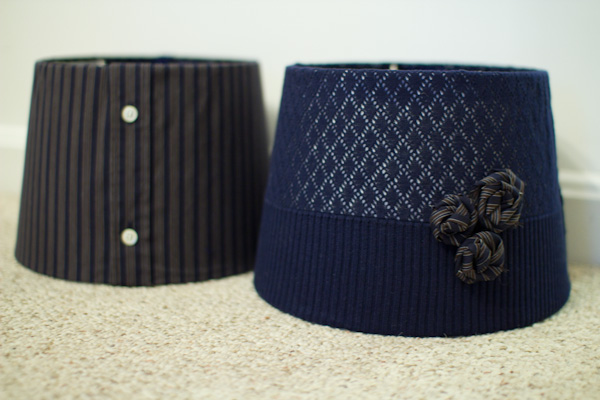
So in accordance with our customized his and hers shelf solution I decided to also make a male and a female lamp shade. After finding inspiration and figuring out the best way to spice up plain lamp shades, I came up with a plan: I would literally dress up these lamp shades:
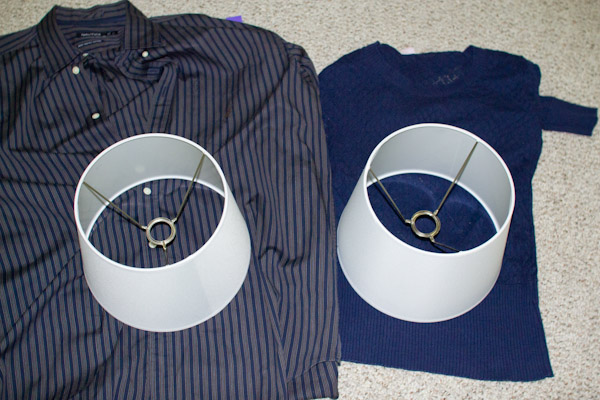
One in a men’s dress shirt, the other one in a ruffly skirt. But they still had to match, so they both had to be navy. Navy is a newbie to our house of muted midtone colors. After hubby convinced me that we needed a blue chair for our bedroom (not the neutral grey that I was voting for), I kinda got used to the thought of adding a new color to our master suite.
Well, after sourcing two different thrift stores I just couldn’t find any ruffles in blue at all. So I went with a thin navy knit sweater with a see-through hole pattern that makes it look a little lacy. Just female enough without being too frilly. This feels more like me anyway. Here are our two candidates:


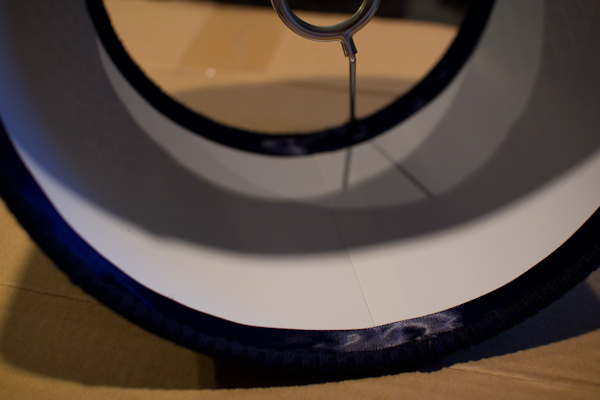
First, I decided which section to use and cut off any excess fabric on top and bottom of the lamp shade. This left me with two wide strips of fabric:


Then, I broke out my hot glue gun and glued down the strip on one side. I pulled it tight around the cylinder, and glued the other end down. Now all that was left was to cut the top and bottom to a uniform overhang, fold the edges over, and attach them by applying a thin bead of glue under the bottom and top rim. Sorry, I didn’t have enough hands nor light to take progress pictures, but this tutorial explains and shows all the steps I took.

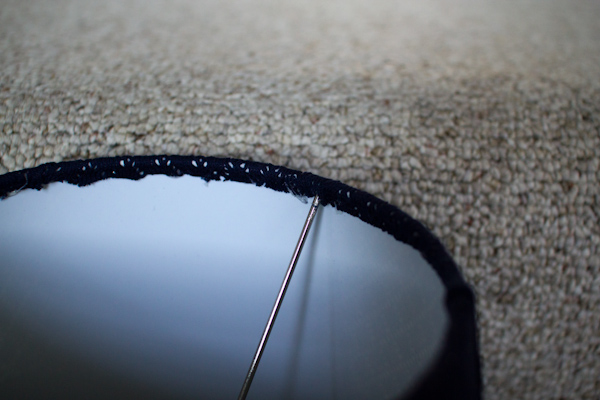
Since I was working with knit fabric, the edges turned out a little too frayed to be pretty. So I bought this half-inch wide ribbon to cover them up. Just glued it on with hot glue as well.
Looking much more finished, there.
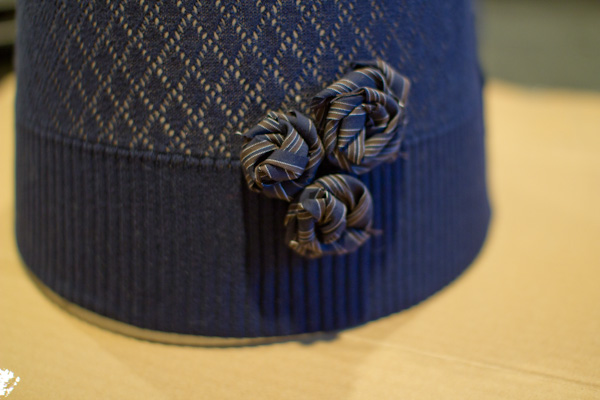
Finally, I created a few fabric flowers out of the shirt remnants to really tie the two lamp shades together.
Here they go. Aren’t they a cute couple?
Now I just gotta spray-paint the bases of the existing light fixtures white, and find a way to attach the shades to them. I’ll keep you posted.
June 23, 2012
Bringing Outdoors In
Remember this post from a while back when Milo’s room got cleared of the baby crib and other nick nacks? Well, of course I didn’t leave it all empty like this.
I’m loving me some blank canvas for more home decorations! The way Milo’s bedroom theme has been evolving it is now clear that it is all about the outdoors. It started with some baby froggy gifts, then came the tree, the tent, and now we are all about camping outdoors. So, here is where we went with some more upgrades to his big boy room.
First, we went to IKEA, bought the cheapo Fjellse bed frame for $40, hacked it and stained it.

I wanted the thing to have a footboard as well as a headboard for symmetry, plus the headboard didn’t need to be quite that high. So Linc built a footboard out of some 2x2s, shortened the headboard and attached them both to the bed. Then it got stained brown to match Milo’s bench.
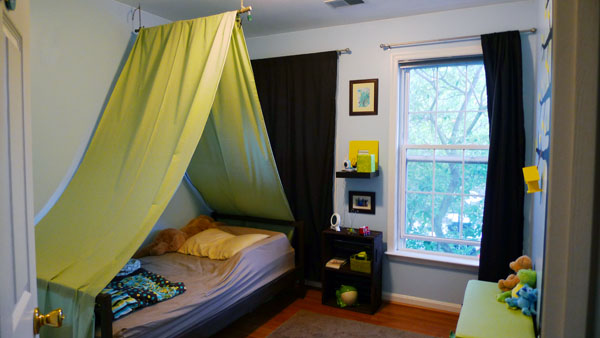
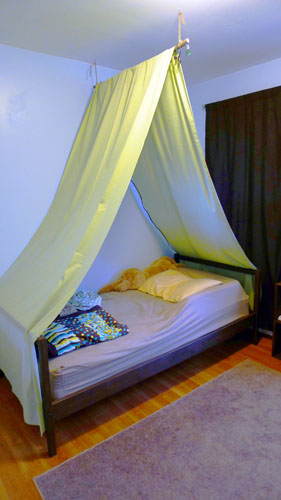
Since the temporary play tent solution worked so well to transition Milo from crib to bed, I decided to make him a new big tent. This version is really easy to build:
1. Find a straight branch and attach it to the ceiling with string and loop hooks.
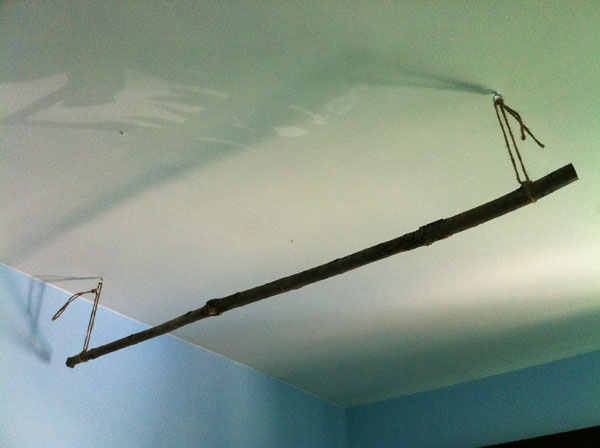
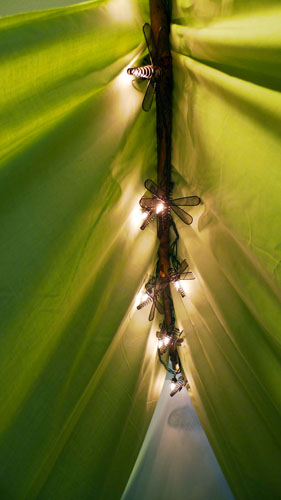
2. Wrap a dragonfly light string around the branch
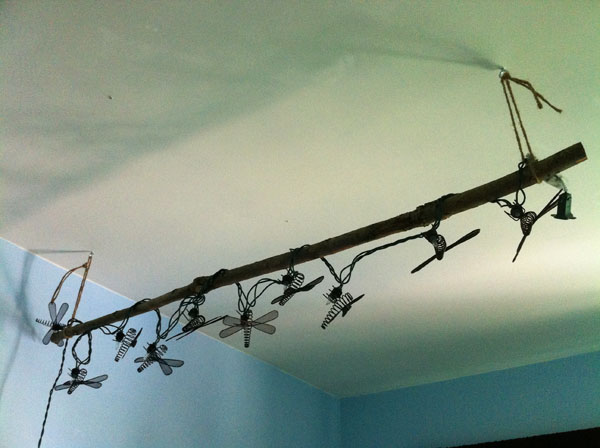
3. Throw a couple of yards of cheap fabric (got these 6 yards for $18 at Joanns, but really only needed 5) over the branch.
I also ordered some of these bed bumpers (for some reason their price went up quite a bit, I got them for under $20) that are placed under the bedding and prevent any active movers to fall out of bed while they are still learning to sleep like a big boy.
Milo loves hanging out under the dragonfly lights in the evening. They make for a really cozy atmosphere in his room.

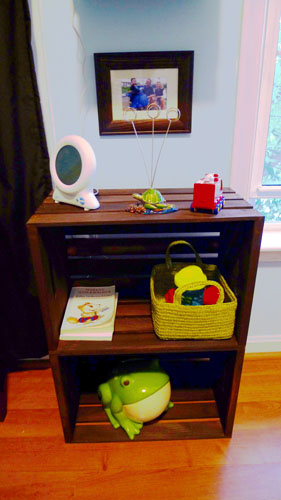
The next step was to build a night stand to go with the new bed that could hold some of Milo’s essentials like his favorite good night books, a drink, his frogs, and his Gro-Clock. This sleep training clock is the best on the market in my opinion and also acts as a night light. See my more detailed review on this purchase here.
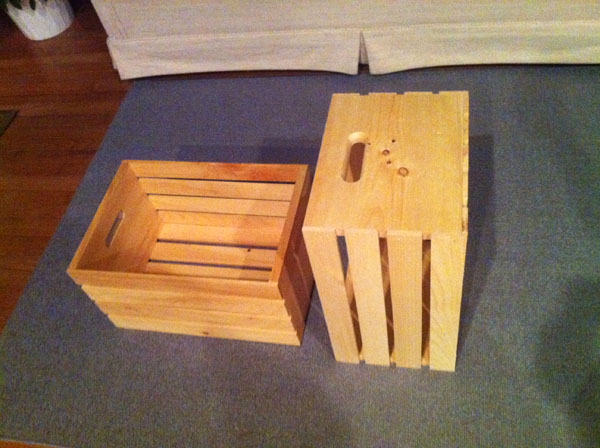
So I got two wooden crates for half price ($15 for both) and stained them the same brown as the bed. Afterwards I just stacked them on top of each other, which is more stable than expected and leaves the opportunity to use them separately again in the future.
Then Milo helped me paint this little bird house yellow that now adds some dimension to his painted tree:

The biggest improvement, however, is almost invisible in all the pictures, yet makes such a big difference to the room: Milo finally has a real ceiling light. One that turns on when you hit the switch at the door. Nothing special you might think, but somehow the previous homeowners had never installed it. Instead in both kid’s rooms (as well as the master and the living room) the light switch controls a wall outlet. But since we are not a big fan of having floor lamps standing around and they really aren’t an option in kid’s rooms where the plug can be pulled and the whole thing can topple over, we have been sort of living in the dark for a bit.
Until one warm day my handy hubby climbed up into the attic a.k.a sauna, ran some wires, and then installed this light fixture in Milo’s room that we had taken out of the guest bedroom in the basement:
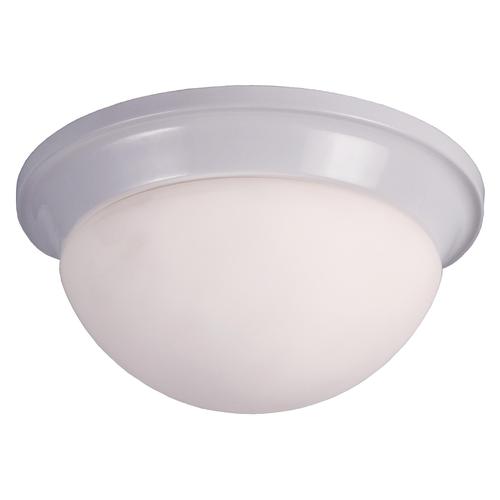
Yeah, it does not look crazy cool, but it was free, and it makes light. Which is really a big help in reading books and getting the boy ready for bed. It is not said and done that I might not upgrade it to a DIYed lamp shade at some point in the future, but right now we are all happy with the way Milo’s room works and how it offers him a cozy comfort zone. Believe it or not, the other day Milo went up to his room and put himself down for a nap all by himself.
May 1, 2012
Good Night Moon
Man, I feel like I am running on steroids these days. No idea where all this energy is coming from, but I take it. After we finished the new guest room it took me only 2 weeks to complete the new nursery. And now we will get started on ripping down wallpaper in the big basement room. Just trying to get as much in the house done as possible before the third trimester heaviness and then newborn craziness sets in.
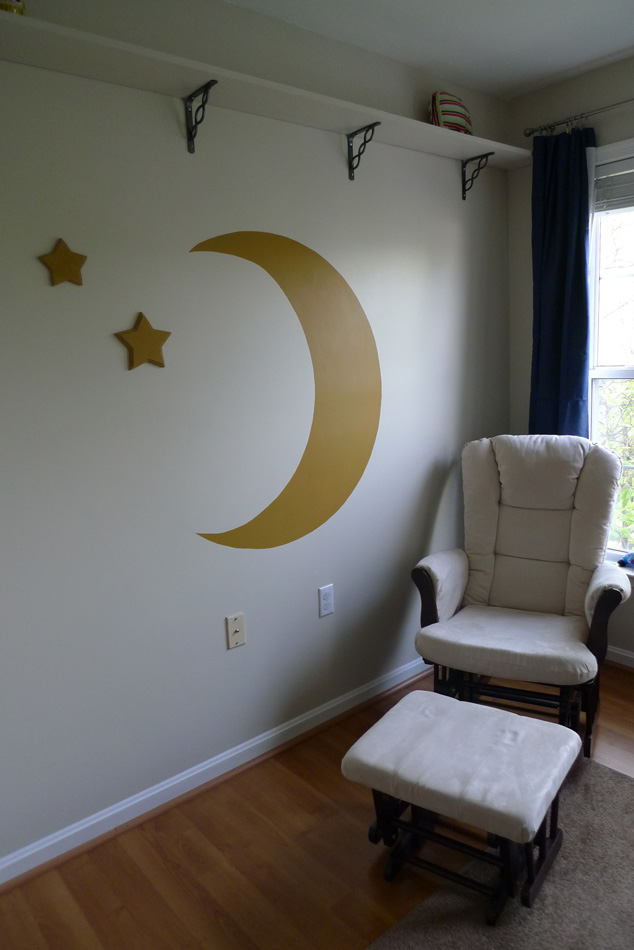
Luckily the nursery wasn’t too big of a project because the walls were already a neutral tan color that anybody can live with, so we didn’t have to paint for this room makeover. It is definitely a more toned down baby room than Milo’s bright blue and green, but hey – nothing to say against saving some time and effort and working with what you got. So all I had to do was to bring in a little bit of color and some baby appropriate decor. When I found these two mustard colored metal stars at my favorite thrift store for $6 the theme was set and stars and moon and night in general.

Perfect to set the mood for a well sleeping baby, right? I decided to pair the mustard yellow with a dark night blue and found those brand new black-out curtains for $10 on Craigslist. On the wall opposite of the crib I painted a big moon in the same color as the metal stars and added two wooden stars. Milo already loves that trio, he goes over to his brother’s room every morning and says hello to the moon. There is something about murals that makes him talk to our walls a lot.
For above the crib Linc and I made this starry night sky light board. I’ll post a separate tutorial for this thing soon.Â

The most time-consuming project was painting all these tiny wooden stars yellow and stringing them up to hang as a mobile above the changing table.

See how Milo is thoroughly testing the new room for his little brother? I am afraid he loves it almost more than his own room right now and I really need to come up with something spectacular for his now empty wall.
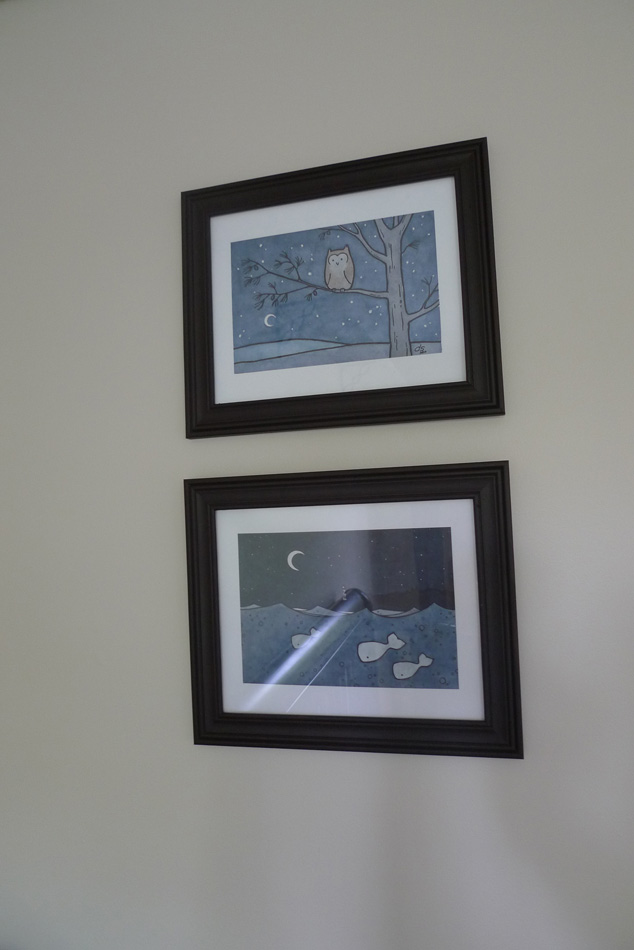
Some other wall space in the baby room was filled with these prints I found and put in cheap frames from Walmart. That’s also where the $15 neutral rug came from.
Since Milo already switched to his big boy bed, we were also able to move the crib over and put the comfy nursing rocking chair in the room. Together with a new crib skirt and color matching sheets this room is officially ready to welcome baby in a few months.


All set for sleepless nights. Bring it on, baby!