
In: Furniture
April 27, 2014
You’ve Been Served
So, about 3 months ago I had written up that long post about how I made over our old dining room buffet and then it didn’t save and all was lost and I never wanted to write again. Not really. But then I decided to start on our staircase renovation, so instead of typing everything up again I started scraping off caulk hours and hours on end. A full post on that coming soon. Maybe.
So now without any patience to go into the buffet details again, let me just throw these picture at you:

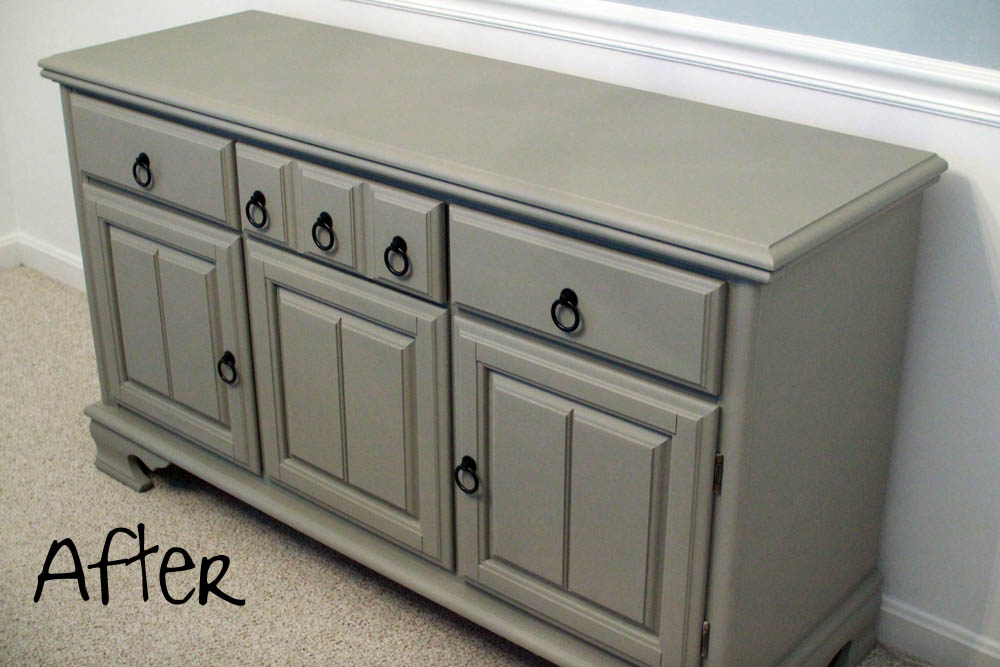
I know, I know, doesn’t look too bad from far. But when you look closer it was really obvious cheap laminate, not actual wood. And said plastic foil started to peel off on one side, so it had to be done.

I used chalk paint (color “French Linen”) for the first time and while it’s not as magical as some DIY people out there make it look like (you still need to sand and multiple coats), it really creates a thick solid cover that should last for another couple of decades.

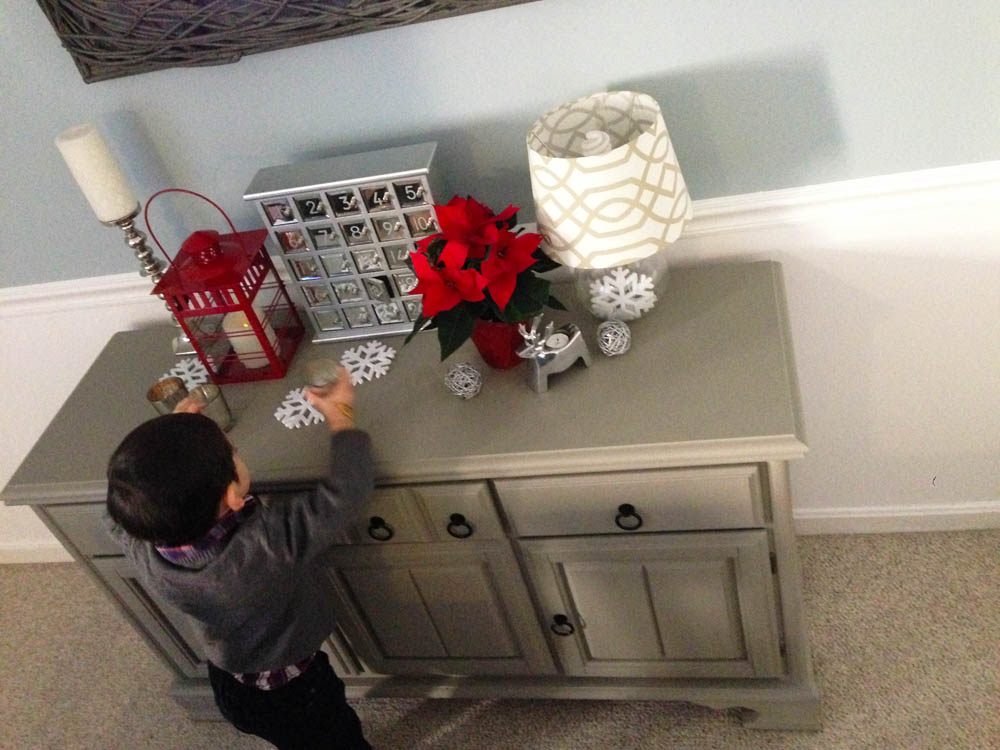
And then it was Christmas.
Happy Spring!
November 26, 2011
My Dear Storage Ottomans
My two beloved guys are starting to feel a little outnumbered at home. An increasing number of storage ottomans is taking over their living space and are getting more attention than probably justified. I can’t help it. I’m in love with storage ottomans. They are really great. They hide a good amount of regularly used stuff, but always keep it handy for when you need it – the perfect middle ground between having stuff like bags, toys, etc. lying around and putting them too far away from where they are being used. You can rest your feet on them, or sit down, or lean your heavy Milo head on them when you get tired from playing but no way! wanna go to bed. They come in all shapes, colors, and sizes – you just gotta find the right one for you. The only downside is that most of them are really pricey. No way am I gonna pay more than $50 bucks for an upholstered box.
Yay! Time to get creative. Well, ottoman number one wasn’t really a product of high creativity, just a lucky find at Ross for $50. This faux leather guy is standing in the foyer and holds all our bags, Milo’s supplies for on the go, and serves as a seat for putting on shoes:
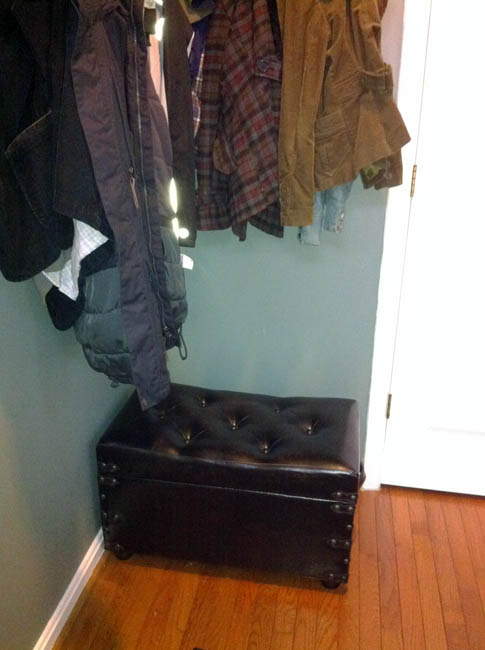 (Seriously, how many jackets do 2.5 people need!!!)
But wait, it gets better. Storage ottoman number two was a much cheaper purchase of $16 and more of a craft project.

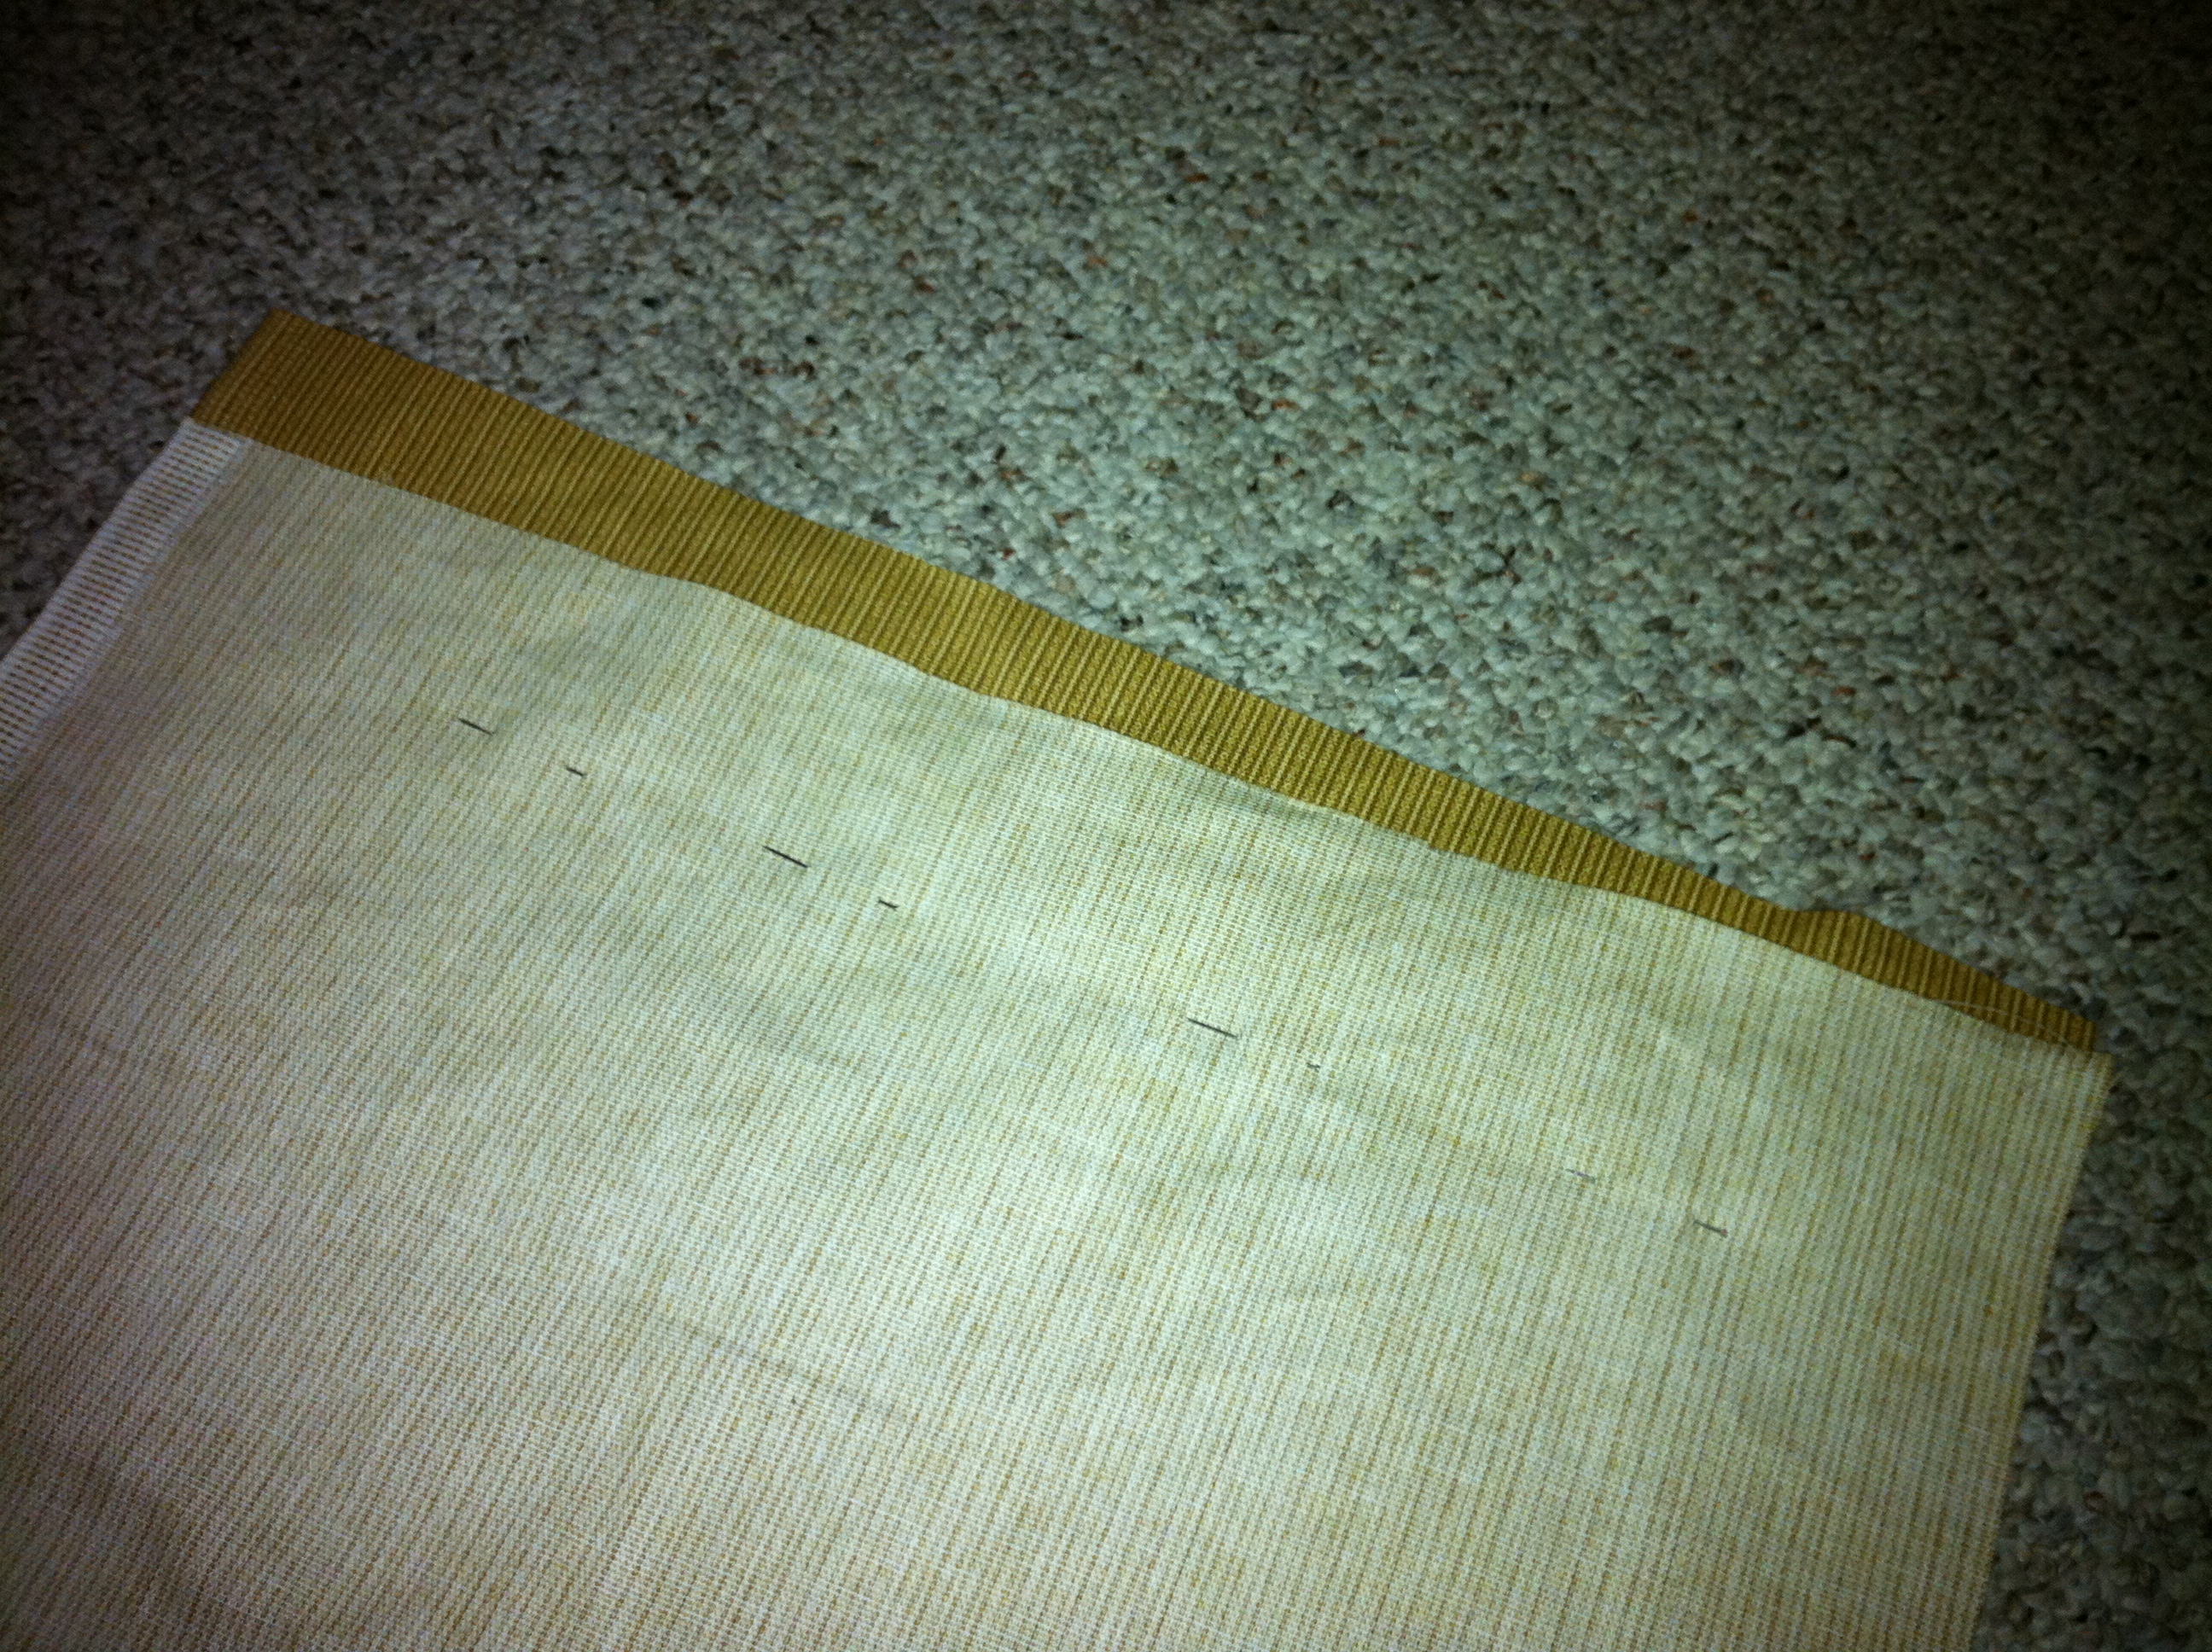
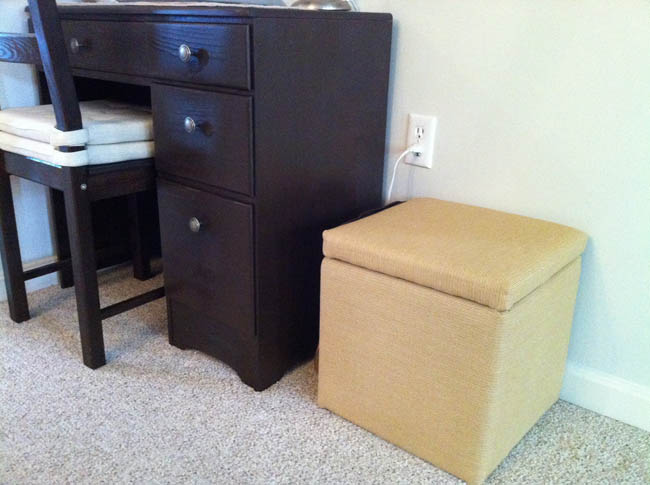
He was supposed to hold the overflow of tools next to my desk, but definitely needed a little more wow to spice up my work nook. Since my favorite golden yellow hadn’t trickled into the dining room area yet, I decided to go hunting for a patterned yellow fabric at Joann. Unfortunately I couldn’t find anything with a bold pattern that would match color-wise, so I went with a plain striped fabric. And here’s how it goes:
- Cut off the piping around the top because it would look bulgy under the new fabric.

- Measure the fabric with a few inches of allowance for stapling. When measuring the allowance, fold the rough edge of the fabric in because you don’t want it to be visible later. Then wrap the fabric around the top and bottom and make sure that the end lays on top of wooden structure that you can actually staple into otherwise the fabric will not hold onto anything.
- Lay the square for the top wrong side out and centered onto the lid. Then pinch the corners together and pin them where you want your corner seam to be.

- For the body we will sew a tube. So just wrap the long piece of fabric around the whole box (wrong side out as well) and pin it together for the seam. Make sure to make the tube tight enough to look fitting later, but so that you can still take it off now. Alternatively you might just want to mark the bottom and top of both fabric layers with a fabric pen, then lay the fabric down and pin a seam.

- Sew your corner seams and side seams as pinned. Cut off all excess fabric.
- Pull the slip covers over the lid and body so that the seams match up with the corners.

- Now it’s time for stapling. Whichever piece you start with, always follow this rule: Punch in just a few staples at one side, then pull fabric tight to the opposite side and staple there. Never do one entire side first and then the other entire side. The fabric won’t come out straight and tight that way. In this manner, work your way through all sides, but leave out 2 inches from each corner for now.
- Lastly, staple the corners. Lay down the fabric on the corner, then fold over the fabric on one side like you would gift-wrapping a box. Same on the other side, and then maybe two staples onto the corner to flatten things down.


Voila!
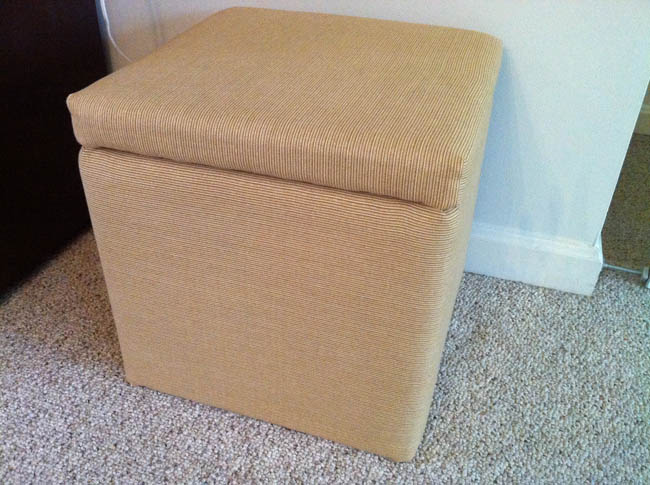
Down the line I am planning to stencil some modern floral pattern in white on it. As soon as I find a cool stencil anyway. Looks already much better than the mess before, right?
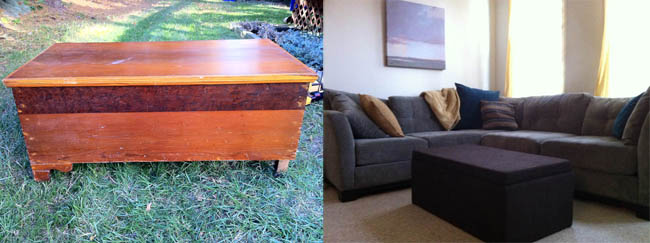
But now let’s get to the biggest ottoman makeover yet. What was once one of the most controversial piece of furniture that I brought home from a yard sale, turned into our great new coffee table / ottoman / toy storage trunk in the living room.
Read the whole story here.
So, are you an ottoman believer yet? Or do you have a fully grown fetish for them like me? Come on, it’s really hard to deny how incredibly practical those guys are.
November 16, 2011
Trunk Gone Ottoman
Yard sale season is pretty much over and I know at least one person that is not sad about it. Lincoln always gets very worried when I go out on a yard sale hunt wondering what old piece of crap furniture I will bring home this time. But hey, so far I have scored some really great finds that just needed a little bit of elbow grease in order to shine. Like my ten dollar desk. Or this ten dollar trunk:
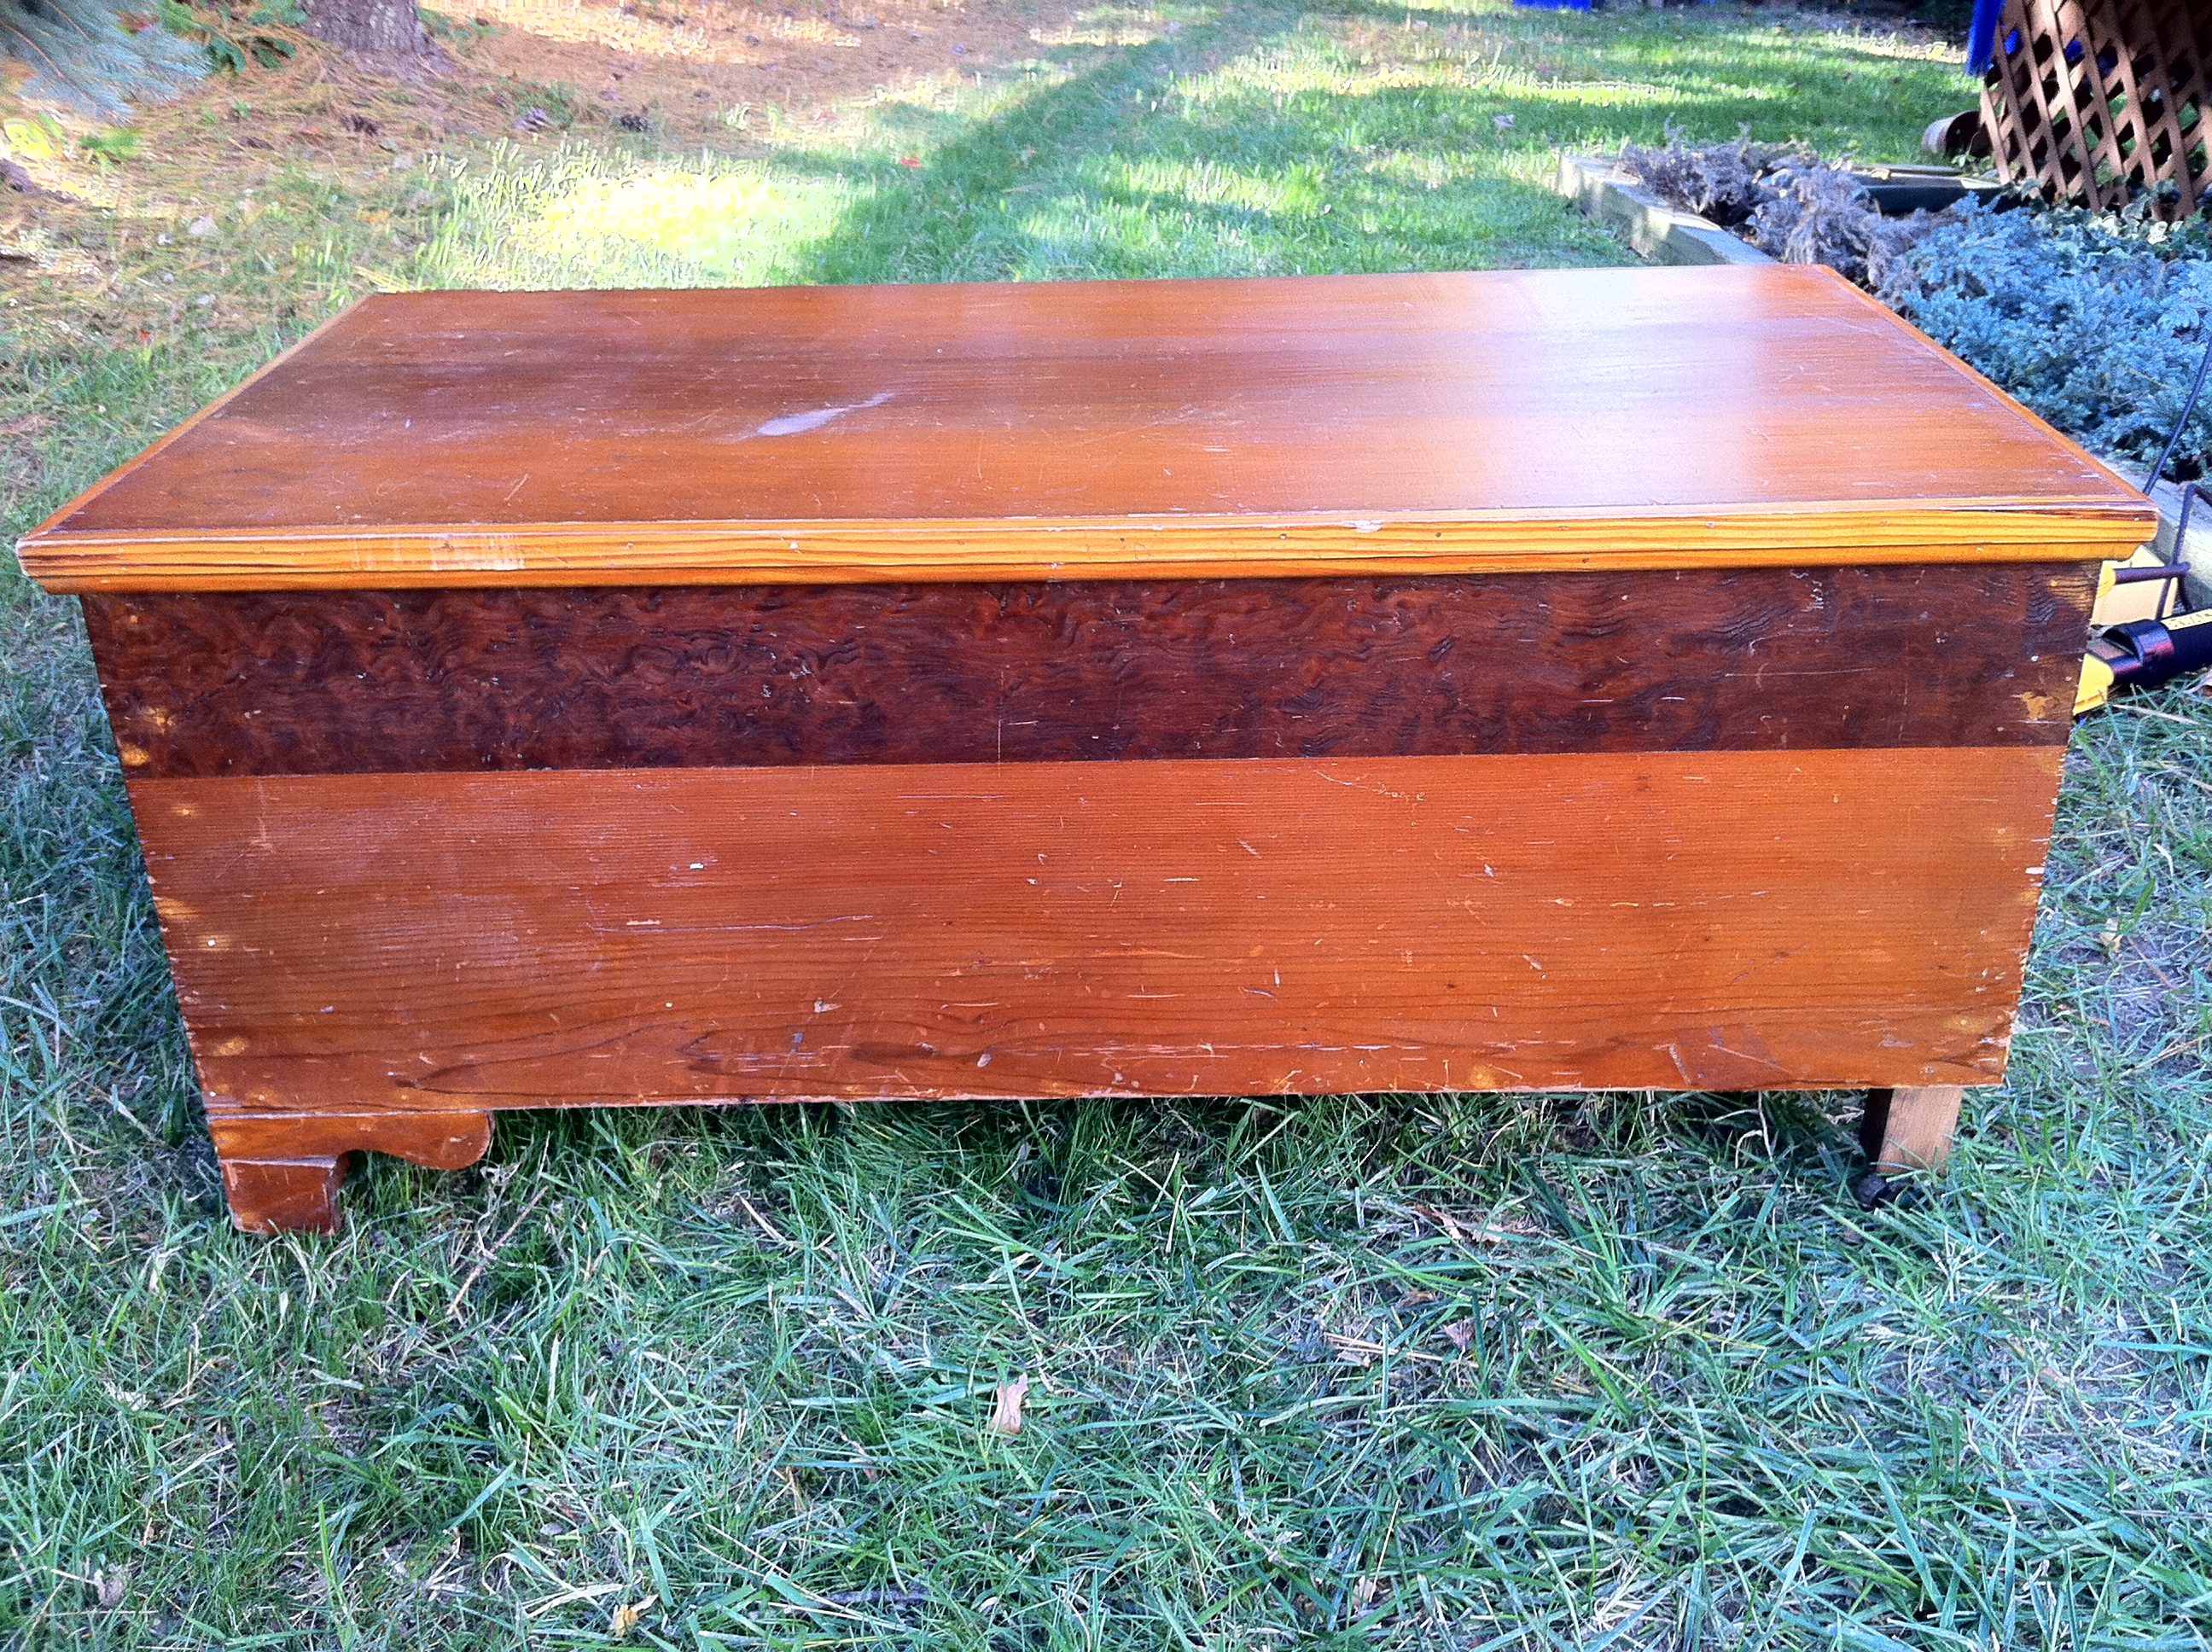
I purchased it together with a big family of spiders and their webs in early summer for $10 and yes, it took a while to tend to it. But finally, here is the result:
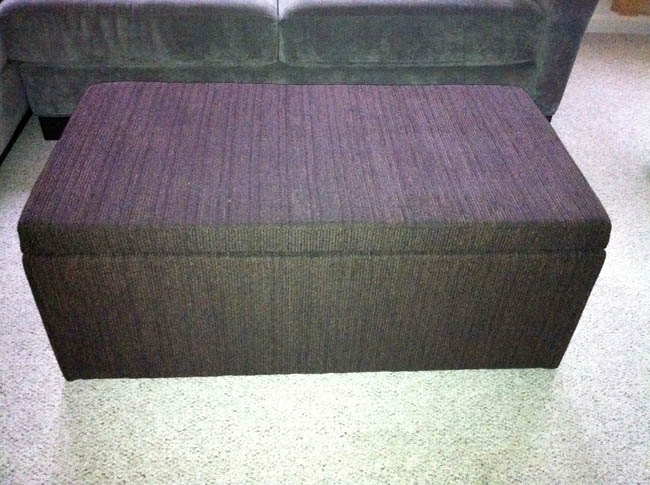
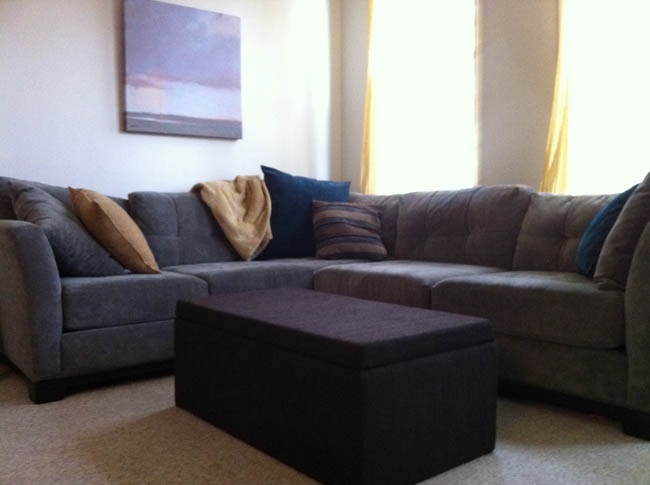
Would you have recognized it as the same trunk? Here is how it all went down: At first I wasn’t quite sure what to do with the thing and where to put it. When I saw it at the yard sale I instantly knew that it would be very practical. I just wasn’t quite sure where in my house I needed this extra storage the most. First it was gonna go at the end of our bed. But then the massive amounts of toys in our living room started to really get to me and so the trunk found its temporary destination. It is still a little bigger than what we would like in the living room, but right now it is perfect to hold cars, cars, cars, and balls. And I kept the style pretty neutral so that it can move around in our house as needed. Here is how it looks in our living room:
And here is how much storage space it offers:

But let’s rewind. At first I was considering painting it since I already had all supplies on hand and the makeover would have had a cost of zero bucks. So I removed all the extra trim and put my birthday present (a sander) to work to remove some very old lacquer. But then I realized that the wood was pretty dinged and dented and would need to be sanded down to almost nothing if I wanted it to look smooth. An even coat of paint would have highlighted all the dents even more. On top of that the living room is a pretty heavily used place for rough playing and we don’t want our son to hit his precious head harder or more often than he already does. Here is how the trunk looked without trim. Later in the game it also lost its flimsy legs.

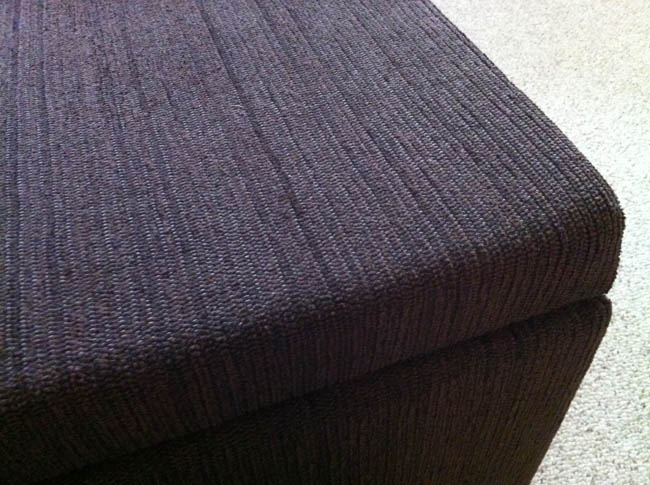
That’s how I ended up going down the upholstering road. And that’s when I understood why ottomans are so freaking expensive. It’s because foam is freaking expensive! Just the piece on top would have been $30 if I hadn’t had a 50% off coupon. Luckily Joann is pretty generous with their coupons and the thicker home decor fabric that is usually pricey as well was marked down to $6 a yard. So all in all I spent $10 on the trunk and $40 on foam and fabric and just managed to stay within my self opposed limit of $50 for a storage ottoman. Look at this pretty corduroyish rough but soft fabric:
I had the top piece of foam (2 inches) cut to size at Joanns and the thinner side side pieces (half inch) were easily cut with a sharp steak knife. Then I glued the foam to the wooden trunk with caulk and got so excited that I forgot to take a picture of this stage.
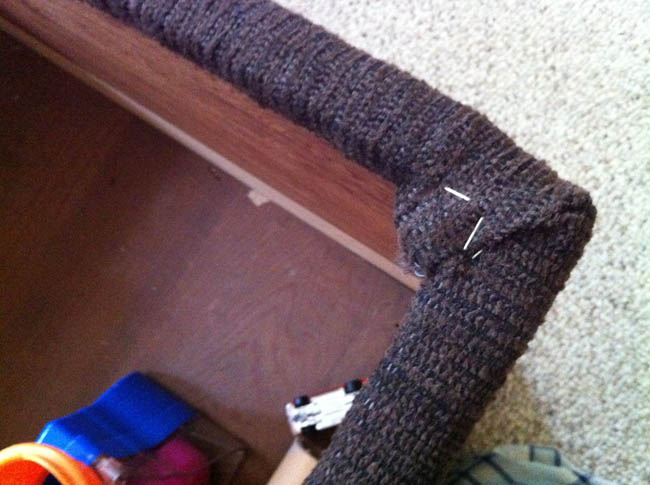
Next step was to cut the fabric to size and sew some simple seams as described here for my other ottoman makeover. Pulling it over the ottoman and stapling took about two hours because this guy needed a lot of staples. A lot!! See here how I tucked in the rough edges, got the corners done, and tried to make it all even. As for the hinges, I just took them off before and then screwed them back into the same places on top of the fabric. Works just fine.

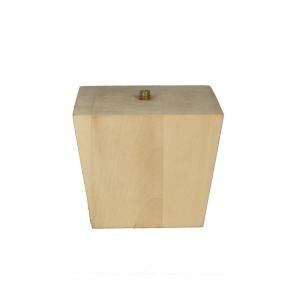
To finish it off completely I am hoping to add some dark tapered square bun legs underneath at some point in the future. Those legs are $8 a piece at the hardware store, so it will have to get done on another month’s budget.
In the meantime Milo is happy that he can reach into the thing perfectly to pick up some cars and let them roll down the lid back into the trunk.

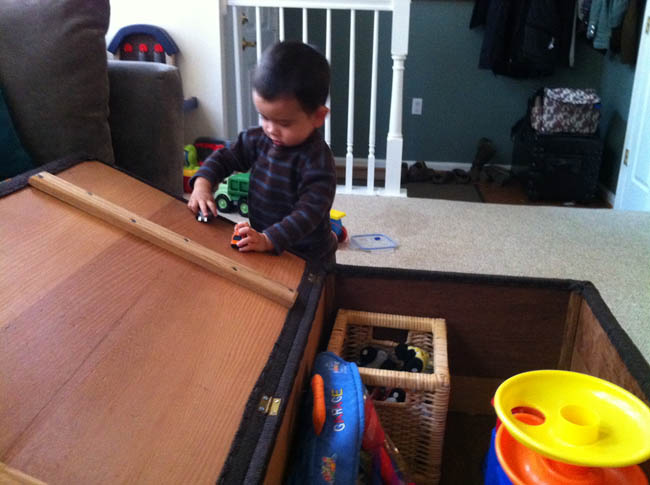
And mama is happy that at the end of the day she can just make the mess disappear and enjoy a clean living room. Life is good.