
In: Home
July 16, 2012
I Heart Organizing
After over 31 years of life I thought that I knew myself pretty well. Until I recently surprised myself once again. Here is what I found out: I love organizing.
I swear, this must be a relatively new obsession of mine because I have not seen myself go crazy of the interior of closets and cabinets like this before. Admittedly, since we bought this lovely house of ours I have been pretty keen on keeping the floors and surfaces clear to be able to actually see this nice home. But so far whatever was out of sight was just fine the way it was. Until I went on a basement reorganizing craze the other day and now I can’t help but organize every single closet and drawer of this house. It all started with one of Lincoln’s many bikes to be in the way of reaching the storage shelf in the basement. And while trying to find a better spot for it I started to wonder why we store kids clothes in the utility room, table cloths in the bathroom, and paper towels in the dining room.
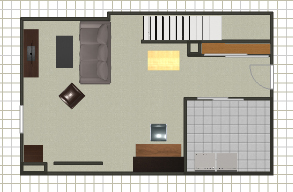
All that stuff did not make sense where it was and did not really fit into the spaces either. So I started some major shuffling around, purging, sorting, and organizing. The utility room now only houses household supplies and outdoor stuff. The storage shelf is for regularly used hobby and office items, the storage room under the stairs for building materials and other rarely used (seasonal) items. See here a sneak preview of our basement improvements featuring the newly hidden storage shelf:

All kids clothing and suitcases will live in our master bedroom on this ledge that I will convert to a hidden storage space as soon as the post-baby recovery is achieved. This is how unsightly that ledge looks right now:
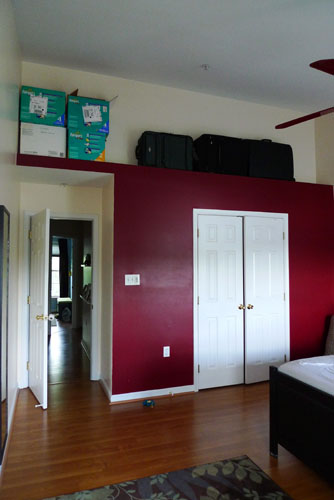
And here is a really bad photoshopped preview of what it will look like afterwards with white sliding doors and the red wall gone:

The pantry and other kitchen cabinets got cleared of expired items and food was grouped into clusters that are somewhat coherent so that you know more intuitively where to look for honey or baking soda. I got some $1 clear bins from Target to hold smaller and opened items together. Now they only need to be labeled.

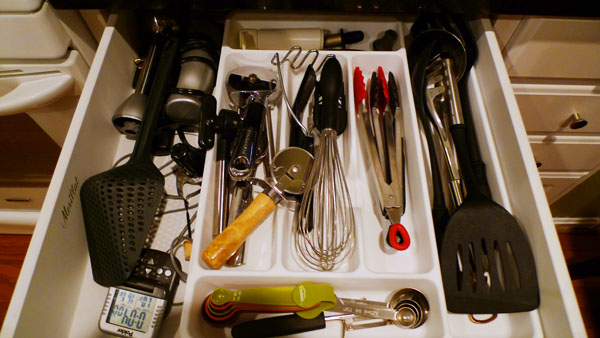
For the junk drawer and cooking utensils we got cheapo drawer organizers (from the IKEA as-is section). Now you can actually find what you are looking for.
I guess you could call this nesting, but I think I’m gonna keep this habit going. There is something extremely comforting and peaceful to having organized cabinets where you can see at one glance what you are looking for and everything is in a place so you don’t have to haul stuff up two flights of stairs.
Check out this blog for many cool organization tips and tricks. I must not be the only one finding peace in cleaning up. How about you?
May 23, 2012
House Tour 2012
Since most of my posts feature only a few shots from random angles in our house, I figured it would be nice to do a house tour on video  so that you can get a more 3D impression of how rooms and things relate to each other. Too bad we didn’t do one when we moved in, but I did my best to explain in this video what we did to which room and what the plans for the future are. From now on I will try to do this yearly.
See for yourself how short of breath I get these days when climbing up the stairs in our beloved house:
April 10, 2012
Welcome Back!
We did it! One day before our house was populated by some German visitors we officially finished the new guest bedroom in the basement and I have to say that it turned out great. We have been working on this for approximately six weeks and it was a real joint effort in the Tran house. Without my handyman I – the surface pretty maker – could not have done such serious handy work as installing lights and new drywall. Looking back, we actually accomplished a lot more than I dared to hope for in my original post about the basement plan. Here is the gist of it.
Just a reminder – this was the colorful craziness we had bought into a year ago:

And this is the new toned down guest oasis:

On our way to the final result we encountered many tedious tasks, such as removing wall paper with lots of water, vinegar, and persistant scraping.
Priming the walls with No-VOC primer because there is not much opportunity for ventilation down there and we did not quite want the baby to be born a natural paint addict.
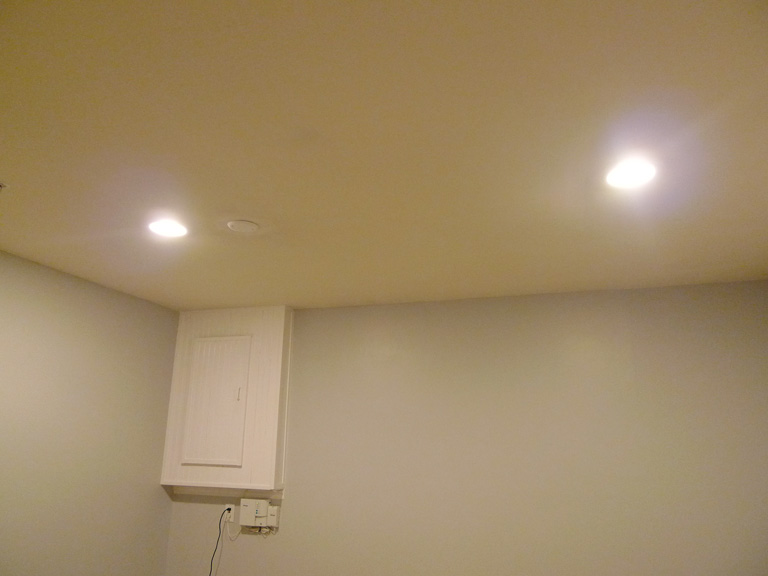
Splitting the room’s lighting from the overall basement circuit and installing two new recessed lights instead of the one dim boob light.
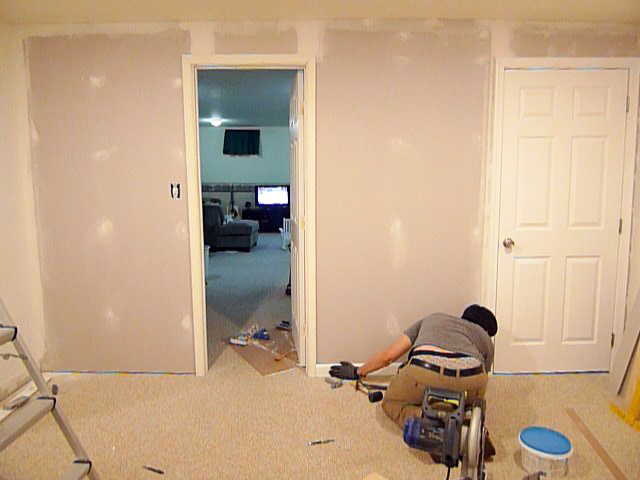
For the sake of installing the new light switch in the room we also decided to take down the bead board paneling on one of the walls which we had never quite understood why it was there.


After taking it down we realized why it was there: Because the previous owners installed the wall framing flush with an existing corner and putting up drywall would have made for an ugly overlapping edge.

Which left us with the exact same problem – how were we gonna accomplish a smooth wall with drywall. Our solution: Using extra thin drywall and extend it to the part around the door over the existing drywall. Not exactly the Holmes-on-Homes way to do it, but good enough.
The trim and doors in this room were wearing many different shades of yellowed old white, so they got a fresh white coat as well .
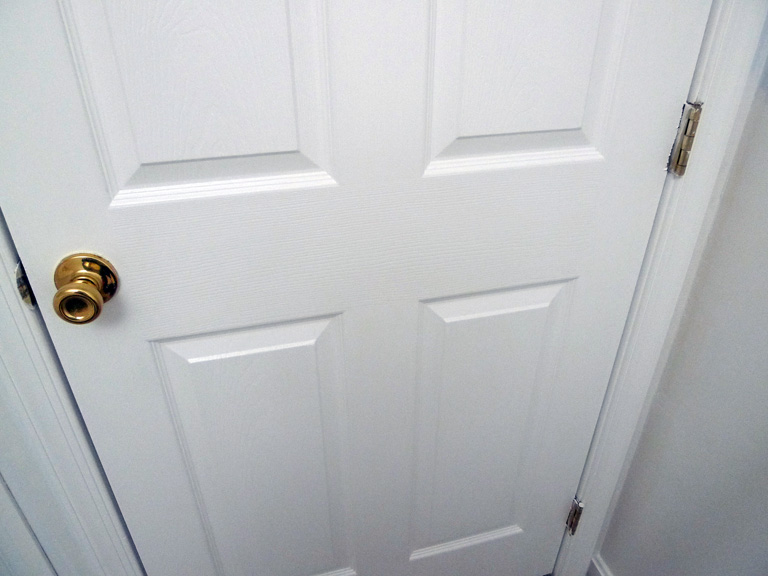
I didn’t even have to bother with taping off the door hardware because on my mission to de-brassify this house and bringing it entirely to the 20th century I also switched out all the door knobs and hinges for brushed nickel ones.

On the final stretch I got sick and my awesome hubby had to paint the room all by himself with the perfect shade of light grey that I had found on the oops-paint rack at Lowes for $5 (and even No-VOC!). It’s amazing what a difference No-VOC paint makes. It might take an additional coat, but the smell during application is minimal and the next day the room is absolutely smell free.

It is actually a little lighter than shown in this photo (more like what you see next to the door above):

Finally, we cleaned the carpet and filled the room with all the existing stuff from the old guest room, plus a yard sale chair and a free dresser.


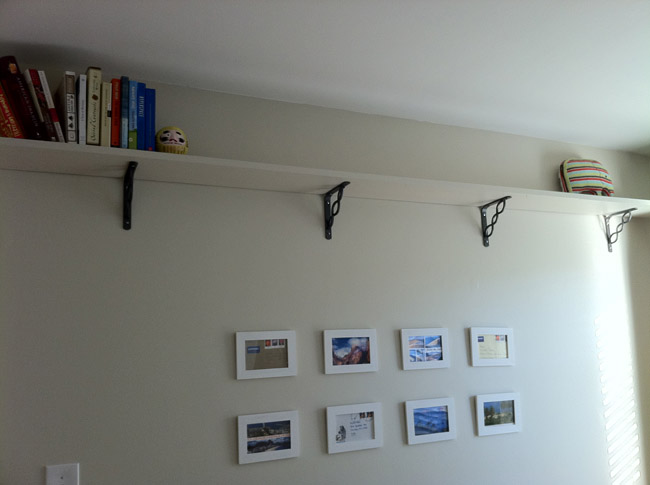
We are gonna hang some more framed postcards to fill the back wall, add a bookshelf and wall art to the reading corner, Â and eventually also have to find a prettier solution for the electric box and modem corner:

But so far it is the most finished bedroom in our house and I am seriously worried that I won’t ever see my husband in our own bedroom again.
March 24, 2012
Living Underground
Our biggest task this year (besides pushing a baby out and taking care of a newborn) is to finally tackle the basement. When we moved in last year the lower level was sort of left alone as it was – hideous wallpaper and everything. Lincoln uses it for his home office and I spend only dark evenings down there anyway, so it didn’t really bother me too much what it looked like. What can I say – I am done ignoring that wallpapery mess down there. And we have to make some room shifting happening this year to fit in another child.
So here is the plan. The baby will move into the current guest bedroom, the guest bedroom will move into the playroom in the basement. We don’t have guests all year round anyway and for those few weeks the basement should not be too uncomfortable. The room is actually bigger and more isolated from noisy kids, the only downside is that it doesn’t have a window. But since it is mainly for sleeping anyway, I think everyone will be okay. This is what the playroom was styled like when we moved in and all we had to do was adding a few toys.

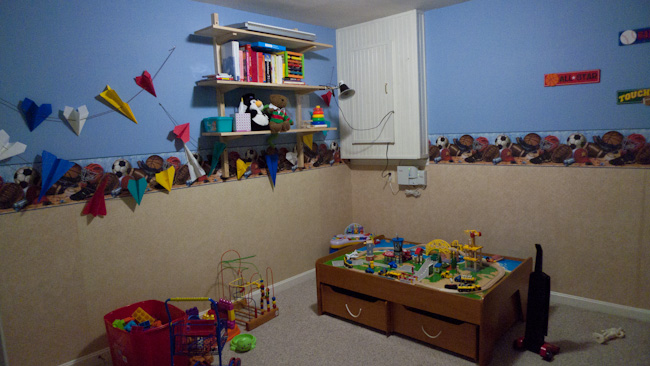
Looks totally appropriate for playing, but not really like a calming retreat for people that need to recover from touring DC all day. So, the blue, the wallpaper, and at least half of the toys will have to go.
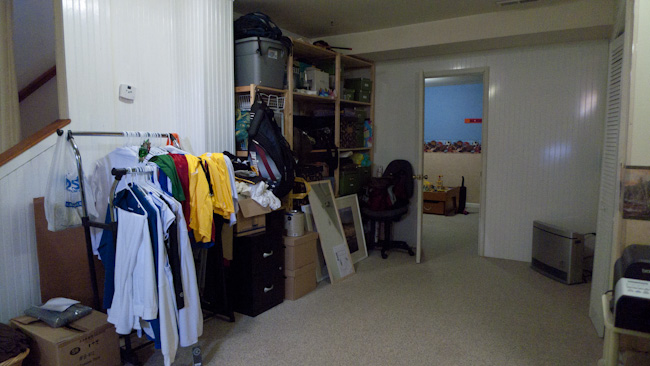
In the main part of the basement things aren’t as colorful, but it looks even crazier. There is stuff everywhere, an oversized couch occupying half of the room, and Lincoln’s work stuff spreads out wherever there is still space. Currently he has a photo studio set up on one side of the room, his extended desk area on the other side, and garments anywhere in between.


The master plan for the big room is huge. And will take some time. And might have to wait until after baby a.k.a next year. Check out here the before and planned after of furniture arrangements:
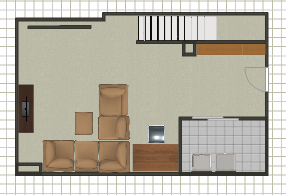
The main goal is to separate work area from living area and confine work stuff to the area that it belongs in. Of course that also requires a comprehensive desk and storage solution that Lincoln has been planning passionately and might share in another post.
These floor plans were made with the free online software homestyler and they even let you shoot a cool 3D panorama view of the designed space. Of course all with limited design options, but this is an approximate idea of what the space will look like. The shelf will be built in as a closet with sliding mirror doors. The desk and work area will be on one side of the room and the lounging area on the other side. Milo will get a small play corner for his train table and other supplies as well.
Phase 1 of the project will be to neutralize the play room due to the urgency of impending baby invasion. We already started stripping down the wall paper and priming the walls. More on that soon.
Phase 2 will be to fix the lighting situation. Currently all lights in the basement are hooked up to one switch, so if you want light in the big room, you are necessarily gonna wake up the guests in the other room or vice versa. We have to separate them into two circuits and will also upgrade them to recessed lights with brighter shine power. The current boob lights are just too dim and won’t fit any bigger light bulbs.
Phase 3 would be to tackle the walls and closet building-in in the big room. But as I said, let’s stay realistic here and see when we actually get to it.
Oh yeah, in the above floor plan I also made the laundry room a little bigger, but that is not really gonna happen. Unless we decide to build a small bathroom in the basement at some point, then we would need the additional storage area.
Okay, enough of unrealistic dreams for now and back to finishing the new guest room.
August 31, 2011
Ready, guests, come!
Wow, this was one of the longest drag for a room makeover so far. An estimated two months later the guest bedroom is finally done. For now. Of course there is gonna be more stuff and deco things added over time, but at least it has all practically needed items in it and looks cozy enough. I think this is my new requirement for a room makeover to be deemed completed. We did splurge on the bed. Got a new mattress from Amazon for the fraction of the price of a store bought mattress (Sleep Innovations memory foam mattress, so comfy that Lincoln wants to sleep over in the other room now. Wish I had gotten this for our own bed 3 years ago.) and a new bed from Ikea because we just couldn’t find a nice one on Craigslist and trust me, I’ve been checking every single day for two months. So at least for the price we got something completely bed bug free and hope that our guests will always want to return to this nice bed.
Here are the details on the makeover:
 Darn, I just noticed that the pattern of the curtain is upside down. Oh well. I am so happy that I found this fabric at Joann’s. It matches the yellow in the duvet cover perfectly and brings some sunny elegance to the room. Got it with a 50% off coupon for $20 and made the curtains in two evenings. (One evening equals two hours in Nicola currency).
Here is a vintage suitcase for $2 from a yard sale that will one day get legs and become a real night stand. A cute lamp for $5 from Goodwill. And some printed travel wisdom in a white painted $3 IKEA frame that had been waiting for its use for 3 years.
 For the bed we had to reuse the old duvet cover because it just wasn’t in the budget to get a new one. I know, this one is very colorful and kind of dominating the room, but just imagine how changing it up one day will be like another entire room makeover in one step.
To fill all the empty space above the rather low IKEA Malm bed (we chose this bed because we did not want to overpower the small room with a huge bed, we had already gotten a free Malm dresser, and because it fit in our car), I created some bigger sized wall art. Had some old canvasses on hand, painted them white, folded some origami boats out of left over maps and hot glued them on. Done.
From some leftover curtain fabric I made the two small pillow covers to replace funky orange ones that we already had.
 On the opposite side of the bed I framed some postcards and envelopes from all over the world in some more super old IKEA frames that I bought in a picture frame obsession 3 years ago and never used. They are the cheap ones that come in 3 packs. They are plain wood and can easily be painted or embellished to match any decor.
On the shelves that I have no problem with in this room (as opposed to Milo’s room) I arranged some random items that we had and that somewhat belong in a guest room: travel guides, some novels for entertainment on all those long vacation days, a hand-sewn elephant that reminds me that I still want to go to Africa one day, a miniature VW van for dreaming of road trips, etc.
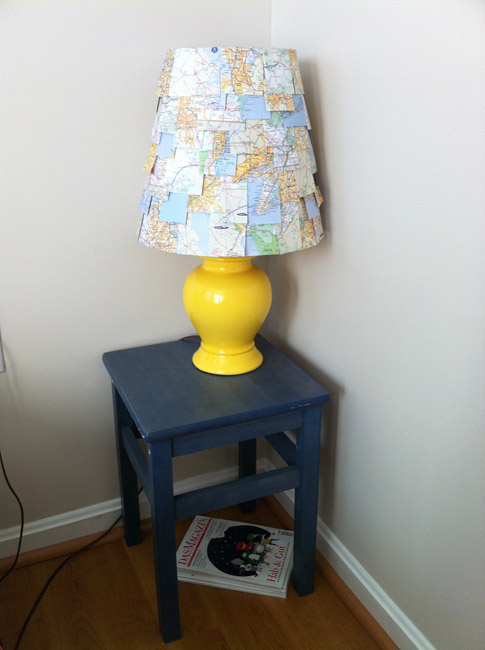 And then we have the previously introduced map lamp. I think all the materials for it were $4.
The little stool/side table thingy is one of those items that are a classic bargain: When I saw them at a yard sale they were super cheap (I think it was $2 for two of them an my mom paid for it because I had conveniently forgotten my cash at home) and seemed somewhat practical, so I got them even though I had no idea what exactly they could be used for. Now one of them is serving as a makeshift nightstand and the other one is holding a fan in Milo’s room. They are also really practical to get up to the slightly too high shelves.
If the bed hadn’t busted our budget, this would have been a really budget friendly room makeover. How do you like it? Is it too travel thematic?
So there you have it, another room done and here is a little hint as to what is next: one of the rooms in a house where you don’t want light colored carpeting.
July 15, 2011
The tree is up
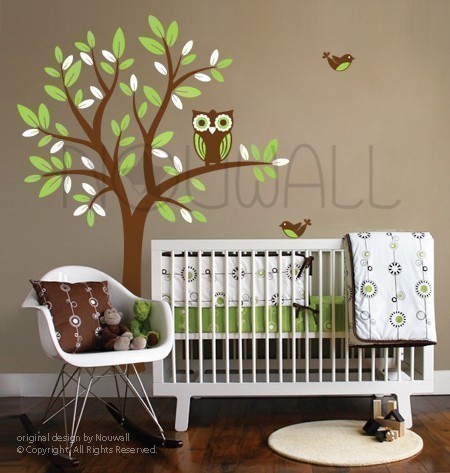
Here is an update on the tree that I painted on Milo’s wall. It all didn’t quite go as planned, but I kind of like the result. My very first idea was to buy a tree wall decal and save all the work of painting. Then I decided against spending money and for painting. But, I didn’t want to risk to free-style it, so I went to look for inspiration on Pinterest and Dr. Google. This is what I was intending to replicate, minus the owl:
When I started drawing the outline on the wall with a pencil (chalk would have been better, but didn’t have any on hand), I realized that I didn’t really care for the curvy branches and wanted to keep the tree more straight and edgy. In the course of changing the direction of this tree an entire eraser lost its life and I did end up free-styling the thing. (more…)
June 25, 2011
The place where food happens
Finally, our kitchen renovation is done. But let’s start from the beginning. Here is what our kitchen looked like when we first met it:

Before
Absolutely hideous, right? In retrospect I can’t believe we even bought the house. This awful combination of early nineties wallpaper with all white cabinets, counters, and wooden country touch to it would surely kill any appetite if I had to live in it. (more…)