
In: Inspiration
February 26, 2013
His And Hers Lamp Shades
Phase 2 of the master closet makeover has officially begun: DIY-ing a bunch of accessories. Up first were the light fixtures.
How these ancient light fixtures made it into our house that was built in the 90s is completely incomprehensible. They must have been rotting at the builder’s warehouse for decades before he decided to finally get rid of them in our lovely home. Too brassy, too teardropish, and too much weird glass texture. They had to go.
So in accordance with our customized his and hers shelf solution I decided to also make a male and a female lamp shade. After finding inspiration and figuring out the best way to spice up plain lamp shades, I came up with a plan: I would literally dress up these lamp shades:
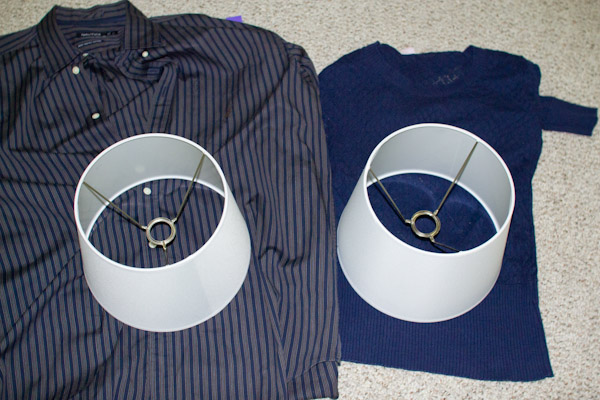
One in a men’s dress shirt, the other one in a ruffly skirt. But they still had to match, so they both had to be navy. Navy is a newbie to our house of muted midtone colors. After hubby convinced me that we needed a blue chair for our bedroom (not the neutral grey that I was voting for), I kinda got used to the thought of adding a new color to our master suite.
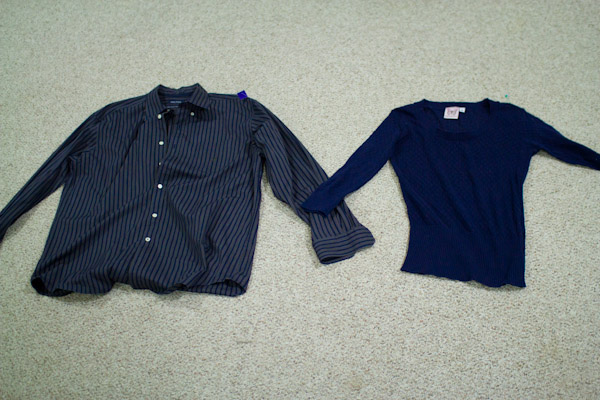
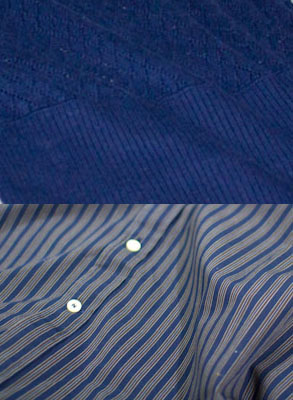
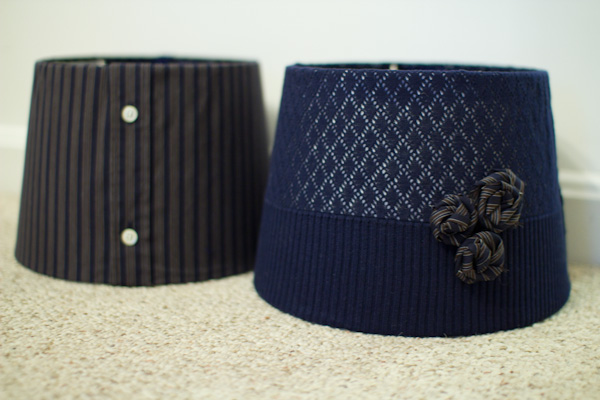
Well, after sourcing two different thrift stores I just couldn’t find any ruffles in blue at all. So I went with a thin navy knit sweater with a see-through hole pattern that makes it look a little lacy. Just female enough without being too frilly. This feels more like me anyway. Here are our two candidates:
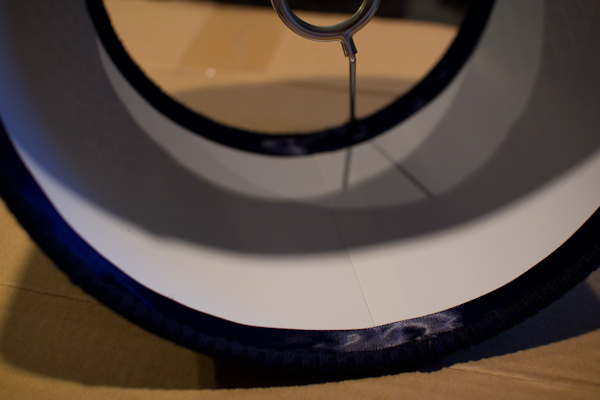
First, I decided which section to use and cut off any excess fabric on top and bottom of the lamp shade. This left me with two wide strips of fabric:


Then, I broke out my hot glue gun and glued down the strip on one side. I pulled it tight around the cylinder, and glued the other end down. Now all that was left was to cut the top and bottom to a uniform overhang, fold the edges over, and attach them by applying a thin bead of glue under the bottom and top rim. Sorry, I didn’t have enough hands nor light to take progress pictures, but this tutorial explains and shows all the steps I took.

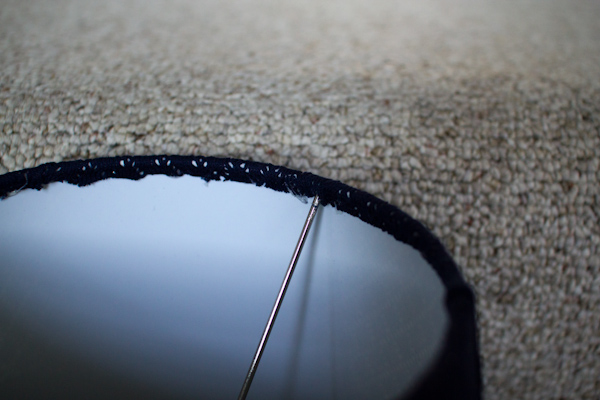
Since I was working with knit fabric, the edges turned out a little too frayed to be pretty. So I bought this half-inch wide ribbon to cover them up. Just glued it on with hot glue as well.
Looking much more finished, there.
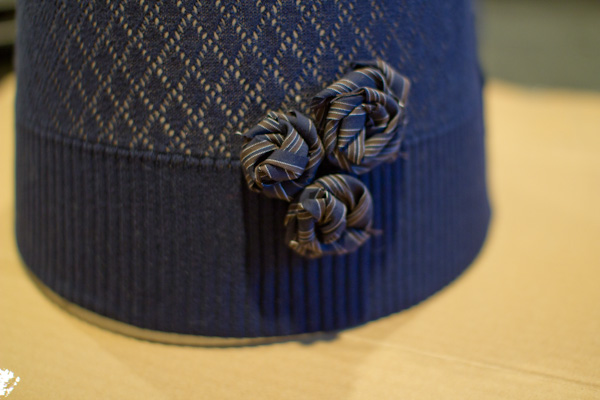
Finally, I created a few fabric flowers out of the shirt remnants to really tie the two lamp shades together.
Here they go. Aren’t they a cute couple?
Now I just gotta spray-paint the bases of the existing light fixtures white, and find a way to attach the shades to them. I’ll keep you posted.
September 27, 2011
Wall Art
In my eyes walls are a piece of art in themselves. How they stand up straight, hold the house together, keep us warm in winter, and can be painted in the prettiest colors of the rainbow. But they tend to shine even more when they are dressed with some beautiful pieces of wall art. Things that give the eye a focal point, that make a plain wall seem more cozy and less structural, things that bring the whole room together and to life. May it be a mural, pictures, photos, wallpaper, or random items. Here are some of my favorite pinteresting ideas for wall art:
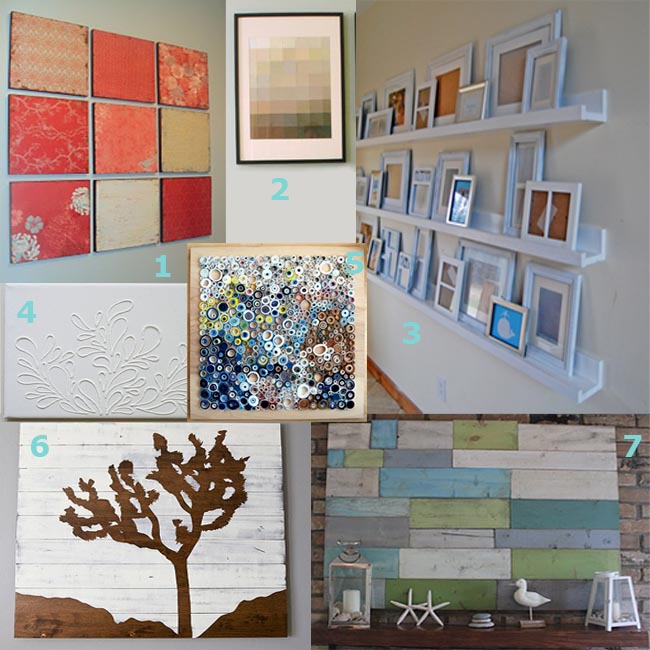
1. Glue pretty scrapbook paper on 1x1foot MDF boards.
2. Arrange paint chips in a gradient pattern. Looks like a pixelated photo.
3. Collect a bunch of white frames with randomly collected art on wall ledges.
4. Use fluffy paint on canvas and then spray-paint the whole thing white.
5. Roll up strips of magazine paper and glue on a wood board. Something for people who need to keep their fingers busy.
6. Tape off a pattern or design on woad boards, paint over it, and then remove the tape.
7. Screw a bunch of withered boards to each other and stain them with a thin coat of any leftover paint.
And then there is this secret I discovered just recently: Pictures look better if they are hung to the wall in groups with some empty wall around them rather than spreading them all over the entire wall. Ideally they should all be in frames of the same color group, texture, or style and then arranged in a seemingly random but coordinated way:


Doesn’t look too complicated, right? Personally, I believe that hanging pictures on the wall is the first step to making a house a home and yet sometimes it is the last thing we get to. I have learned my lesson from the past when I would finally hang picture son the wall and then moving out again shortly after. So, let’s get to it. Shall we?
Please feel free to share any wall dressings that you have hung or made recently. Do you prefer photos, paintings, or other art? Are you an empty wall person or put up all your favorite memories?
September 6, 2011
Scary stuff
Holy moly, I just spent almost two hours at Lowes! There is just so much wonderful stuff to see that makes me dream about endless possibilities that are restricted by a tight budget, which I already blew tonight. No more spendings for the the rest of September. But the supplies I got should last for a good while and for a bunch of projects that are lined up.
Originally I thought that the dining room is gonna be the next candidate for a makeover. It still had that somewhat tolerable wallpaper, but stood there kind of bland and blah in the middle of our house ad wouldn’t quite fit in with the kitchen and living room. So within only 1.5 hours I was able to pull off an unexpectedly smooth wall paper removal, and was left staring at even more boring walls. What to do, what to do .. let’s ask Pinterest. And there I found this fine little piece of inspiration:

Board and Batten is what it’s called. Never heard of it before, but I’ll take it. Supposedly it is a very simple project that involves only cutting some boards and nailing them to the wall. But then again, it looks like a lot of board cutting and nailing and caulking corners and painting. So I got a little intimidated by the whole thing. Actually quite a bit intimidated. A lot. Scared almost. But I still want it.
To escape this scary room, I quickly moved on to another smaller project. The foyer. While this is the only room where we totally love the wall color and coat hooks were already installed, at first glance it doesn’t look like it needs a lot of work.
But then look a little closer:
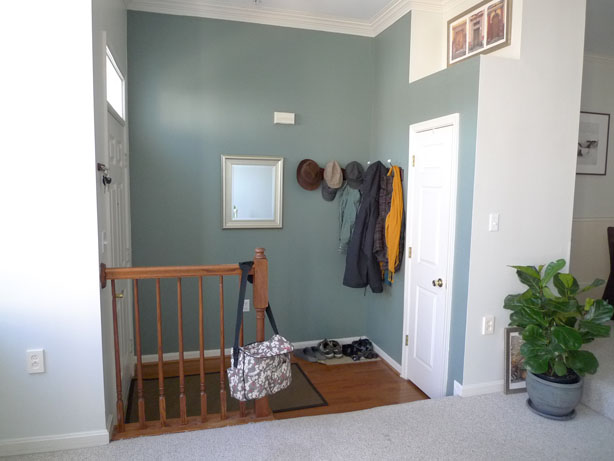
1st problem: Bags are hanging out at the banister, shoes pile up on the floor. Solution: Add storage for bags and shoes. Simple as that.
2nd problem: The banister is ugly. Too oaky, to traditional, and it kind of feels like you walk straight into it when coming into the house. Unfortunately right now it is doing a good job keeping Milo and his toys from falling down the step, so it will have to stay until there are no more little toddlers toddling around. Solution: Paint it white to blend in with the other trim.
3rd problem: The trim isn’t even white. Solution: Just bought a heavy gallon full of ultra white semi-gloss paint.
4th problem: There is an unsightly door bell box hanging in the middle of the wall. Solution: Not sure. What do you suggest?
5th problem: The wall art above the closet is very generic. The only thing it has going for it is that it fits perfectly shape wise. Solution: Change the picture and add something 3dimensional.
6th problem: The ceiling light is not in the photo. But trust me, it is not worth it taking another photo. Solution: Maybe in the long run switch it out for a nice (possibly DIYed) pendant light that ties in the high ceiling a little better.
That reminds me – it’s almost Halloween. Time to get some fall craft going and breaking out some scary moves myself. How about you guys? In the mood for some easy foyer fixing upping? What ideas do you like to make this practical room a little more pretty?
August 11, 2011
More than words
So, recently I made this framed piece of wisdom to hang over the suitcase nightstand in the guest bedroom. I have never really been into hanging words onto walls just because they are so literal and usually I find pictures more subtle in expressing what I want to say. But then again, words are way more specific and why not contribute a little bit to keep the lost art of reading alive.
When it comes to creating wall art, I don’t like my handwriting enough nor do I trust the steadiness of my hand. Therefore I gladly take on the help of internet and computer for matters like these. I guess I don’t have to go too much into detail about how to print on paper, but I don’t want to miss this opportunity to share with you one of my favorite internet pages besides Pinterest and Kuler when it comes to design stuff: Dafont! You can download thousands of funky, pretty, exotic, or stylish fonts for free and will for sure find the right “handwriting” for your project. The one I used for my travel words is called FFF Tusj. Here are just a few samples of what else is out there:

July 6, 2011
Bye bye nursery
According to my husband any news is only official when posted on Facebook. But I will post an exclusive piece of information right here before the Facebook world will know: Milo is taking his first steps!!! As soon as possible I will snap a video and post it here, but currently I still need both hands to catch him when he stumbles towards me. This little boy is almost a wobbly toddler now and is busy putting pieces and bits together every day to figure out the world and become a fully functional human being. First he learned to climb up the steps, now he can get down. First he figured out how to take things apart, now he is starting to put things together.
It’s just one more month until Milo’s first birthday and time for my little boy to get a big boy’s room. Yayyy for another room makeover in this house!! Here is what Milo’s room looked like when he was just a tiny 6 month old baby: (more…)
July 3, 2011
Now that’s pinteresting!
Sometimes, when my brain runs extra rounds and all those plans and what-I-could-do’s overflow my skull, I know exactly what I want to do, but have no idea how exactly I’m gonna do it. It’s a little bit like the theme of Milo’s pre-toddlerhood: I really want to get that iPhone that’s up there on the table, but I just don’t know how to get up there. So, For example I know that there needs to be some more comfy warmth in the somewhat sleek and cool kitchen (warmth – the feeling, not the temperature), but I am not sure if some pillows will do the trick, if we should put up some nice shades, or if I should dare to try the impossible and convince my husband that we absolutely need curtains.
So, what are our options? Back in the days of limited online access my mom’s living and style magazines were a good source of inspiration. But who wants to limit their inspirations to 100 pages for $4 anymore, when the web has millions of pages for free. (more…)
June 22, 2011
Vintage Summer it is!
Here is the new theme that I have chosen for our website. I called it Vintage Summer. Don’t the colors totally remind you of a slightly aged photo of a summer picnic out in nature by a wheat field? And ta-da – it does have orange in it. We’ll see how it turns out. Still working on the background of the page and how to incorporate some more of the red tones.