
In: House
September 8, 2014
House Tour 2014 Main Floor
This year was supposed to be the year of all years, when I was finally gonna be able to rip out the discolored old carpet in our living room and install wood floors. But then the furnace started acting up and that’s where the money went. So, next year it’s gonna be.
Foyer
Before:

Between:

Now:

Alright, the perspective is not the same, but this area is still mid makeover (since April) and I’ll show more details soon. So far I got to re-paint the walls, molding, install a board with coat hooks, and shuffle some storage solutions around. And these things are gonna get done before the end of this year:
- Finish wall of board and batten on the left. Like this.
- Install new pendant light fixture
August 23, 2014
Housetour 2014 Upstairs
It’s been over 3 years that we lived in our beloved home. Much has changed, much will still change, and we are happy to be in this cozy place that has become truly ours. It is still constantly transforming and adapting to our ever changing needs. At this point we are planning to stay in this house roughly until Milo is done with elementary school, so another 5-6 years. The neighborhood and the community is just too great to leave and the elementary school is right across the street. Eventually however, we would like to move into a single family house with a garage and our own yard. With that in mind we are trying to make mostly cosmetic changes that take the house from old country to fresh contemporary on a low budget, so that it will sell easily and hopefully for a profit.
Some of the updates we are making throughout the house are:
- Paint all trim bright white instead of cream color
- Change all brass light fixtures to white, black, or silver
- Swap out all brassy wobbly door hardware to brushed nickel
- Remove nasty old carpet from main level and basement and replace with wood floors and new darker carpet
- Repaint rooms to a more gray based coordinated palette instead of tan and red.
Other than that it’s really just some major decorating. Look at this evolution of a home.
April 27, 2014
You’ve Been Served
So, about 3 months ago I had written up that long post about how I made over our old dining room buffet and then it didn’t save and all was lost and I never wanted to write again. Not really. But then I decided to start on our staircase renovation, so instead of typing everything up again I started scraping off caulk hours and hours on end. A full post on that coming soon. Maybe.
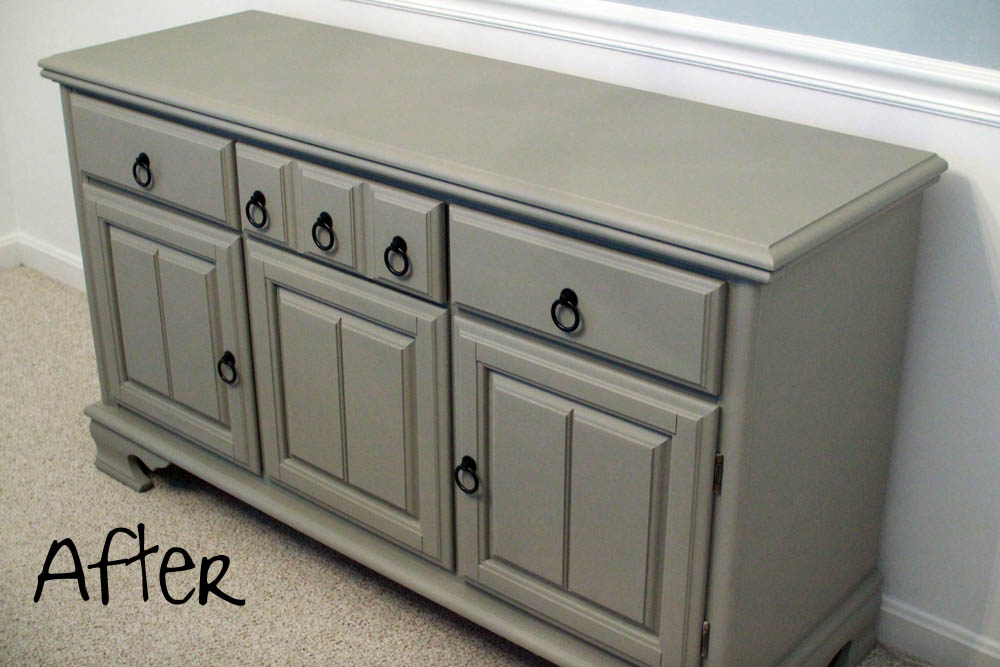
So now without any patience to go into the buffet details again, let me just throw these picture at you:

I know, I know, doesn’t look too bad from far. But when you look closer it was really obvious cheap laminate, not actual wood. And said plastic foil started to peel off on one side, so it had to be done.

I used chalk paint (color “French Linen”) for the first time and while it’s not as magical as some DIY people out there make it look like (you still need to sand and multiple coats), it really creates a thick solid cover that should last for another couple of decades.

And then it was Christmas.
Happy Spring!
December 20, 2013
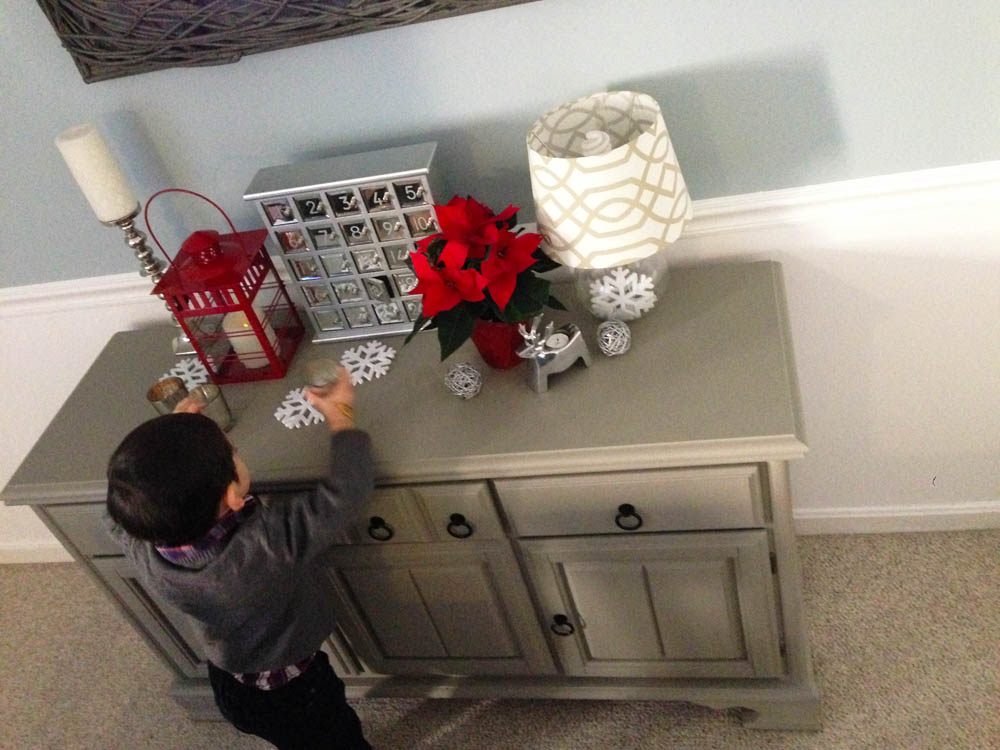
Milo’s New Advent Calendar
A few years ago, I got this sparkly advent calendar for 3 dollars at a yard sale. It was really nice and doing it’s job, the only problem was that the compartments behind the doors were so tiny, that really nothing but a piece of chocolate or other unhealthy candy would fit in them. But what I really wanted to sweeten the wait for Christmas, were some small little gifts that wouldn’t disappear in one bite. Especially now that Milo is getting into Legos, the possibilities are endless to make each day of December special.
So I went on Pinterest for the usual inspiration and found this link. It also helped that my friend Kathleen did a similar one last year. Overall this was not a cheap and quick project, but it will hopefully last through Milo’s childhood and pay off in durability and joy. I probably paid about $40 total for all 25 boxes, paint, and decoration supplies. The project took about three evenings to complete = 6 hours. And here it goes.

First I laid out the 25 boxes on a board that I had left over from a different project so that they would spread out nicely and not repeat too much. Then I marked each one for which base color it was to receive, also making sure not to have too many of the same color in the same neighborhood.

The next step was to paint all boxes with craft paints. Milo actually helped with this step. We painted one at a time and then put it right back into its place on the board to keep everything in order.

The main idea of this project was to have Milo involved in decorating the boxes, so I bought a bunch of stickers for easy decorating. But after glueing on 3 stars, he was “getting tired of stickers”. So, most of the decorating was left to me. Lincoln jumped in to create the most elaborate box (guess which one), and I just free-styled all the other ones. I used some glittery scrapbook paper, felt snowflake stickers, star stickers, white puffy paint, and a glitter marker. To keep things cohesive it probably helps sticking to 4-5 colors. And I made sure to use at least two of those colors on each box and sticking with winter motives like snowflakes, pine trees, snowmen, stars, etc.

Next, I whitewashed the wooden board. Whitewashing or any color washing is soo easy I can’t believe I ever bought wood stain. Just water down any existing paint (I do around 1:1 ratio, but you can water it down further to have it more transparent) and then brush on the wood. It gives the wood a soft tint while still showing the grain. After it all dried, I sealed the board with Polycrylic – another recent discovery of mine. Somehow I always thought that Polyurethane is the number one top coat to use. But Polycrylic is much less smelly, dries faster, smoother, and cleans up easily with water. It also won’t yellow over time.

Finally, it was time to attach the boxes to the board. Because I have had some incidents with hot glue losing its power from one Christmas season to the next from being exposed to all sorts of temperatures while stored in the attic, I wanted to be safe and not only used hot glue, but also drilled one small screw through the back of each box. I screwed a string picture hook in the back and hung the final product out of Felix’s reach on a wall.
Next year, it’s Felix’s turn to get one of these.
September 24, 2013
greeNEW Office
Here it is – my latest project, my biggest pride, my baby, the reason for many sleepless nights. Seriously, the amount of nightmares and mind-spinning nights I had over greeNEWit’s office space is a little ridiculous. In case you  haven’t noticed, I deeply identify with and care about my company. This has been my first and only job and I’ve been with the company almost since the very beginning. greeNEWit is more than a 9-5 gig, it’s my home during the day, where I can be with friends and do something meaningful. Therefore it was the greatest honor, but also most serious tasks for me to create a new home for greeNEWit.

In August we had to leave the residential home that we had slowly been taken over and grew out of over the past years. The guys found a really nice and bright space with lots of potential. You just had to see past all the tiny cave-style office rooms, divider walls, green marbled wall paper, cream trim, and brown carpet.

The place was terribly outdated and boring, but we were getting a completely free renovation with the lease. My dreams went wild with endless possibilities. Until I learned that my budget to furnish the new home was about as much as other companies spend on a good conference table alone. Nothing my thrifty DIY self can’t handle, but ugh, this meant way more labor and less bottomless shopping than hoped for.
The Plan
First step on the agenda: tear down a bunch of walls and open up the dungeony dark center. This was the original floor plan of the entire third floor and the yellow lines mark the walls that are to crumble to dust forever. (Later we ripped out another room to let more light to the kitchen area)
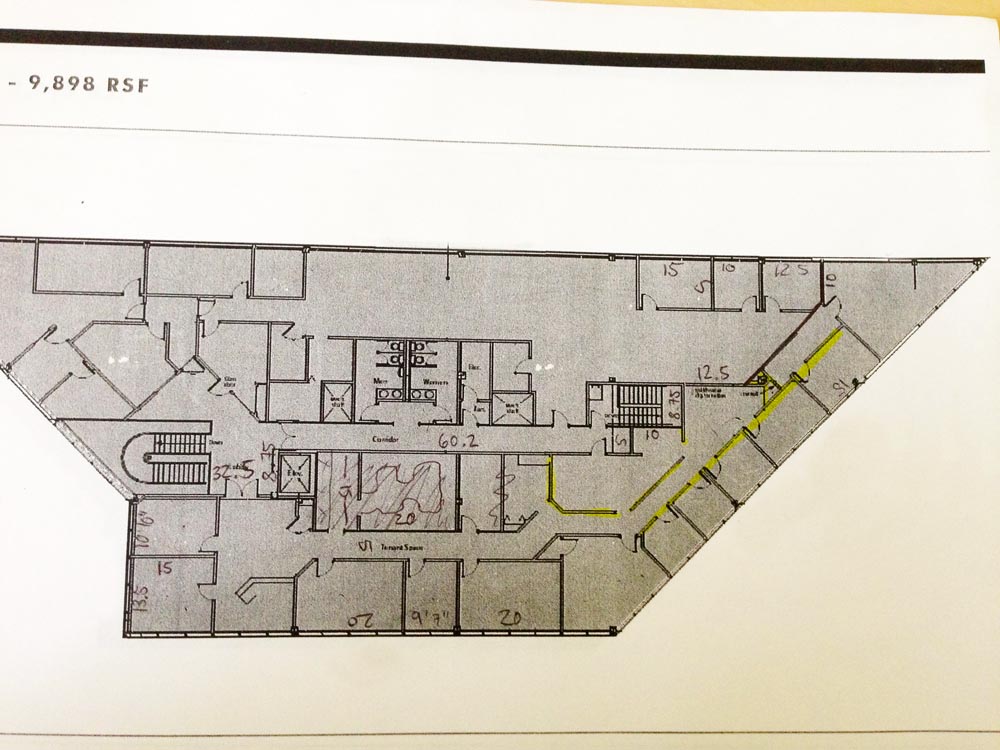
And here you can see the southern portion of the floor that greeNEW is leasing and how all the walls had to go bye bye.

The goal was to create a bright, modern, cozy, and inspiring place. This was the idea, created with floorplanner.com. For a fully maneuverable 3D model, click here.

The Action
Because of the limited budget, I had to work with the pieced together furniture that we already had, but did not want to compromise on style again like we did over the past years. So, a lot of furniture makeovers were in order. Everything that didn’t have a matching wood finish (birch or bamboo), had to change its look.
Tables in various shades of brown were greeNEWified.


Our old black conference table got a new coat of black spray paint on the legs and a shiny new birch table top  slapped on (made from a$50 piece of plywood).

In the meantime the contractors were hard at work tearing out walls, removing wallpaper, rewiring, patching, painting, and laying floors.


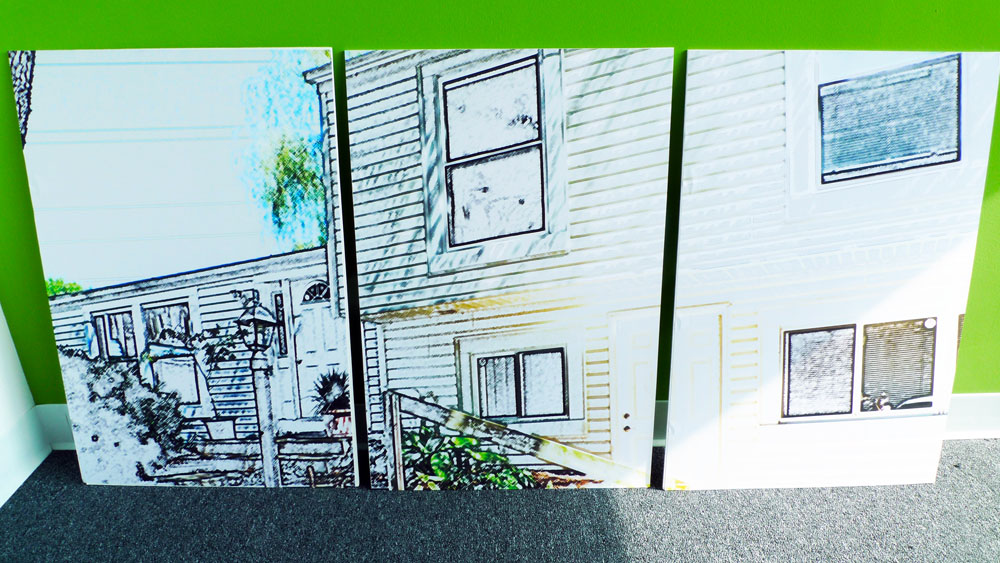
To make things even more challenging, I imposed a rule on myself to get only meaningful wall art instead of just pretty stuff. So of course, I had to make it myself. Here are just a few initial pieces to start out with. More to come over the next months.
greeNEWit signature wall. Bamboo installed by Richard Hammond Builders, sign by image360.

Icon wall tiles with representations of what we do and stand for. I used stock icons, printed them big, and glued on MDF squares.

Triptychon of our old greeNEWit home.
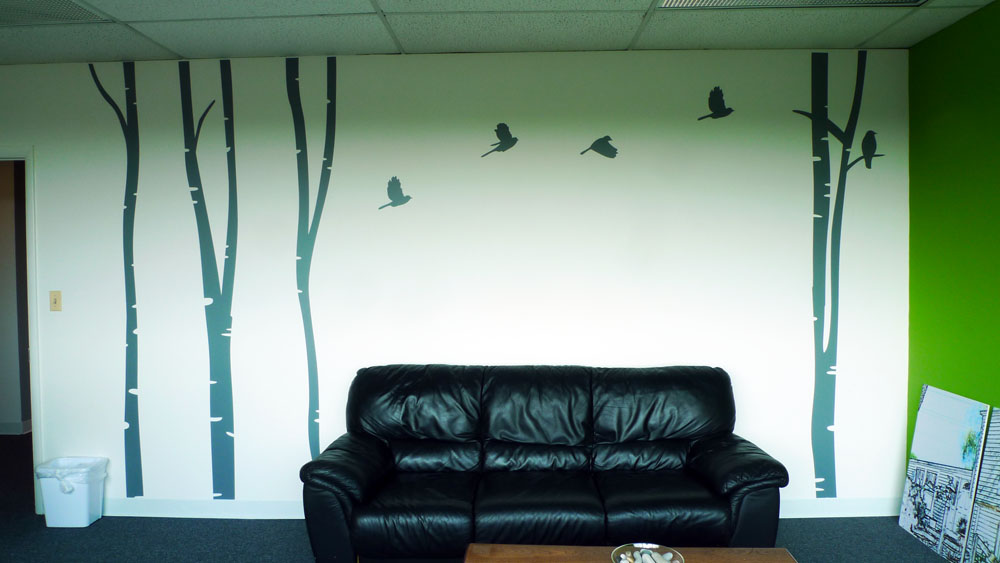
Super large wall decal for our Rec-room ordered from Coocoodecal on Etsy.
Together with two of my coworkers the kitchen got transformed from the orange old oak to a crisp white.

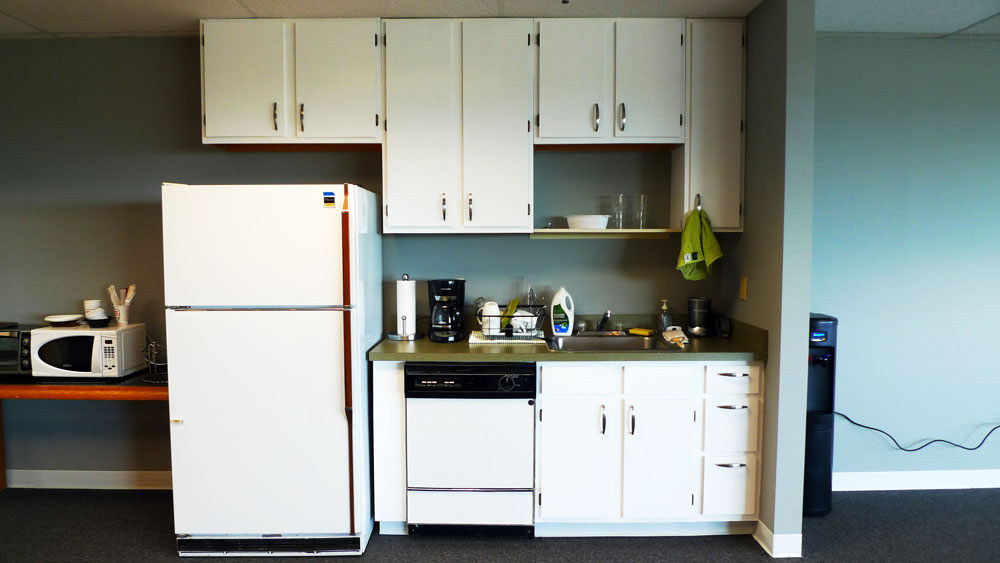
Now we just need a new dishwasher and maybe do something about the greenish marbled countertop some day.
The Result
After 3.5 weeks of renovations our new office was finally ready for move-in. The whole team pitched in to set everything up for working conditions within one day. I’ll probably do a separate post on direct comparisons of before and after pictures. So without further ado, here is a tour of our brand spanking new greeNEWit office. Just look past the mostly blank walls and a few unmatched pieces of furniture. We’ll get there by the end of the year.


September 23, 2013
The Reason Why
I have been absent for over two months – just the usual craziness. Plus some extra on top. You know, working a full time job (I might not have updated my job status in a while, but at the beginning of this year I became responsible for building up a whole new business line for greeNEWit, which means tons of work to be completed only on my own and not being able to take much of a break), and being a full time mom with mostly sick kids. Seriously, every two weeks another type of sickness strikes. On top of working over time in two jobs, I also had to prepare for our trip to Germany, plan a bachelorette weekend and some wedding surprises for my friend Johanna. And then in August, greeNEWit suddenly had to move out of our old home office and find a new office space. Well, guess who gladly volunteered to take full charge of all interior design related tasks for the new office space and couldn’t bear to deliver a nothing but perfect space, therefore adding about another 20 hours per week to my work load for the past 5 weeks? Yep, that’s me.
But now, we are in vacation mode. As much vacation as is possible with two little kids, one of them called Felix the Destructor. But there are some additional helping hands here, more sleep, and almost no work to do. So, I’m gonna try to catch up on all blogging now. Now or never. Up first, the office space reveal – my biggest pride.
July 6, 2013
Get Out!
This year I was really determined to spend as much time outside as possible. Before I knew that it’s gonna be on of the wettest spring / summer in history. So instead of being trapped inside because of the cold, we are now banned from the outside by constant wetness. Rain, rain go away!
Nonetheless, our outdoor spaces got some nice small updates to make them family friendly should any day unexpectedly turn out rain free.
In the front yard we had that spiky ground cover bush going on that was really good for trash and leaves getting stuck in it, but not for hanging out front to watch our kids play.

One sunny day I went at it and just ripped it all out. It all originated in just 3 plants and the roots were all intertwined with the tree’s roots, so much sweat was shed. But all worth it afterwards. The home owners association sent the landscapers out to even things out and put down sod.
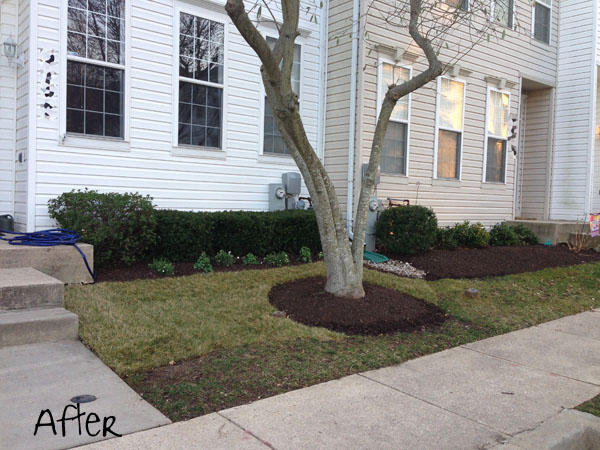
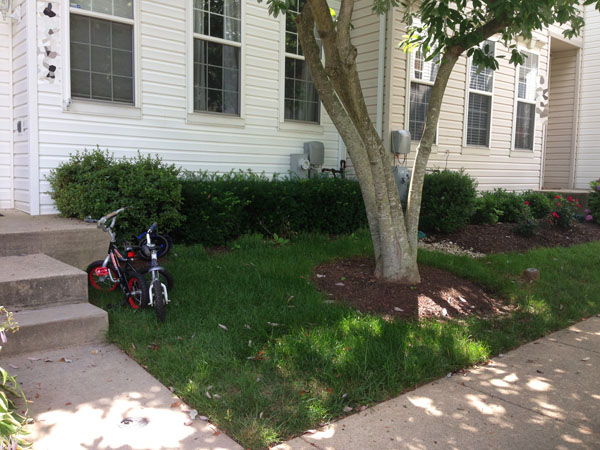
Just a few weeks later – thanks to the rain – everything was lush and green and all set for mini picnics. The flowers grew in almost too much, so I might transplant them to the backyard next year or extend the flowerbed a little.
In the backyard we took on a pain-in-the-butt project that was long needed. Previously the deck was all taken over by bikes, trash cans, and other stuff. Apparently it was not even picture worthy. So we decided to extend our patio by just a few square feet on each side of the deck stairs in order to tuck things away. For being such a small area, it was kind of a big project. Digging out dirt, hauling in gravel and sand and pavers, cutting wood borders, etc.
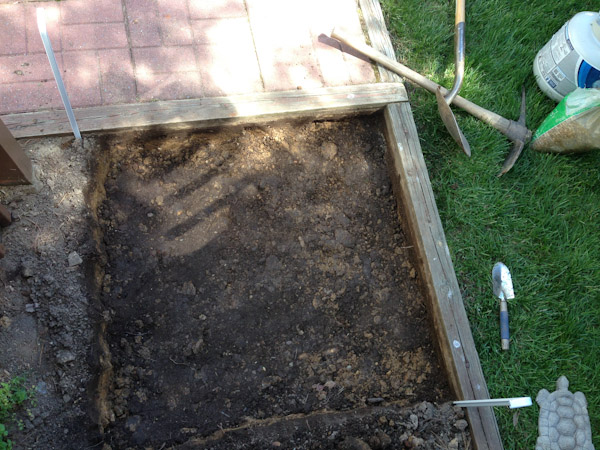
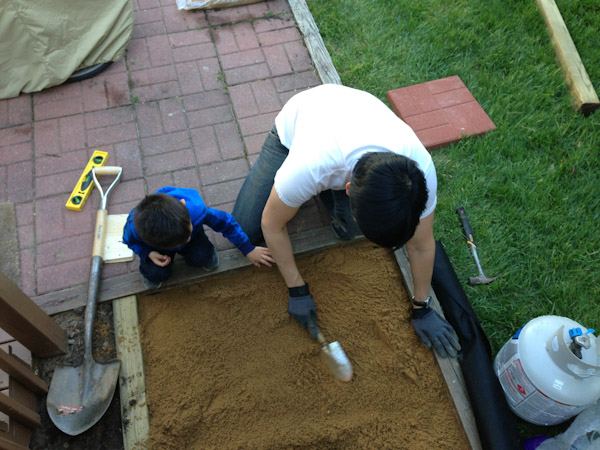

Daddy helped Milo do it and over the course of the following weeks I actually got around to cleaning up other junk that had accumulated around our deck, regraded the soil below our deck to prevent water damage in the basement, and painted the wooden border with leftover deck paint.
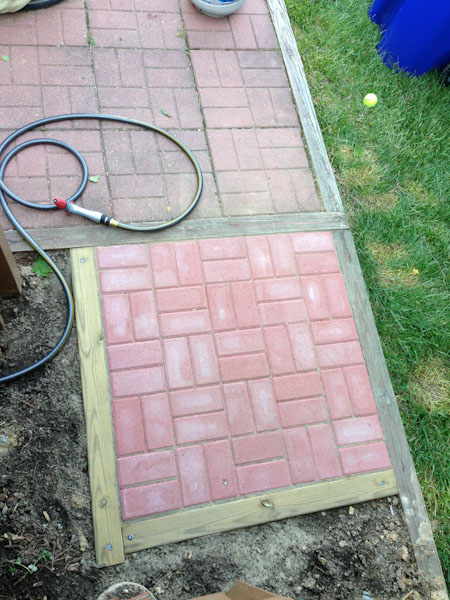
Now this whole area is just way more functional and neat without spending a fortune.

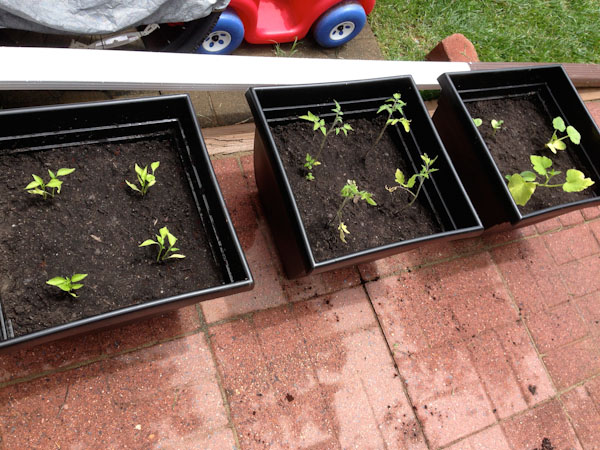
The bikes and trash cans have space on the new paved corners and make room on the original patio to even grow three big planters full of veggies.
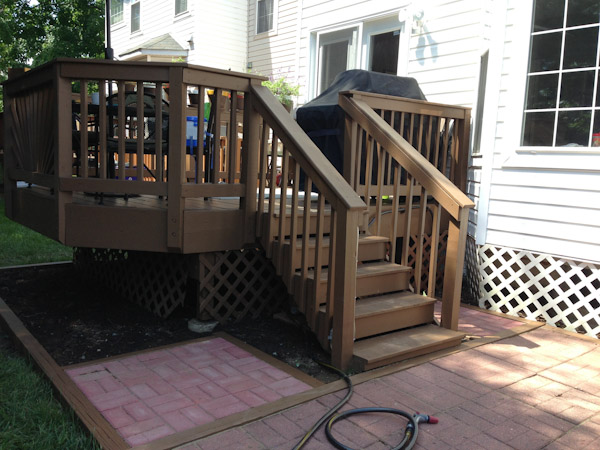
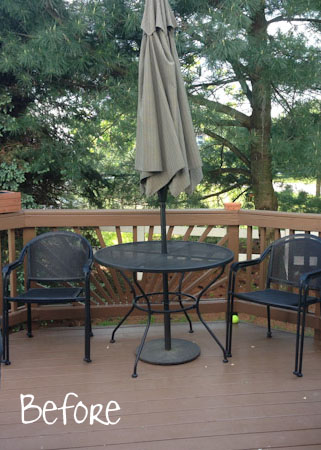
And then it was time to do something about our deck. I mean, it was all nicely renovated and painted, but came out a little too neutral / brown / blah.

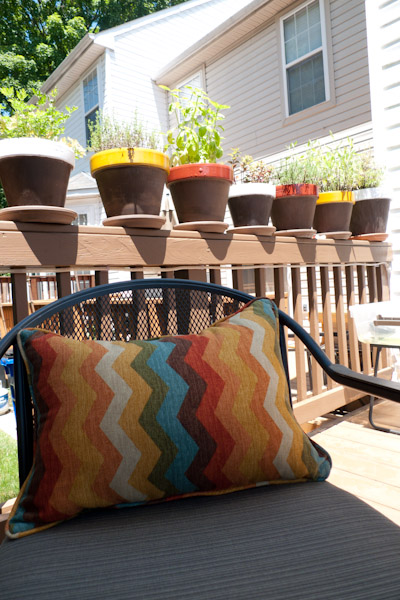
With the help of some paint on the herb pots and new pillows …
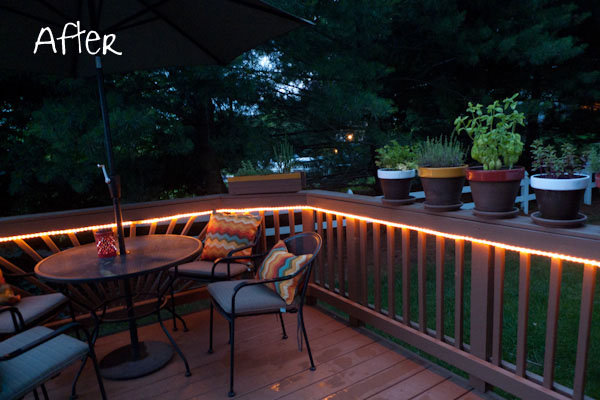
… as well as a red solar lantern, and rope lights that I wrapped all around our deck, it’s now a lot more cheerful and moody to spend summer evenings.
And who would have thought – by the time I finally get to finish this post, the summer actually has made an appearance and I am typing this as I am sipping a glass of wine on the deck. Happiness.