
In: House
February 26, 2013
His And Hers Lamp Shades
Phase 2 of the master closet makeover has officially begun: DIY-ing a bunch of accessories. Up first were the light fixtures.
How these ancient light fixtures made it into our house that was built in the 90s is completely incomprehensible. They must have been rotting at the builder’s warehouse for decades before he decided to finally get rid of them in our lovely home. Too brassy, too teardropish, and too much weird glass texture. They had to go.
So in accordance with our customized his and hers shelf solution I decided to also make a male and a female lamp shade. After finding inspiration and figuring out the best way to spice up plain lamp shades, I came up with a plan: I would literally dress up these lamp shades:
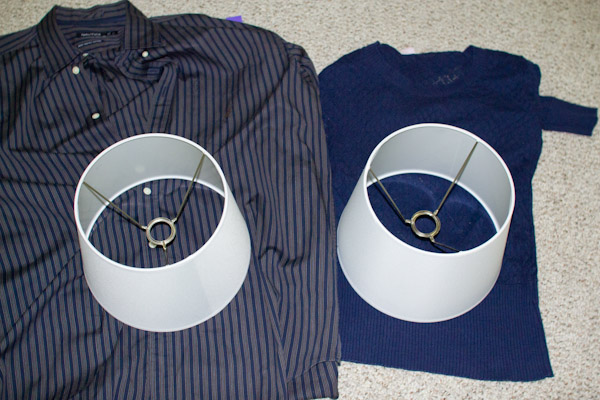
One in a men’s dress shirt, the other one in a ruffly skirt. But they still had to match, so they both had to be navy. Navy is a newbie to our house of muted midtone colors. After hubby convinced me that we needed a blue chair for our bedroom (not the neutral grey that I was voting for), I kinda got used to the thought of adding a new color to our master suite.
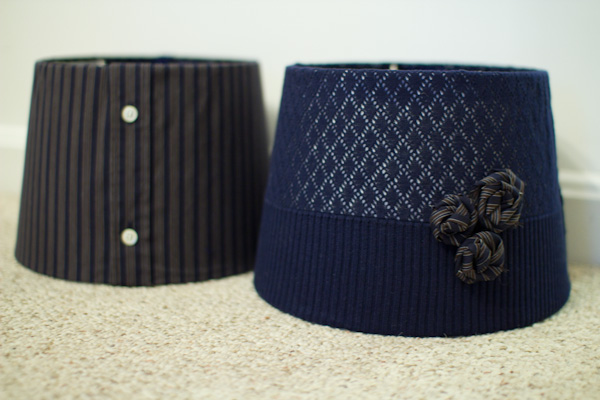
Well, after sourcing two different thrift stores I just couldn’t find any ruffles in blue at all. So I went with a thin navy knit sweater with a see-through hole pattern that makes it look a little lacy. Just female enough without being too frilly. This feels more like me anyway. Here are our two candidates:


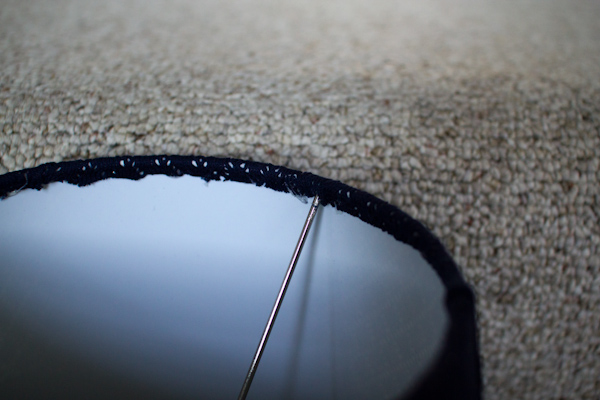
First, I decided which section to use and cut off any excess fabric on top and bottom of the lamp shade. This left me with two wide strips of fabric:


Then, I broke out my hot glue gun and glued down the strip on one side. I pulled it tight around the cylinder, and glued the other end down. Now all that was left was to cut the top and bottom to a uniform overhang, fold the edges over, and attach them by applying a thin bead of glue under the bottom and top rim. Sorry, I didn’t have enough hands nor light to take progress pictures, but this tutorial explains and shows all the steps I took.

Since I was working with knit fabric, the edges turned out a little too frayed to be pretty. So I bought this half-inch wide ribbon to cover them up. Just glued it on with hot glue as well.
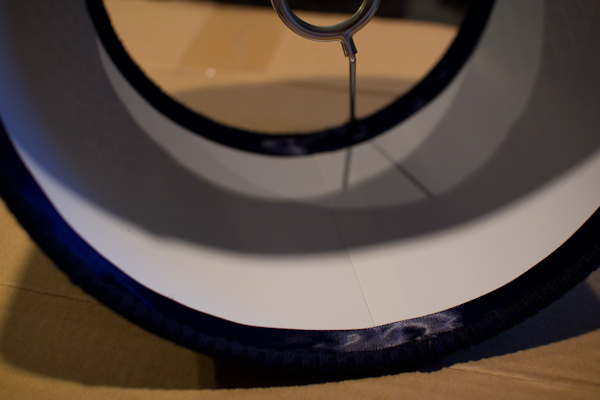
Looking much more finished, there.
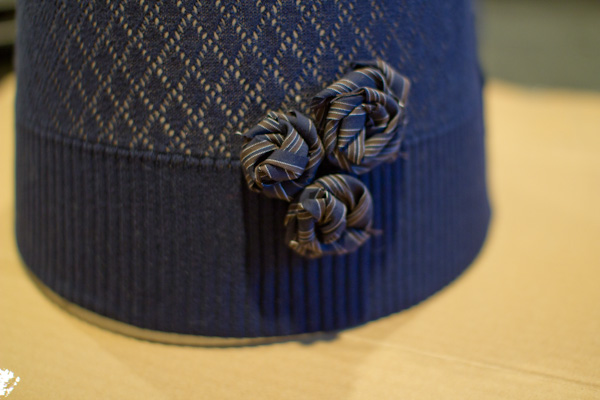
Finally, I created a few fabric flowers out of the shirt remnants to really tie the two lamp shades together.
Here they go. Aren’t they a cute couple?
Now I just gotta spray-paint the bases of the existing light fixtures white, and find a way to attach the shades to them. I’ll keep you posted.
February 16, 2013
Fanciest Closet In Da House
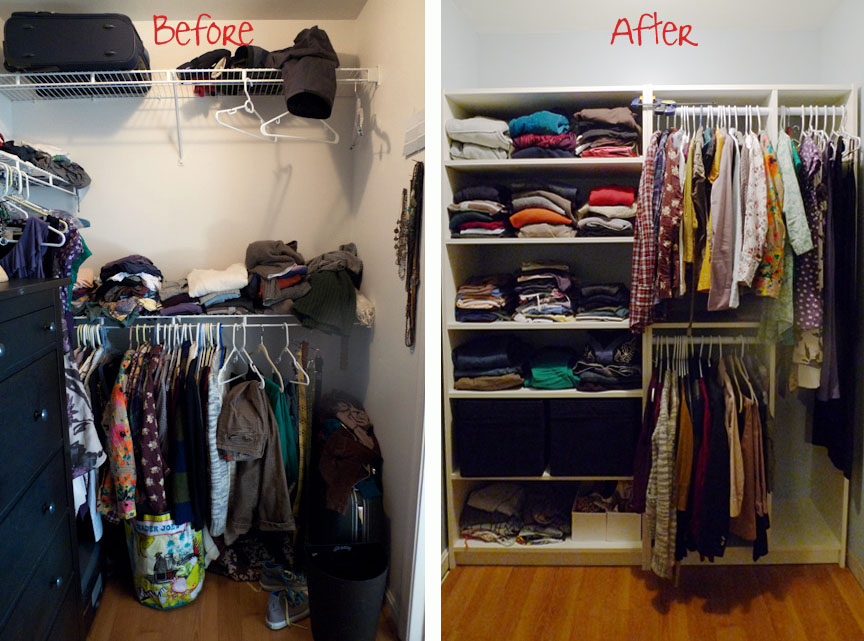
Before, I was just a messy and boring wire closet. Now I am much fancier, colorful, and organized. Check me out:
And some more fancy schmanzy before-and-after pictures:

This is where we left you off last time:
The first step in customizing our master closet was painting it a custom color. The reality is that I was too cheap to buy new paint, when we had three cans of leftover paint sitting in the basement. So, I threw some yellowish white, medium gray-blue, and navy blue together, and ended up with half a gallon of this muted blue (just a little lighter than the picture):

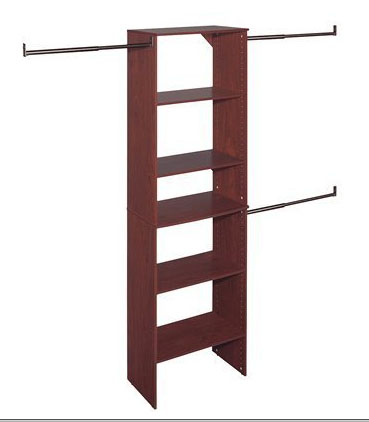
Very similar to the shade that I was gonna get at the store. The amount of paint was just enough to paint all the walls and backboards of the bookcases. Up next was assembling the shelves. Initially I was gonna go super budget and just get one bookcase on each side, plus some rods to build something like this:
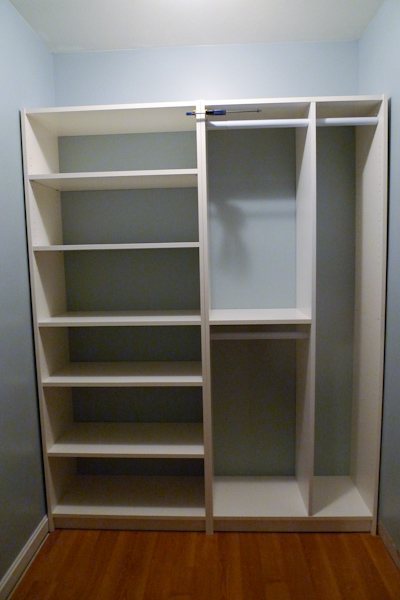
But then I decided to go all out on this project. Just because I had been waiting for this closet for so long and didn’t want to regret any cheap choices that I wasn’t totally happy with. Also I realized that two of those bookcases would fit perfectly in the space. So we got a total of 4 Ikea Billy bookcases, the deeper kind so that all clothes would comfortable fit.
Lincoln’s side was pretty straight forward. For the hanging part of it I got some extendable rods at the hardware store and left all optional shelves out.

On my side we had to hack it a little bit because I needed some taller space for dresses. So we cut the middle board in half, got a laminated board for the center from Lowes (they cut it to the right size and the color and finish was already close enough to the Billy’s so that it was all set to go), and with the help of my handy dandy husband put it all together. Before assembly we had drilled a hole through the center divider so that the rod would just slide through to both sides.
In order to fit both shelves next to each other I had to take the quarter round trim out, so putting that back in will be next on the list. Along with some other detail work:
Paint the walls a grayish blueHack and install white Billy bookcases from IKEABuild in some racks to maximize space usage- Install trim around the shelves
Get some nice storage bins for small things like socksBring in a tall mirror and an ottoman to sit onGet a prettier laundry hamper and trash can- DIY some custom lamps
- DIY a jewelry organizer for the wall
- DIY an organizer for Lincoln’s pocket stuff
- Find a solution to temporarily hold clothes that will be worn again
- Get and hang some wall art
- Maybe a rug
Do the happy dance!
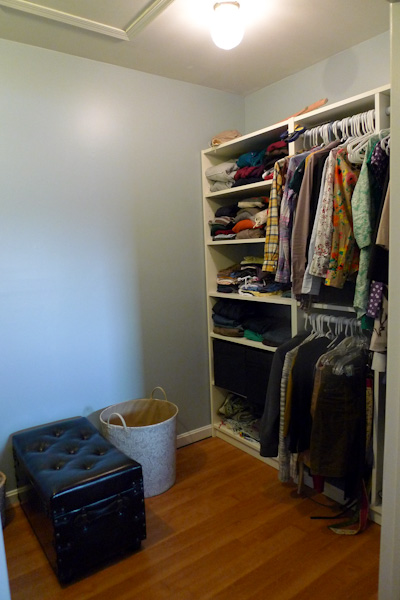
As you can see we already made some progress on accessorizing and dancing as well.
Here is our new hamper ($15 Home Goods) and trash can ($15 Target).
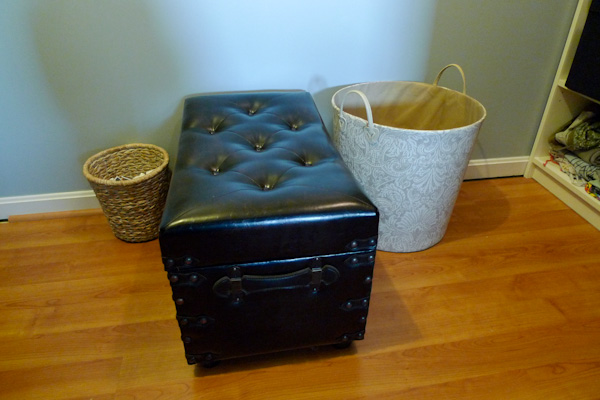
The storage ottoman is from our foyer where we will be adding a storage cabinet instead. Now it is serving to hold my bags and as a seating bench to put on socks and stuff.
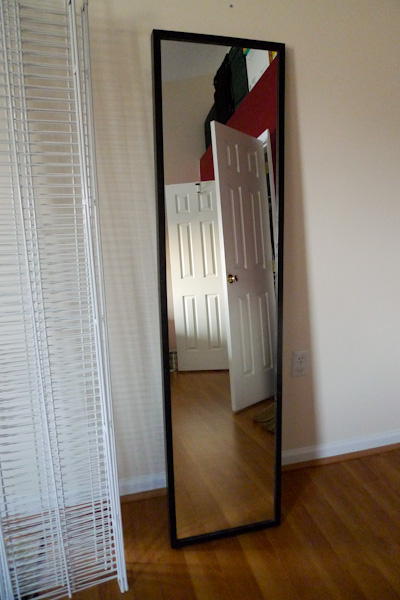
This mirror was previously residing in our bedroom, but for the purpose of fully getting ready in the closet without having to wake up the other sleeping person (Linc and I are on very different sleep schedules) it will also find a spot somewhere in the closet.
There you have it , my new most favorite room in the house.
February 1, 2013
Undoing The Mess
Welcome back to LincNic’s home renovation show! After a 5 month baby break we are back in business. Not quite full force yet, but with a totally manageable project – our walk-in closet. I have been waiting to tackle this project ever since we moved in and am especially excited about it since  this is not only about making a space look nicer, but also more functional. It’s no secret that I am a sucker for beautiful things, but most of you also know that functionality is even more important to me. With little time and money to spare, I like to have my life and household organized to maximum efficiency. If there is an empty corner in my house, I’ll take a storage ottoman or additional cabinet over a decorative vase any time. Form follows function, people!
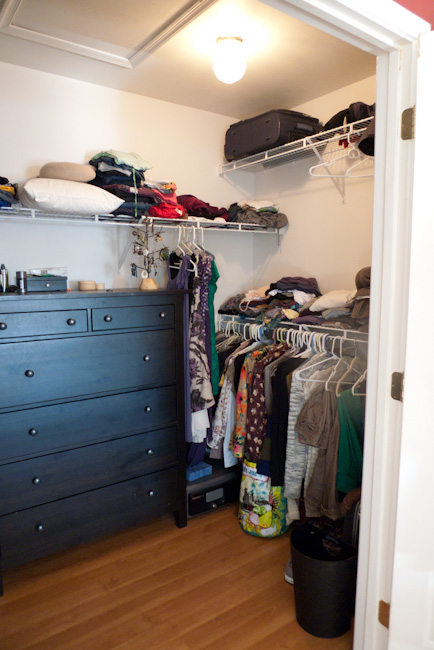
And this builder grade closet just wasn’t cutting it for me. Yeah, it’s nice and big, but what good is that if I can’t use half of the space? The main conflict here is that I am not a clothes hanger, but a folder. It’s way faster for me and the sweaters don’t get stretched out. So, if you look at my side of the closet, there were only two shelves to hold my stacks of clothes – only one of them really within my reach. And a lot of empty space in between.
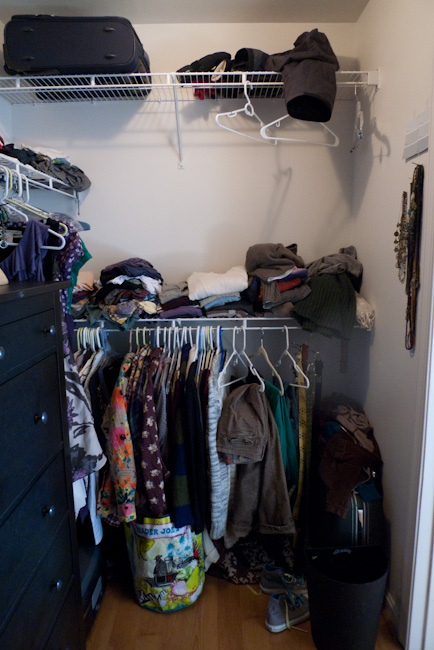
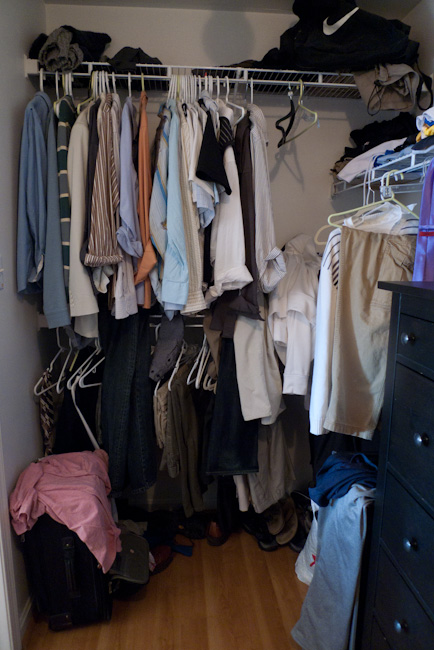
Lincoln’s side was dealing with other issues. He is neither a clothes hanger, nor a folder, but a putting-them-downer. Whatever has been taken off the shelves or racks, just ends up laying around somewhere.
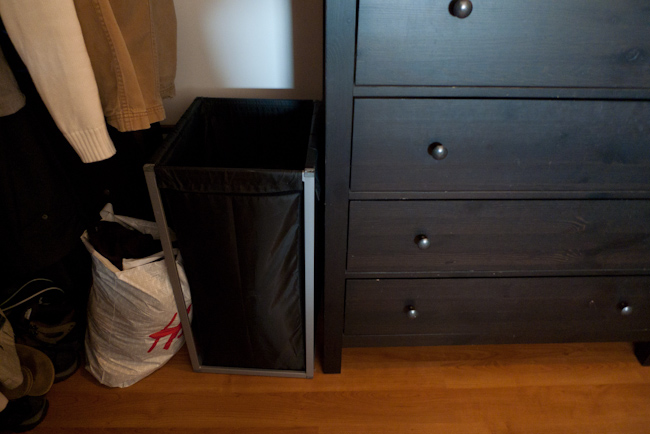
We tried to make up for the lack of shelf space by using this big ass dresser which is taking up half of the closet.
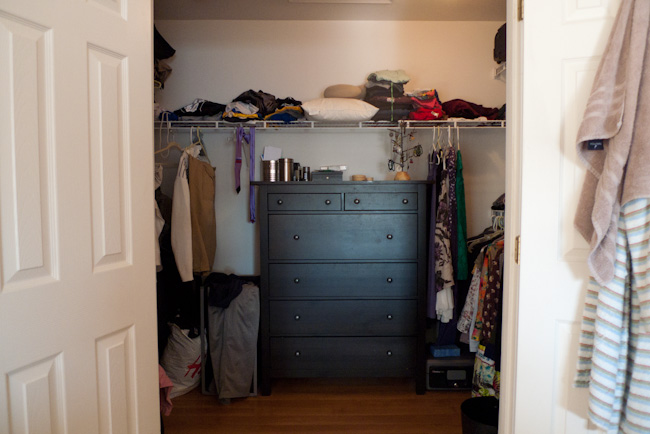
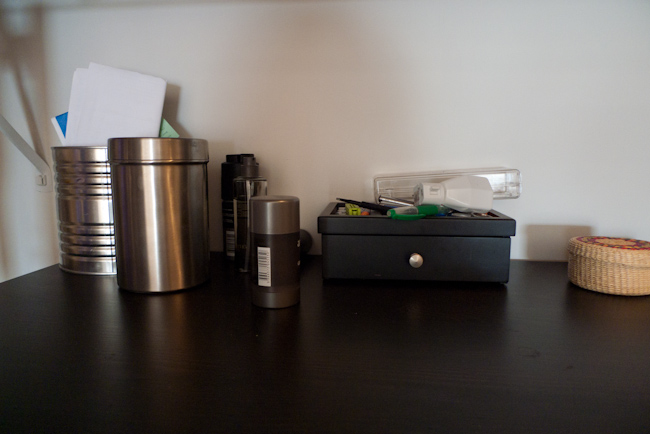
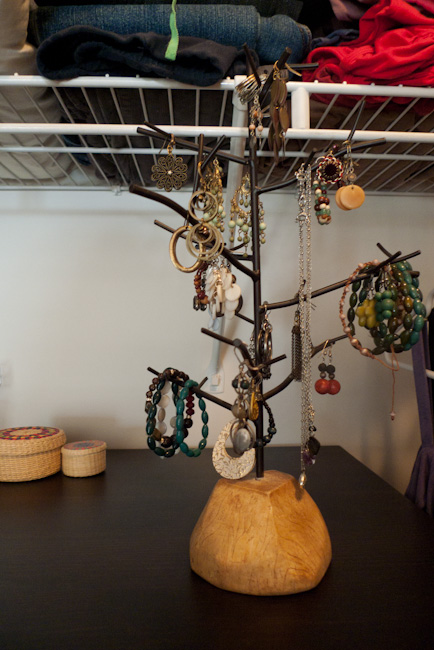
On top of the dresser we don’t have enough organized space to hold all my earrings and the stuff that spills out of Lincoln’s pockets every evening.
The trash can is ugly black plastic and the black hamper so deep that I almost fall in head first every time I try to find those black socks in there.
So, what was the logical first step? Creating a hot mess in our bedroom.

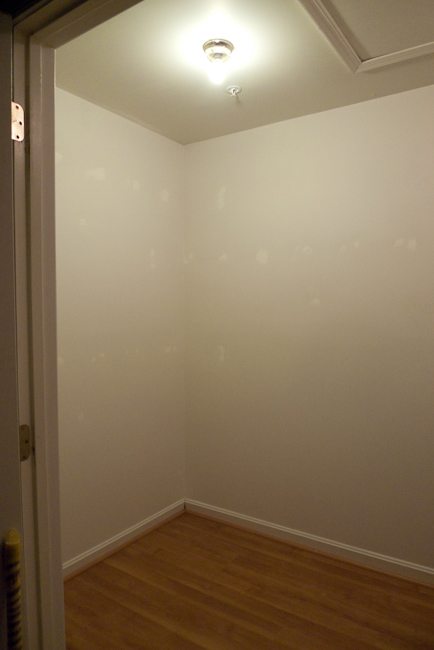
Then it was time to rip all the stupid wire shelving out and make some swiss cheese.

Why, you ask? Because some genius decided to use threadless screws aka nails together with bolts to attach the shelves to the walls. So instead of being able to screw them out, my only option was to pull as hard as possible and try not to tear down my interior walls completely.

Two rounds of spackling ensued and left me with this blank slate.
Now this is where the real fun starts. Here’s the plan:
- Paint the walls a grayish blue
- Hack and install white Billy bookcases from IKEA
- Build in some racks to maximize space usage
- Get some nice storage bins for small things like socks
- Bring in a tall mirror and an ottoman to sit on
- Get a prettier laundry hamper and trash can
- DIY some custom lamps
- DIY a jewelry organizer for the wall
- DIY an organizer for Lincoln’s pocket stuff
- Find a solution to temporarily hold clothes that will be worn again
- Get and hang some wall art
- Maybe a rug
- Do the happy dance!
July 31, 2012
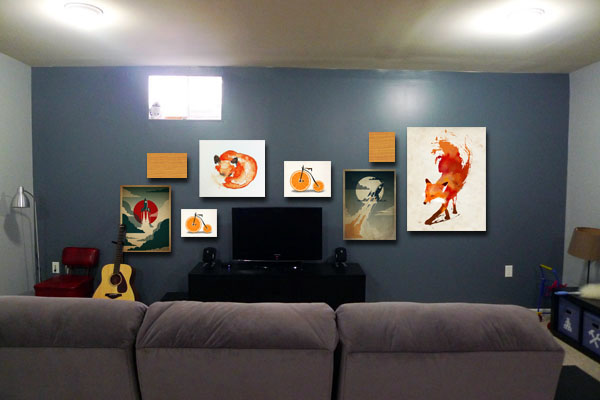
Man Cave
Who would have thought that my man is so susceptible to advertising? When I picked up a paint swatch for our basement accent wall that was called “Man Cave”, he was all of a sudden so set on using that color even though it was way darker and brownish than what we were looking for. He also bought dog snacks for his parent’s dogs just because they are called “Milo’s Kitchen”. Just name things something that are meaningful to him, and he will buy them.
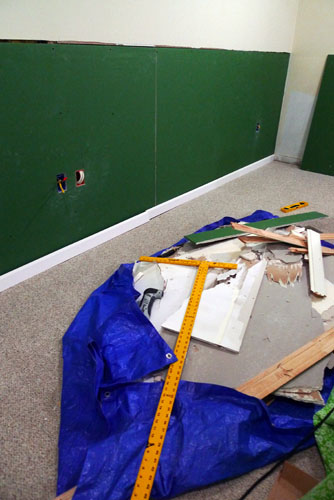
But side notes aside – this post is about the preliminary finished status of our big basement makeover. Here is a quick reminder of what it used to look like and the plans we had for it:
And here is the for-now-final result:

This project was really more Lincoln’s than mine, since I was getting too pregnant to help with any laborious work, he spends way more time down there anyway, and wanted it to become his very own man cave. A space where he can make the manlier design choices and that is totally technically geared up. So all I had to do was motivating him to get things done before baby arrives, help to strip down some wall paper, and moderate his design just a little bit.
Preparation
The wall paper removal and painting was the more tedious and painful part, but we had a pretty good system down (learned from the guest room makeover) and managed to finish it within two weeks (working on it almost every evening). For the walls we chose a light grey that was supposed to be color-matched to the guest bedroom walls, but turned out a little darker and blueish. Oh well, close enough for now. Therefore the darker accent wall also had to have a blueish grey undertone. We chose “Iron Frame” from Valspar and had it successfully color matched to Olympic No-VOC.
Before painting however, we had to add some more outlets to the room. There had been only three accessible outlets so far and they were both overloaded by numerous computer and TV components. This required Lincoln to take down the bottom half of one basement wall board, but the good news was that this extra step enabled us to inspect insulation levels and we were also relieved to find no mold or other moistures issues in the basement even though both our neighbors’ basement had been flooded recently.
Lincoln also added wiring for the future surround sound movie theater setup he has envisioned and laid the cables for that behind the baseboards around the room.
Furniture and Features
We bought all new furniture (except for the desk) from IKEA and the couch was a sale item from a local furniture store.
- This couch was a total score and is super comfy with memory foam, dual recliners, and all.
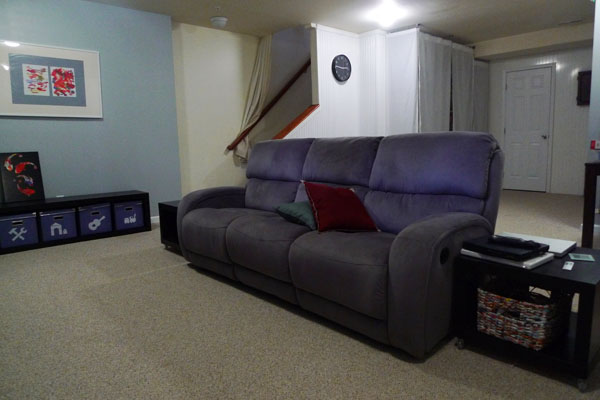
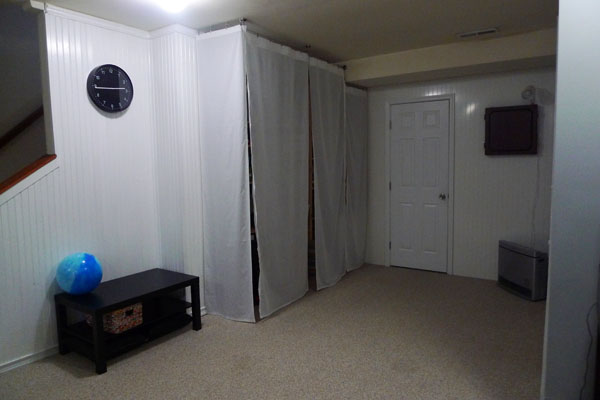
- We also concealed our messy storage shelf for all office and hobby related items. Considering the limited time and energy we had for this project we did not create a real built in closet as originally planned, but hung up a simple curtain solution from IKEA to make the mess disappear when needed.
 .
.
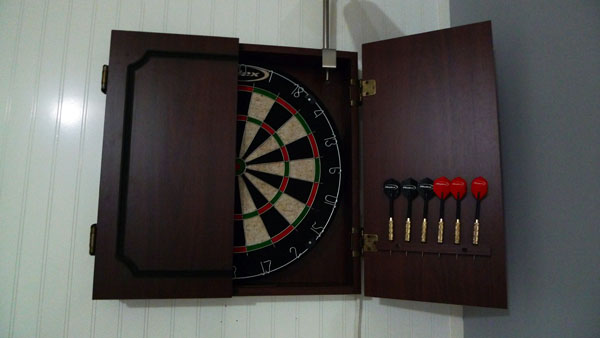
- Lincoln bought himself this long-wanted dart board cabinet. I am still trying to convince Lincoln to paint this thing the same blue-grey color as the accent wall to make it look less country.
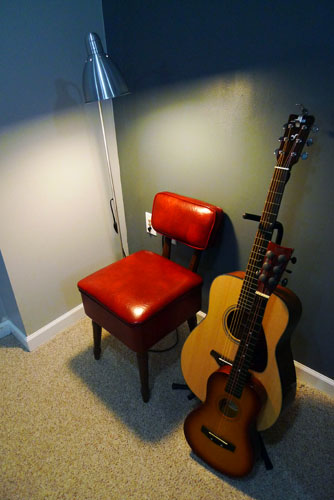
- This vintage red Vinyl chair was a find at Goodwill. It even has a storage compartment in the seat – just to my liking. You can never have enough storage space.
 .
.
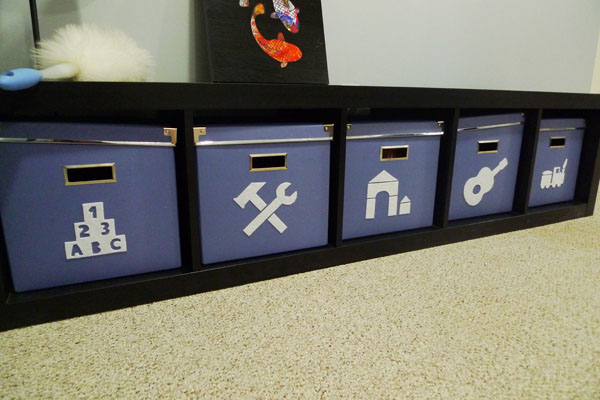
- One of the long IKEA Expedit book cases with boxes to house Milo’s toys. They are now organized by similarity and the labels I cut out of sticky felt indicate even to illiterate little toddlers which toys to find in which box and in which one they need to be put back in. Eventually I might add some cushions on top of it for additional seating.
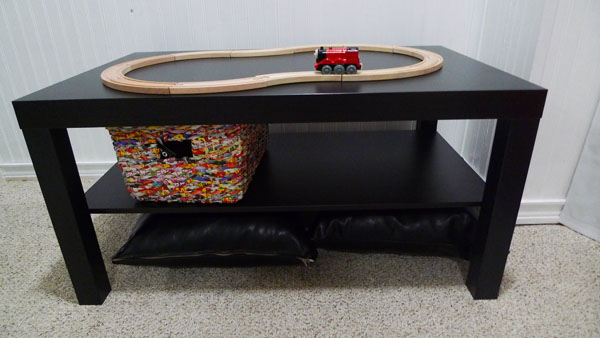
- A smaller play table. Yes, that’s right, I finally sold that big hunk of ugly orange laminate train table. This little one provides enough space for drawing, building block houses, and driving cars on it while fitting in much nicer. Whenever I get to it I will add some table toppings for different activities. Maybe a thin chalk board, a lego base plate, a traffic pattern, or other ideas as seen on this pin board. The trains are now being set up on the floor whenever needed and we can create much larger configurations.
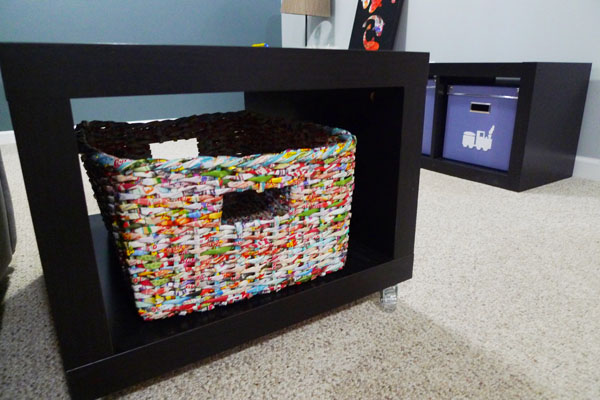
- Also, check out these cool baskets made out of woven recycled newspaper ads from China. They are nicely speckled and colorful to bring in some pop. And they fit perfectly into our side tables to hold magazines, remotes, etc. And yes, it totally bothers the color perfectionist in me how the purplish blue of the toy bins does not match anymore with how the grey-blue paint of the wall turned out. But I will not spend any more money right now, so suck it up, Nicola.
- Lincoln’s desk remained as the only old piece of furniture, but was upgraded with a self-made hutch and a giant contraption to hold his two monitors, before it moved to a more suitable location on the short wall by the laundry room.
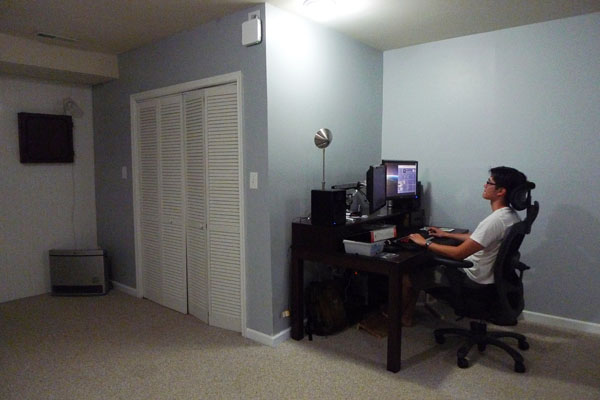
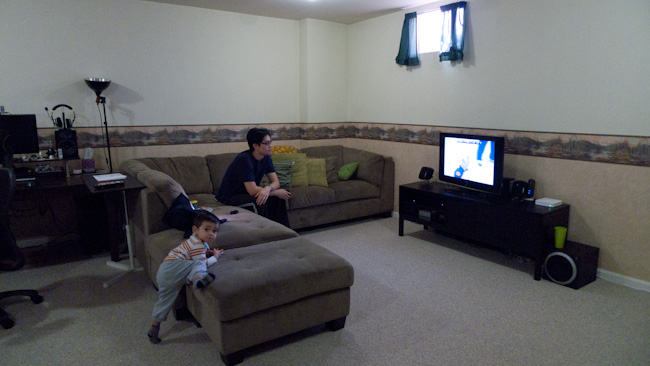
For now the furniture arrangement is still focused on the TV, but it will change a little bit once the home theatre including projector and big screen will be implemented. The sofa will then move to the large light grey wall in the back, and the screen will go up above the toy bench.
Art
The color scheme for the basement is quite different from our upstairs. Much brighter, colorful, and saturated. And there is even some red involved – my so not favorite color. But what can I say … the basement is a whole different zone. A man cave. And it is manly enough to be able to handle some red.
After deciding on a blueish grey backdrop of the walls, some more color was definitely called for and we found inspiration in these pictures painted by Milo:
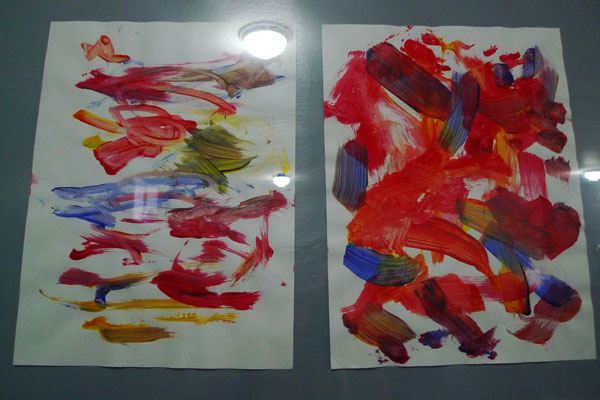
The red, orange, and yellow, make for a nice contrast to the cool blue. I also used one of Milo’s paintings for this first official piece of man cave art:
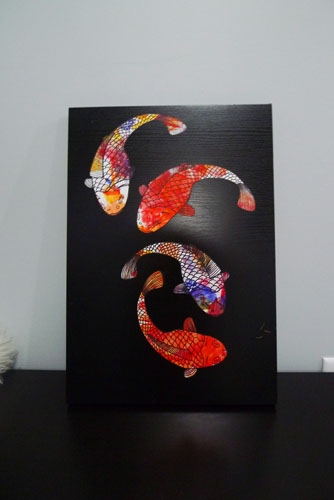
Just use a kids painting (ideally let them use only three colors, otherwise everything will turn brown eventually), put it in the printer, print some outlines on it, cut them out, and glue on a wood board from the IKEA As-Is section. This board cost me only $1 and the fish were free. See, I couldn’t have painted such a completely random pattern on the fish even if I tried.
We will definitely need lots and lots more of some cool art for the huge amount of walls down there.
Maybe arranged like this photoshopped vision:
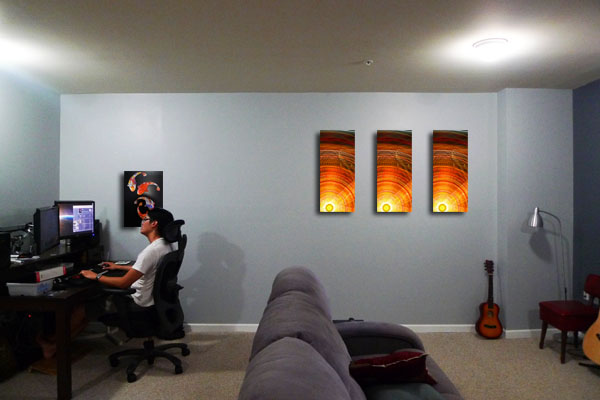
With some cool art from this website.
Future Plans
Still missing and on the definite list to be done:
- Improve the lighting situation. The current ceiling fixtures are still too dim and in impossible locations.
- Get some lamps for the side tables for moody lighting when no complete illumination is needed.
Phew, our biggest project yet. So glad to be done for now.
July 16, 2012
I Heart Organizing
After over 31 years of life I thought that I knew myself pretty well. Until I recently surprised myself once again. Here is what I found out: I love organizing.
I swear, this must be a relatively new obsession of mine because I have not seen myself go crazy of the interior of closets and cabinets like this before. Admittedly, since we bought this lovely house of ours I have been pretty keen on keeping the floors and surfaces clear to be able to actually see this nice home. But so far whatever was out of sight was just fine the way it was. Until I went on a basement reorganizing craze the other day and now I can’t help but organize every single closet and drawer of this house. It all started with one of Lincoln’s many bikes to be in the way of reaching the storage shelf in the basement. And while trying to find a better spot for it I started to wonder why we store kids clothes in the utility room, table cloths in the bathroom, and paper towels in the dining room.
All that stuff did not make sense where it was and did not really fit into the spaces either. So I started some major shuffling around, purging, sorting, and organizing. The utility room now only houses household supplies and outdoor stuff. The storage shelf is for regularly used hobby and office items, the storage room under the stairs for building materials and other rarely used (seasonal) items. See here a sneak preview of our basement improvements featuring the newly hidden storage shelf:

All kids clothing and suitcases will live in our master bedroom on this ledge that I will convert to a hidden storage space as soon as the post-baby recovery is achieved. This is how unsightly that ledge looks right now:
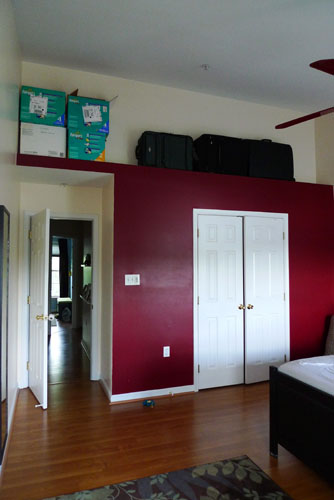
And here is a really bad photoshopped preview of what it will look like afterwards with white sliding doors and the red wall gone:

The pantry and other kitchen cabinets got cleared of expired items and food was grouped into clusters that are somewhat coherent so that you know more intuitively where to look for honey or baking soda. I got some $1 clear bins from Target to hold smaller and opened items together. Now they only need to be labeled.

For the junk drawer and cooking utensils we got cheapo drawer organizers (from the IKEA as-is section). Now you can actually find what you are looking for.
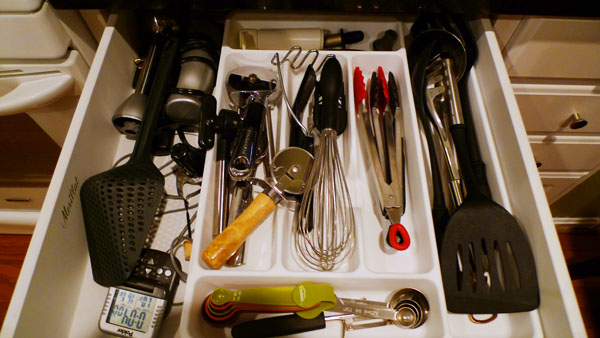
I guess you could call this nesting, but I think I’m gonna keep this habit going. There is something extremely comforting and peaceful to having organized cabinets where you can see at one glance what you are looking for and everything is in a place so you don’t have to haul stuff up two flights of stairs.
Check out this blog for many cool organization tips and tricks. I must not be the only one finding peace in cleaning up. How about you?
June 23, 2012
Bringing Outdoors In
Remember this post from a while back when Milo’s room got cleared of the baby crib and other nick nacks? Well, of course I didn’t leave it all empty like this.
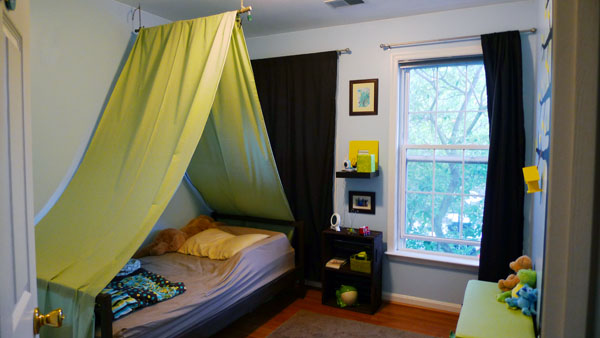
I’m loving me some blank canvas for more home decorations! The way Milo’s bedroom theme has been evolving it is now clear that it is all about the outdoors. It started with some baby froggy gifts, then came the tree, the tent, and now we are all about camping outdoors. So, here is where we went with some more upgrades to his big boy room.
First, we went to IKEA, bought the cheapo Fjellse bed frame for $40, hacked it and stained it.
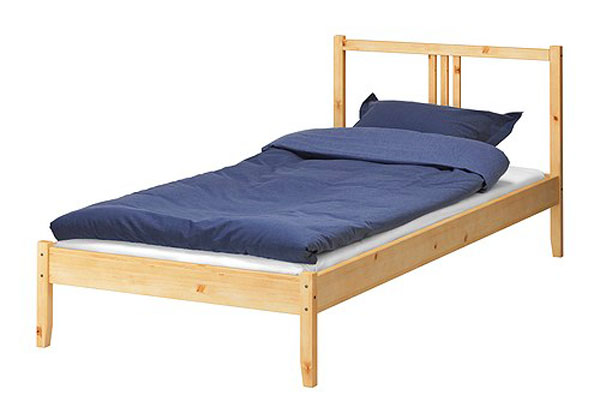
I wanted the thing to have a footboard as well as a headboard for symmetry, plus the headboard didn’t need to be quite that high. So Linc built a footboard out of some 2x2s, shortened the headboard and attached them both to the bed. Then it got stained brown to match Milo’s bench.
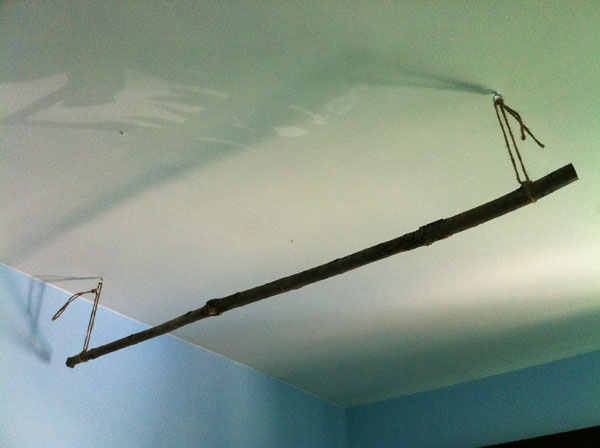
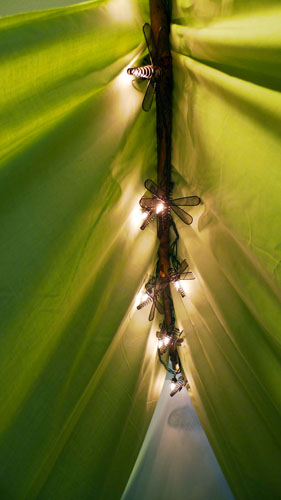
Since the temporary play tent solution worked so well to transition Milo from crib to bed, I decided to make him a new big tent. This version is really easy to build:
1. Find a straight branch and attach it to the ceiling with string and loop hooks.
2. Wrap a dragonfly light string around the branch
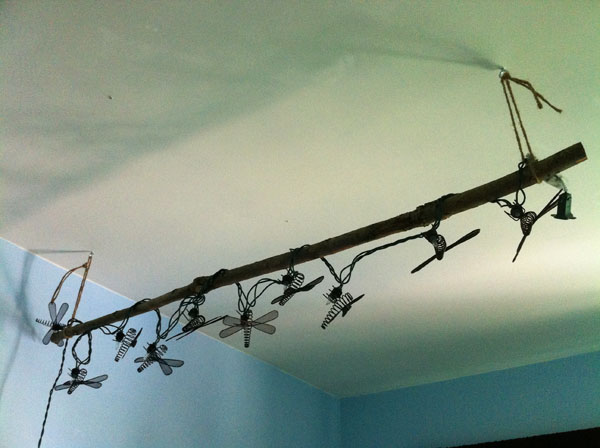
3. Throw a couple of yards of cheap fabric (got these 6 yards for $18 at Joanns, but really only needed 5) over the branch.
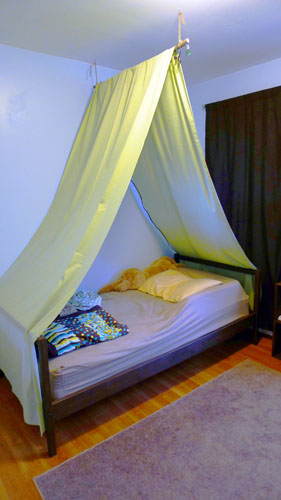
I also ordered some of these bed bumpers (for some reason their price went up quite a bit, I got them for under $20) that are placed under the bedding and prevent any active movers to fall out of bed while they are still learning to sleep like a big boy.
Milo loves hanging out under the dragonfly lights in the evening. They make for a really cozy atmosphere in his room.

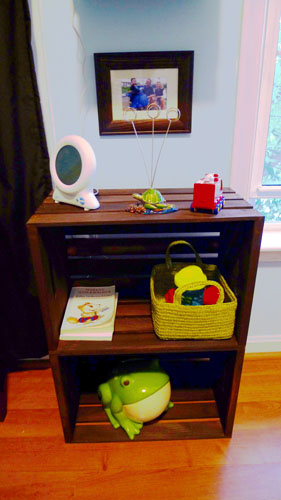
The next step was to build a night stand to go with the new bed that could hold some of Milo’s essentials like his favorite good night books, a drink, his frogs, and his Gro-Clock. This sleep training clock is the best on the market in my opinion and also acts as a night light. See my more detailed review on this purchase here.
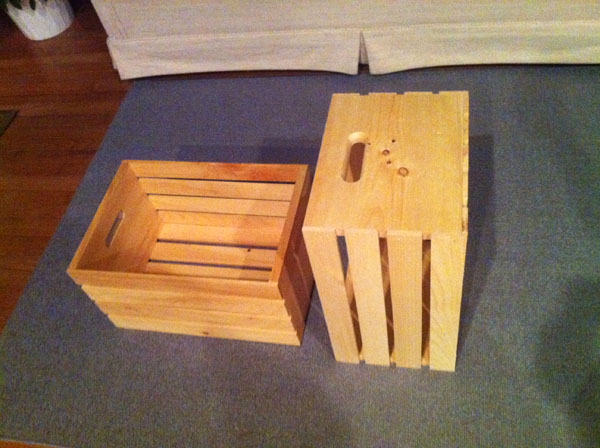
So I got two wooden crates for half price ($15 for both) and stained them the same brown as the bed. Afterwards I just stacked them on top of each other, which is more stable than expected and leaves the opportunity to use them separately again in the future.
Then Milo helped me paint this little bird house yellow that now adds some dimension to his painted tree:

The biggest improvement, however, is almost invisible in all the pictures, yet makes such a big difference to the room: Milo finally has a real ceiling light. One that turns on when you hit the switch at the door. Nothing special you might think, but somehow the previous homeowners had never installed it. Instead in both kid’s rooms (as well as the master and the living room) the light switch controls a wall outlet. But since we are not a big fan of having floor lamps standing around and they really aren’t an option in kid’s rooms where the plug can be pulled and the whole thing can topple over, we have been sort of living in the dark for a bit.
Until one warm day my handy hubby climbed up into the attic a.k.a sauna, ran some wires, and then installed this light fixture in Milo’s room that we had taken out of the guest bedroom in the basement:
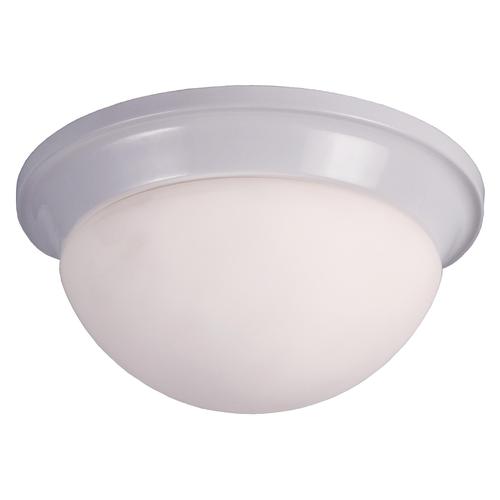
Yeah, it does not look crazy cool, but it was free, and it makes light. Which is really a big help in reading books and getting the boy ready for bed. It is not said and done that I might not upgrade it to a DIYed lamp shade at some point in the future, but right now we are all happy with the way Milo’s room works and how it offers him a cozy comfort zone. Believe it or not, the other day Milo went up to his room and put himself down for a nap all by himself.
May 23, 2012
House Tour 2012
Since most of my posts feature only a few shots from random angles in our house, I figured it would be nice to do a house tour on video  so that you can get a more 3D impression of how rooms and things relate to each other. Too bad we didn’t do one when we moved in, but I did my best to explain in this video what we did to which room and what the plans for the future are. From now on I will try to do this yearly.
See for yourself how short of breath I get these days when climbing up the stairs in our beloved house: