
In: Makeover
May 1, 2012
Good Night Moon
Man, I feel like I am running on steroids these days. No idea where all this energy is coming from, but I take it. After we finished the new guest room it took me only 2 weeks to complete the new nursery. And now we will get started on ripping down wallpaper in the big basement room. Just trying to get as much in the house done as possible before the third trimester heaviness and then newborn craziness sets in.
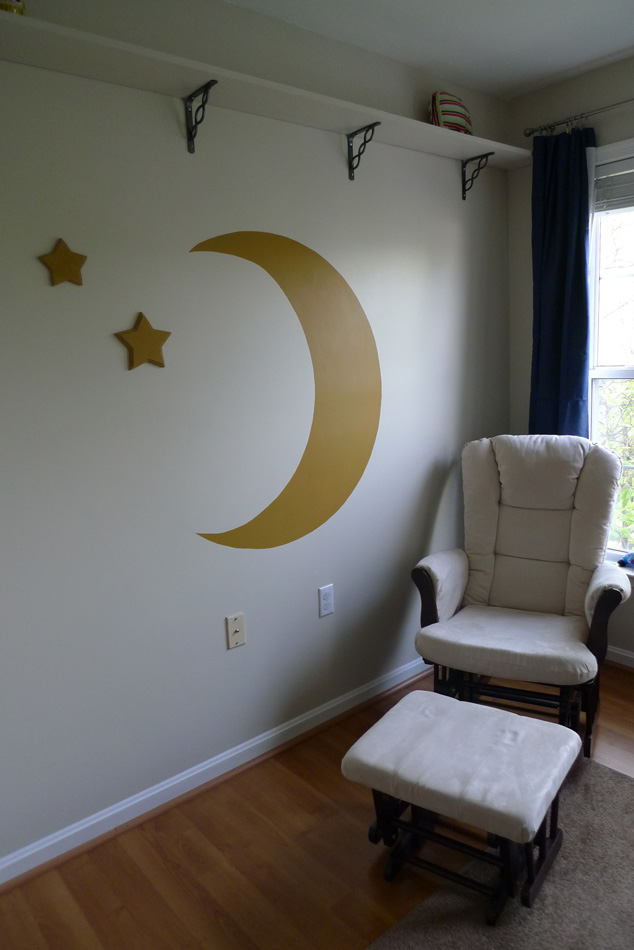
Luckily the nursery wasn’t too big of a project because the walls were already a neutral tan color that anybody can live with, so we didn’t have to paint for this room makeover. It is definitely a more toned down baby room than Milo’s bright blue and green, but hey – nothing to say against saving some time and effort and working with what you got. So all I had to do was to bring in a little bit of color and some baby appropriate decor. When I found these two mustard colored metal stars at my favorite thrift store for $6 the theme was set and stars and moon and night in general.

Perfect to set the mood for a well sleeping baby, right? I decided to pair the mustard yellow with a dark night blue and found those brand new black-out curtains for $10 on Craigslist. On the wall opposite of the crib I painted a big moon in the same color as the metal stars and added two wooden stars. Milo already loves that trio, he goes over to his brother’s room every morning and says hello to the moon. There is something about murals that makes him talk to our walls a lot.
For above the crib Linc and I made this starry night sky light board. I’ll post a separate tutorial for this thing soon.Â

The most time-consuming project was painting all these tiny wooden stars yellow and stringing them up to hang as a mobile above the changing table.

See how Milo is thoroughly testing the new room for his little brother? I am afraid he loves it almost more than his own room right now and I really need to come up with something spectacular for his now empty wall.
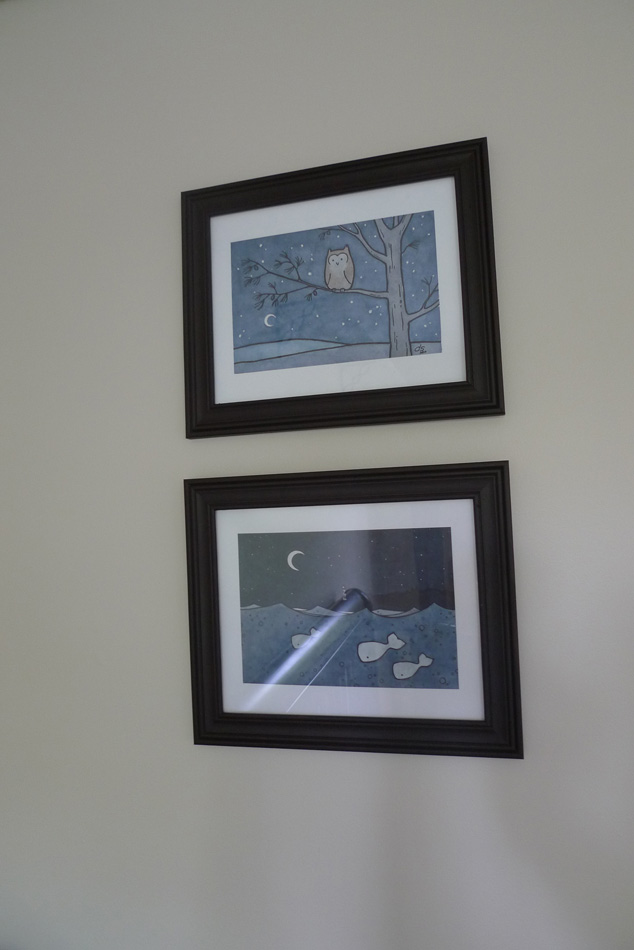
Some other wall space in the baby room was filled with these prints I found and put in cheap frames from Walmart. That’s also where the $15 neutral rug came from.
Since Milo already switched to his big boy bed, we were also able to move the crib over and put the comfy nursing rocking chair in the room. Together with a new crib skirt and color matching sheets this room is officially ready to welcome baby in a few months.


All set for sleepless nights. Bring it on, baby!
April 10, 2012
Welcome Back!
We did it! One day before our house was populated by some German visitors we officially finished the new guest bedroom in the basement and I have to say that it turned out great. We have been working on this for approximately six weeks and it was a real joint effort in the Tran house. Without my handyman I – the surface pretty maker – could not have done such serious handy work as installing lights and new drywall. Looking back, we actually accomplished a lot more than I dared to hope for in my original post about the basement plan. Here is the gist of it.
Just a reminder – this was the colorful craziness we had bought into a year ago:

And this is the new toned down guest oasis:

On our way to the final result we encountered many tedious tasks, such as removing wall paper with lots of water, vinegar, and persistant scraping.
Priming the walls with No-VOC primer because there is not much opportunity for ventilation down there and we did not quite want the baby to be born a natural paint addict.
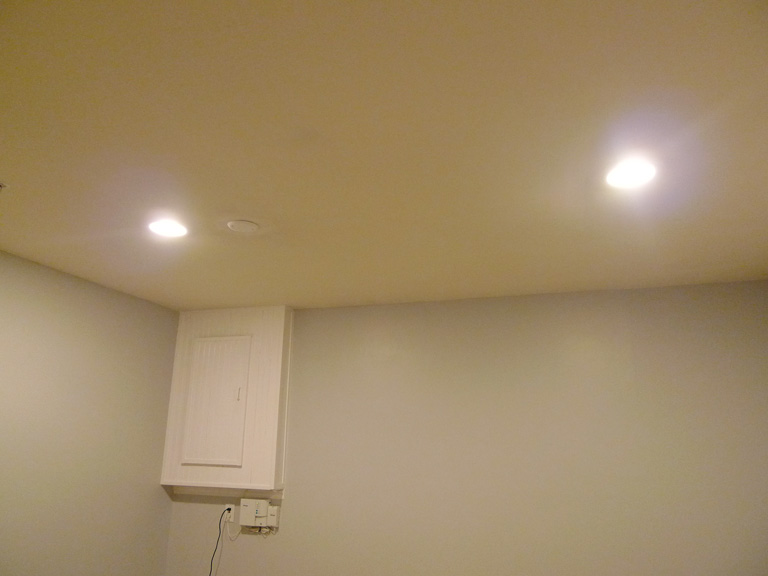
Splitting the room’s lighting from the overall basement circuit and installing two new recessed lights instead of the one dim boob light.
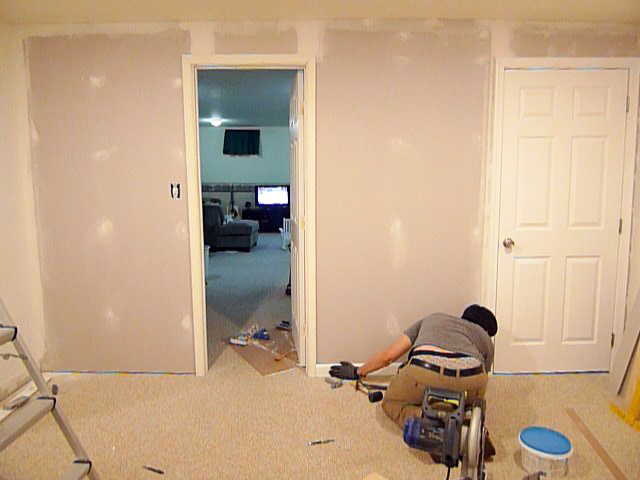
For the sake of installing the new light switch in the room we also decided to take down the bead board paneling on one of the walls which we had never quite understood why it was there.


After taking it down we realized why it was there: Because the previous owners installed the wall framing flush with an existing corner and putting up drywall would have made for an ugly overlapping edge.

Which left us with the exact same problem – how were we gonna accomplish a smooth wall with drywall. Our solution: Using extra thin drywall and extend it to the part around the door over the existing drywall. Not exactly the Holmes-on-Homes way to do it, but good enough.
The trim and doors in this room were wearing many different shades of yellowed old white, so they got a fresh white coat as well .
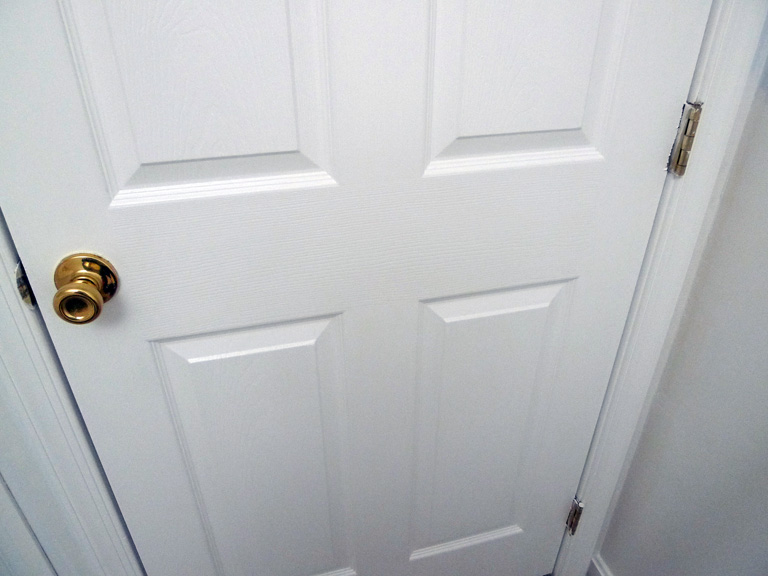
I didn’t even have to bother with taping off the door hardware because on my mission to de-brassify this house and bringing it entirely to the 20th century I also switched out all the door knobs and hinges for brushed nickel ones.

On the final stretch I got sick and my awesome hubby had to paint the room all by himself with the perfect shade of light grey that I had found on the oops-paint rack at Lowes for $5 (and even No-VOC!). It’s amazing what a difference No-VOC paint makes. It might take an additional coat, but the smell during application is minimal and the next day the room is absolutely smell free.

It is actually a little lighter than shown in this photo (more like what you see next to the door above):

Finally, we cleaned the carpet and filled the room with all the existing stuff from the old guest room, plus a yard sale chair and a free dresser.


We are gonna hang some more framed postcards to fill the back wall, add a bookshelf and wall art to the reading corner, Â and eventually also have to find a prettier solution for the electric box and modem corner:

But so far it is the most finished bedroom in our house and I am seriously worried that I won’t ever see my husband in our own bedroom again.
March 24, 2012
Living Underground
Our biggest task this year (besides pushing a baby out and taking care of a newborn) is to finally tackle the basement. When we moved in last year the lower level was sort of left alone as it was – hideous wallpaper and everything. Lincoln uses it for his home office and I spend only dark evenings down there anyway, so it didn’t really bother me too much what it looked like. What can I say – I am done ignoring that wallpapery mess down there. And we have to make some room shifting happening this year to fit in another child.
So here is the plan. The baby will move into the current guest bedroom, the guest bedroom will move into the playroom in the basement. We don’t have guests all year round anyway and for those few weeks the basement should not be too uncomfortable. The room is actually bigger and more isolated from noisy kids, the only downside is that it doesn’t have a window. But since it is mainly for sleeping anyway, I think everyone will be okay. This is what the playroom was styled like when we moved in and all we had to do was adding a few toys.

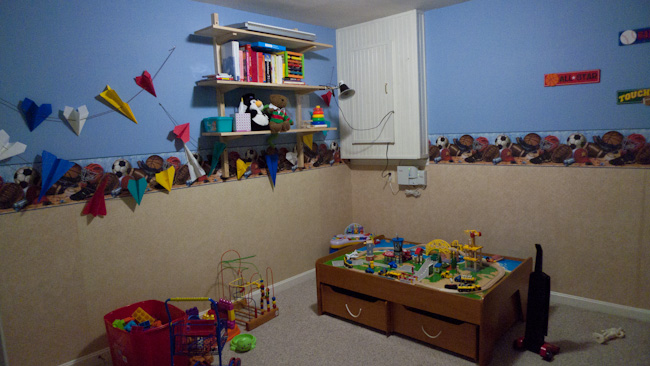
Looks totally appropriate for playing, but not really like a calming retreat for people that need to recover from touring DC all day. So, the blue, the wallpaper, and at least half of the toys will have to go.
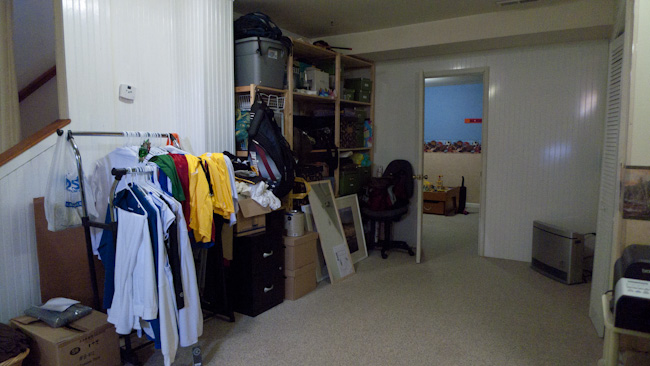
In the main part of the basement things aren’t as colorful, but it looks even crazier. There is stuff everywhere, an oversized couch occupying half of the room, and Lincoln’s work stuff spreads out wherever there is still space. Currently he has a photo studio set up on one side of the room, his extended desk area on the other side, and garments anywhere in between.


The master plan for the big room is huge. And will take some time. And might have to wait until after baby a.k.a next year. Check out here the before and planned after of furniture arrangements:
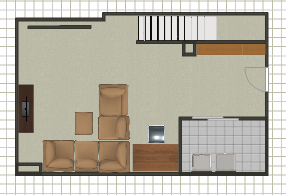
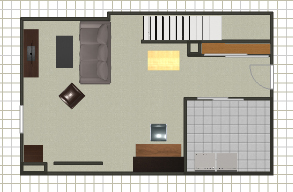
The main goal is to separate work area from living area and confine work stuff to the area that it belongs in. Of course that also requires a comprehensive desk and storage solution that Lincoln has been planning passionately and might share in another post.
These floor plans were made with the free online software homestyler and they even let you shoot a cool 3D panorama view of the designed space. Of course all with limited design options, but this is an approximate idea of what the space will look like. The shelf will be built in as a closet with sliding mirror doors. The desk and work area will be on one side of the room and the lounging area on the other side. Milo will get a small play corner for his train table and other supplies as well.
Phase 1 of the project will be to neutralize the play room due to the urgency of impending baby invasion. We already started stripping down the wall paper and priming the walls. More on that soon.
Phase 2 will be to fix the lighting situation. Currently all lights in the basement are hooked up to one switch, so if you want light in the big room, you are necessarily gonna wake up the guests in the other room or vice versa. We have to separate them into two circuits and will also upgrade them to recessed lights with brighter shine power. The current boob lights are just too dim and won’t fit any bigger light bulbs.
Phase 3 would be to tackle the walls and closet building-in in the big room. But as I said, let’s stay realistic here and see when we actually get to it.
Oh yeah, in the above floor plan I also made the laundry room a little bigger, but that is not really gonna happen. Unless we decide to build a small bathroom in the basement at some point, then we would need the additional storage area.
Okay, enough of unrealistic dreams for now and back to finishing the new guest room.
October 12, 2011
Fine Dining
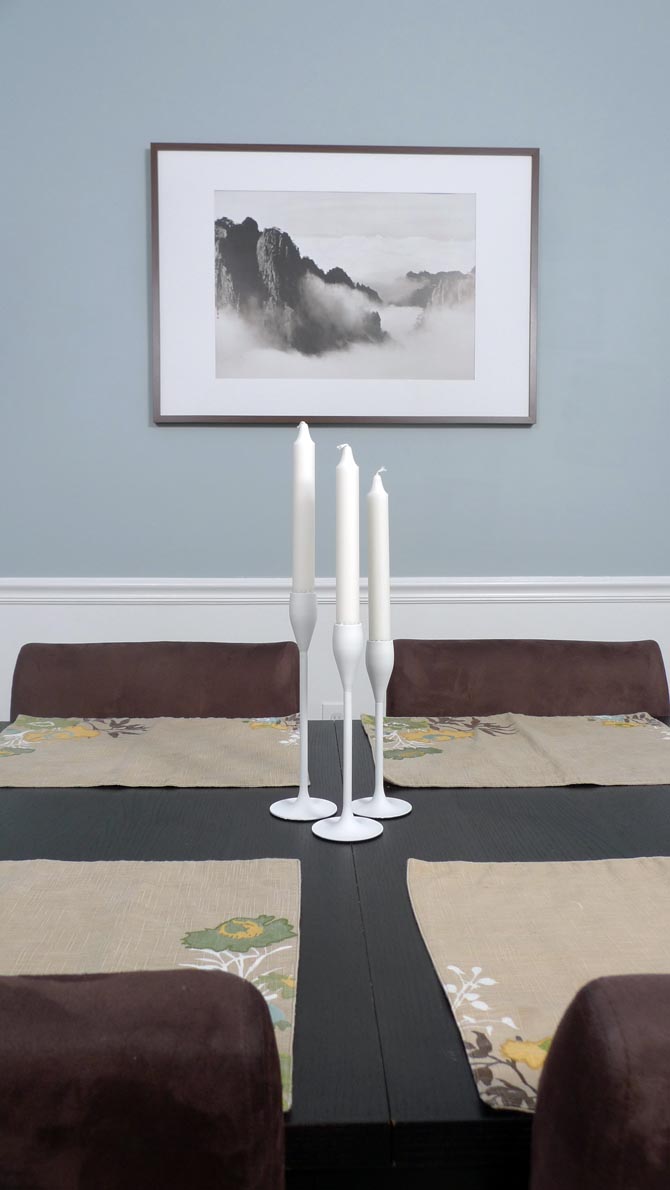
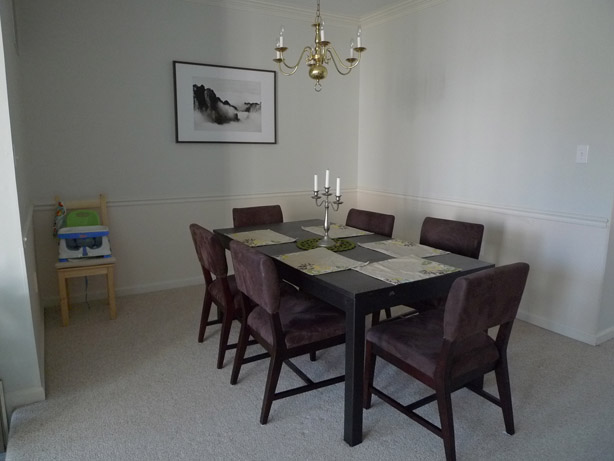
Another makeover is deemed complete. Of course art work is still missing, but those things take time. For now we proudly present the new and improved dining room:

You already learned about our difficult choice of wall paint color here, so let’s move on to some other brand new details. The second place in the category best color improvement goes to … the chandelier.

It went from 90s-brass to modern white in just a few coats of glossy spray paint. Well, of course the guy had to be taken down and primed first, but other than that it was a lot easier than expected. I got primer and paint for not even $15 and spent about 1 hour intermittently spraying outside. So, a lot of bang for you buck and effort. Definitely recommendable to anyone who is currently enduring the outdated view of a brassy chandelier and doesn’t want to spend hundreds on a new one. To spare you all the details of how to spray-paint a chandelier, I’m just gonna link you straight through to my inspirationers over at younghouselove. And this is what my setup outside looked like:

While I was at it, I also sprayed some old frames and candle holders into matching accessories.

Then of course we have the fresh coat of semi-gloss ultra white paint on the trim. While applying it I noticed the unusually bad coverage of the thin paint right before I noticed that I had accidentally bought No-VOC (you know, without the majority of the toxins) paint. That was about the same time when I noticed that this paint was pleasantly unsmelly and I immediately felt so much better breathing in deeply that I might have become a new advocate of this paint. It’s not even that much more expensive anymore than regular paint and much better to use in a household with a young child. Not that I don’t care about my own health, but you know, just watching out for my kid first. The only downside is that it does require one additional coat. In the course of painting the trim I also came up with this nifty trick to reduce cleanup time:

Luckily Martha Stewart had already thought of the same idea, so I didn’t even have to take a photo or write up a lenghty description of a simple thing. More space for other good news.
Or the bad ones first. After the whole paint job was done, I drifted into somewhat of a conceptual crisis. While I love the new color of the dining room and also still deeply care for the green kitchen and the teal foyer and the golden curtains, it suddenly was becoming a little bit too much uncoordinated color. Even for me, the color addict. Too much of a good thing can get too much if it is all just thrown together without concept.
I started to learn my lesson that where rooms are well connected like this, you can’t just color-conceptualize room by room. You have to view the entire level as one.
Usually what I do to come up with a color concept is to take an item that I love (could be a blanket, a piece of fabric, a piece of art, etc) and take the colors from there. Basically taking over the color concept somebody else has already won me over with. Kind of like these people over at design seeds do it. This way you know upfront that everything is gonna go well together.
Well, it was kind of too late for that approach. So what now? How about setting the table for a nice dinner and photo shooting?
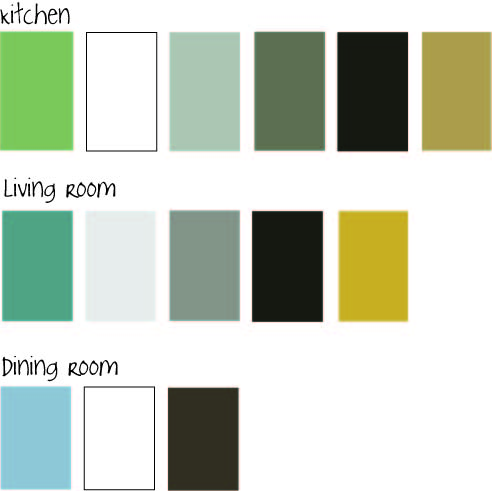
Yep, you got it. When I was pulling out those place mats (that I got a few months ago at Target on clearance for $2 a piece and love so much that I have been protecting them from spills by hiding in the cabinet) it suddenly all started to make sense:

The green from the kitchen, the blue from the dining room, the brown of the furniture, the golden yellow of the curtains, the white trim – all of them tied together nicely in a nature-themed piece of fabric. The only guy not present is the teal of the foyer, so we all know it will have to be painted over. But that’s a whole other story. For now, let’s cheers and have some good home-cooked meals. For example like tonight’s spaghetti squash. Hmmm….
October 9, 2011
The Odyssey
So, there has been some action going on in our living/dining/foyer area lately. You know, just a few little splashes of paint here and there. What started as a dining room makeover and then turned into a foyer makeover has become a whole first floor minus the kitchen makeover. There are so many things to do here that my scatter brain just happily jumps from one project to the next without any clear focus. Whatever feels right is next on the list. Right now I am trying to get all the painting projects done before winter comes and takes away the ability to air out the house without freezing to death.
Updates from the foyer are coming as soon as I finish painting the trim and front door white. But in the meantime let’s switch back to the dining room.
Remember how I got all scared by the boards and batten idea that I would love for the dining room walls? Well, I finally found a good excuse to delay this project indefinitely until we put new floors in our house one day in the distant future. When we install new floors we will have to put up new baseboard anyway, so why go through the trouble installing all these boards now? Exactly! So for now we are keeping the chair rail, will paint the bottom half white, and are adding some color to the top half. And here is where it becomes tricky.
The foyer was already painted a muted dark teal that we love and want to keep. The kitchen is sporting a muted olive green. So the dining room that sits in between those to rooms has to match both colors. So far it has accomplished that by wearing the same neutral light grey as our living room. But we wanted it to stand out as a separate room a little more. However, since the rooms are all well connected, they still have to connect visually somehow. But no more green! Phew, what to do? We were thinking somewhere in the blueish area, muted of course and maybe with a tiny hint of purple in it. Like the clouds on a rainy day. And the sky of the painting in our living room. Read from left – foyer, dining room, kitchen:

So we picked up a bunch of paint chips in that color range and after looking at them for a few weeks in all different lighting situations, we narrowed it down to just a few candidates.

The final winner was “Misty Morning Dew” from Valspar. It had that perfect balance between blue, grey, and purple. Or so it seemed. Because once that baby went up on the entire wall it looked purrrrple like no tomorrow. I can’t say that we didn’t try to let it grow on us or even fall in love with it. But it just didn’t happen. Can’t force love where there is none. The purple was just a tiny bit too funky for us quiet people. So it had to go. (Notice how we turned the table 90 degrees? Not completely decided on the orientation yet, but it definitely opens up a lot more space in the center of the house. The downside is that you have to squeeze your way a bit to the chairs behind the table.)

Well, we didn’t quite feel like buying another bucket of paint either, so I consulted the 15+ paint leftovers in the basement for a solution. Did you know that paint is still in usable condition after 3 years? The only problem is that the can starts to rust and crumble into the paint at some point. Anyway, these were my candidates for a happy mixer event: A pale green, a medium muted teal, and our unloved periwinkle grey.

Together they made this beautiful ice-blue that is now just waiting for the bottom half and the trim to put on a crisp white. More/better pictures to come soon after the trim is finished.

Fits in a little better with the other two colors anyway:

What do you think? Improvement or not? Would you have been daring enough to go with the purplish color? Have you ever experienced a color looking completely different on the wall than on the sample? What did you do about it? Live with it or paint it over?
August 31, 2011
Ready, guests, come!
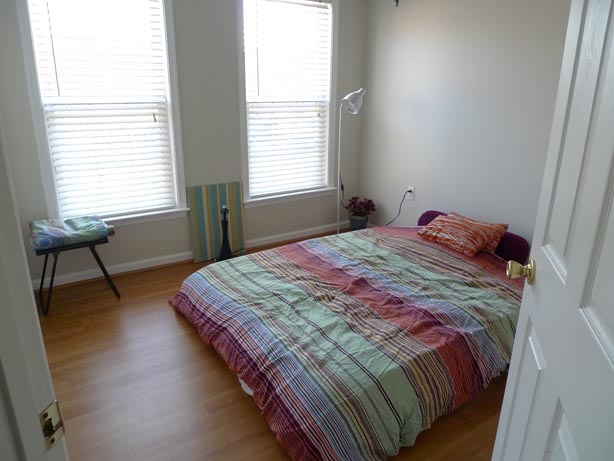
Wow, this was one of the longest drag for a room makeover so far. An estimated two months later the guest bedroom is finally done. For now. Of course there is gonna be more stuff and deco things added over time, but at least it has all practically needed items in it and looks cozy enough. I think this is my new requirement for a room makeover to be deemed completed. We did splurge on the bed. Got a new mattress from Amazon for the fraction of the price of a store bought mattress (Sleep Innovations memory foam mattress, so comfy that Lincoln wants to sleep over in the other room now. Wish I had gotten this for our own bed 3 years ago.) and a new bed from Ikea because we just couldn’t find a nice one on Craigslist and trust me, I’ve been checking every single day for two months. So at least for the price we got something completely bed bug free and hope that our guests will always want to return to this nice bed.
Here are the details on the makeover:
 Darn, I just noticed that the pattern of the curtain is upside down. Oh well. I am so happy that I found this fabric at Joann’s. It matches the yellow in the duvet cover perfectly and brings some sunny elegance to the room. Got it with a 50% off coupon for $20 and made the curtains in two evenings. (One evening equals two hours in Nicola currency).
Here is a vintage suitcase for $2 from a yard sale that will one day get legs and become a real night stand. A cute lamp for $5 from Goodwill. And some printed travel wisdom in a white painted $3 IKEA frame that had been waiting for its use for 3 years.
 For the bed we had to reuse the old duvet cover because it just wasn’t in the budget to get a new one. I know, this one is very colorful and kind of dominating the room, but just imagine how changing it up one day will be like another entire room makeover in one step.
To fill all the empty space above the rather low IKEA Malm bed (we chose this bed because we did not want to overpower the small room with a huge bed, we had already gotten a free Malm dresser, and because it fit in our car), I created some bigger sized wall art. Had some old canvasses on hand, painted them white, folded some origami boats out of left over maps and hot glued them on. Done.
From some leftover curtain fabric I made the two small pillow covers to replace funky orange ones that we already had.
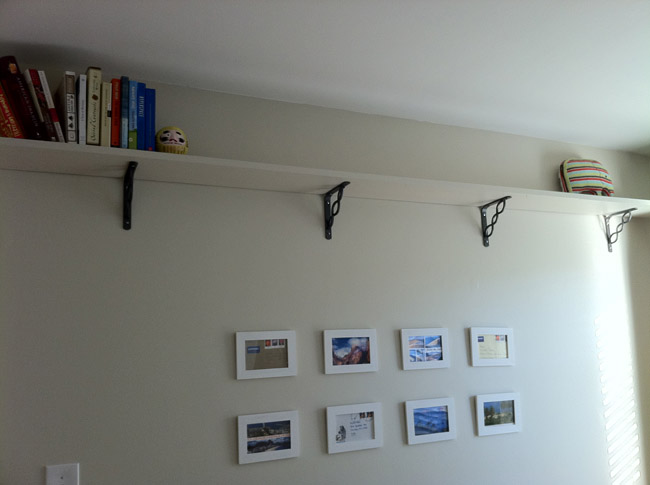 On the opposite side of the bed I framed some postcards and envelopes from all over the world in some more super old IKEA frames that I bought in a picture frame obsession 3 years ago and never used. They are the cheap ones that come in 3 packs. They are plain wood and can easily be painted or embellished to match any decor.
On the shelves that I have no problem with in this room (as opposed to Milo’s room) I arranged some random items that we had and that somewhat belong in a guest room: travel guides, some novels for entertainment on all those long vacation days, a hand-sewn elephant that reminds me that I still want to go to Africa one day, a miniature VW van for dreaming of road trips, etc.
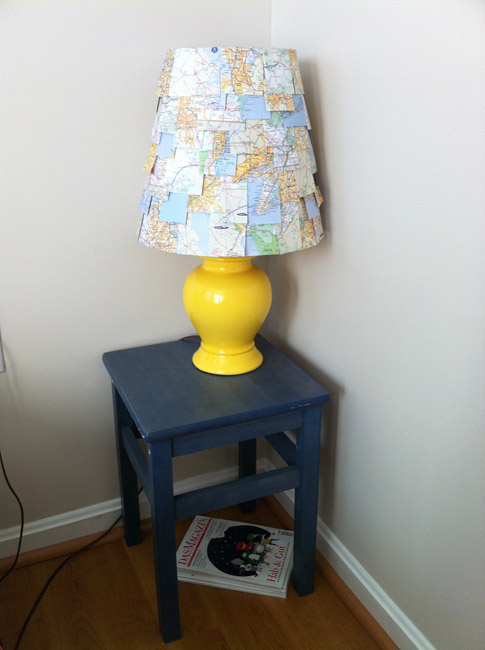 And then we have the previously introduced map lamp. I think all the materials for it were $4.
The little stool/side table thingy is one of those items that are a classic bargain: When I saw them at a yard sale they were super cheap (I think it was $2 for two of them an my mom paid for it because I had conveniently forgotten my cash at home) and seemed somewhat practical, so I got them even though I had no idea what exactly they could be used for. Now one of them is serving as a makeshift nightstand and the other one is holding a fan in Milo’s room. They are also really practical to get up to the slightly too high shelves.
If the bed hadn’t busted our budget, this would have been a really budget friendly room makeover. How do you like it? Is it too travel thematic?
So there you have it, another room done and here is a little hint as to what is next: one of the rooms in a house where you don’t want light colored carpeting.
July 26, 2011
Willkommen, bienvenue, welcome!
These are the future colors that will welcome our hopefully many dear guests. Yes, while it seemed like I was just sitting back and relaxing to recover from the last major room makeover, I have been secretly getting very excited about the next project – the guest bedroom. One, because this room is a very blank slate. All we have at the moment is bedsheets. Two, because this is a room we won’t use on a regular basis I expect very little interference from my practical-oriented husband. Yayy! Last Saturday morning I ran some errands to gather all materials needed for the DIY parts of the makeover and also happened to run into this great moving sale and scored some great vintage finds for the room.
This is what the room looks like at the moment:
And here is the scoop about what is planned:
– Keep the shelves (figure that!) and decorate them with travel-themed collectibles
– Buy a mattress and find a cheap white bed frame or make a headboard out of old wood
– Make nightstands out of suitcases
– Hang curtain rods and sew curtains
– Make some wall art
– Ideally change out the bed sheets for something more matchy with the new room. But this depends on the budget.
These ideas from Pinterest are my inspiration:


